Tips for Printing on Ceramic Cups With Sublimation
by Anthony Clark · April 03, 2022
Learning how to print ceramic cups sublimation style comes down to four essentials: a sublimation printer, a mug heat press, sublimation-coated ceramic cups, and precise temperature and timing. The dye bonds directly into the cup's polymer coating at the molecular level, producing permanent, full-color prints that survive dishwasher cycles and daily use without fading or peeling. If you're building out your sublimation setup from scratch, the sublimation printing category is the best place to start before adding ceramic cups to your workflow.
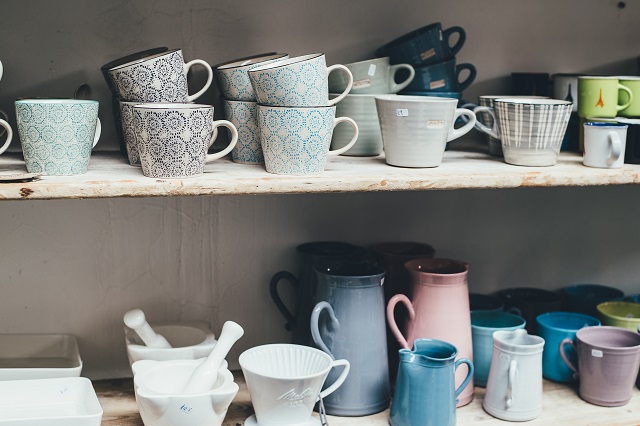
Ceramic mugs are one of the highest-margin, lowest-complexity sublimation products you can produce. They're inexpensive to source, universally appealing, and fast to press once your process is locked in. A single mug goes from printer to finished product in under six minutes. That speed makes them viable for both one-off custom orders and profitable batch runs.
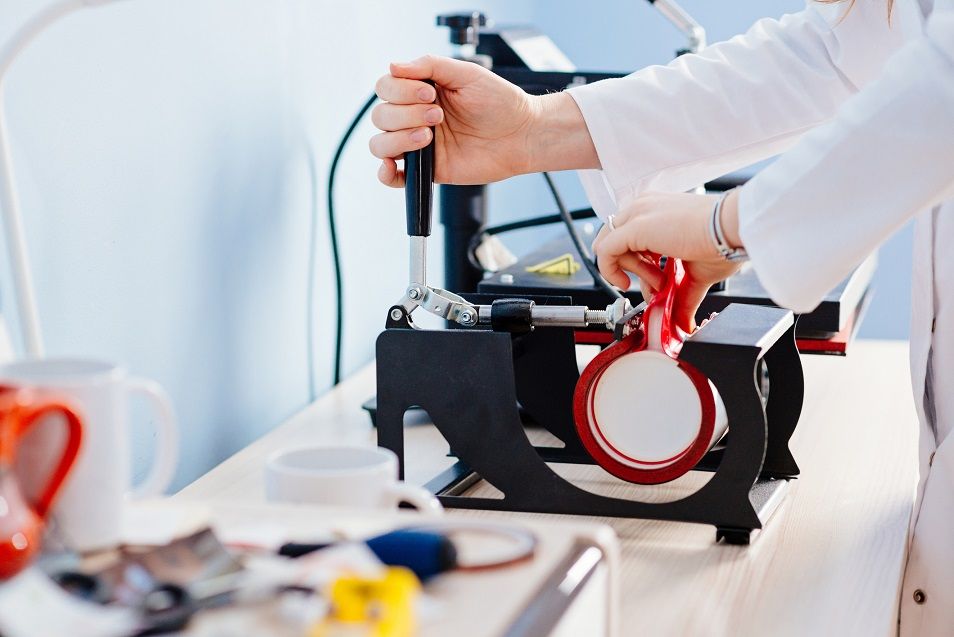
Unlike flat substrates such as t-shirts or mouse pads, ceramic cups require a cylindrical mug press attachment rather than a standard flat platen. That one equipment difference changes your entire workflow — from how you size your design to how you secure the transfer paper. Getting those fundamentals right from the start prevents the most common failure modes: ghosting, faded color, and uneven wraps.
Contents
- The Equipment and Supplies You Need
- How to Print Ceramic Cups With Sublimation: Step-by-Step
- What Sublimation Mug Printing Looks Like in Practice
- Common Sublimation Cup Mistakes and How to Avoid Them
- Troubleshooting Sublimation Cup Problems
- Building a Repeatable Ceramic Cup Sublimation Workflow
- Frequently Asked Questions
- Next Steps
The Equipment and Supplies You Need
Before your first mug comes off the press, you need the right tools. Improvising with a flat heat press or non-coated mugs produces unreliable results. Here's what the complete setup looks like.
Choosing a Mug Heat Press
A dedicated mug press is non-negotiable. Flat platens cannot conform to a cylindrical surface, which means you'll get incomplete contact and blotchy prints every time. The two main options are:
- Clam-style cylindrical mug press — The most common entry-level option. A single heating element wraps around the cup. Reliable and affordable, typically $80–$200.
- 3D vacuum heat press — Uses a silicone sleeve and vacuum suction to wrap the entire mug uniformly. Better for tapered mugs, travel tumblers, and awkward shapes. Higher cost, but more consistent on complex curves.
For standard 11 oz and 15 oz straight-sided ceramic mugs, a clam-style press is all you need to start. If you plan to expand into travel tumblers or oddly shaped cups, the 3D vacuum machine is worth the investment. You can learn more about related heat transfer techniques in our guide to t-shirt heat printing basics — many of the temperature and pressure principles carry over directly.
Sublimation Printer and Ink
Your printer must be a dedicated sublimation unit — either purpose-built or an Epson EcoTank or Sawgrass machine converted with sublimation ink. Key considerations:
- Use only sublimation-specific ink — standard dye or pigment inks won't transfer under heat
- Sawgrass SG500/SG1000 printers come ready for sublimation out of the box
- Converted Epson EcoTanks (ET-2800, ET-15000) are the budget-friendly alternative
- Never mix sublimation and standard inks in the same printer — cross-contamination ruins both
Print quality directly affects transfer quality. A low-resolution design printed on a cheap printer won't improve in the press. Set your printer to the highest DPI your system supports — typically 1440 DPI for Epson-based setups.
Sublimation Paper and Coated Mugs
Not all sublimation paper performs equally on curved surfaces. Lightweight, flexible paper (around 90–105 gsm) wraps tightly against the mug with fewer air pockets. Heavy paper buckles and creates uneven contact zones. Our guide on how to use sublimation paper covers the specific paper types and their best-use applications in detail.
Your mugs must have a sublimation-ready polymer coating. Uncoated ceramic, stoneware, or mugs labeled "dishwasher safe" without mentioning sublimation will not accept the dye. Always verify with your supplier that the coating is rated for sublimation transfer.
| Mug Size | Recommended Temp (°F) | Press Time | Pressure | Notes |
|---|---|---|---|---|
| 11 oz standard | 400°F (204°C) | 180 seconds | Medium | Most common mug; reliable baseline |
| 15 oz standard | 400°F (204°C) | 200–210 seconds | Medium | Thicker walls; add 20–30 sec |
| Latte mug (17 oz) | 400°F (204°C) | 210–220 seconds | Medium-high | Wider diameter; check full wrap |
| Travel tumbler (20 oz) | 385°F (196°C) | 240–300 seconds | Vacuum press | Requires 3D vacuum press |
| Color-changing mug | 375–385°F (190–196°C) | 150–180 seconds | Medium-low | Sensitive coating; lower temp |
How to Print Ceramic Cups With Sublimation: Step-by-Step
Once your equipment is ready, the process for how to print ceramic cups sublimation style follows a consistent sequence. Each step matters — cutting corners anywhere in the chain produces visible defects on the final mug.
Design Preparation
- Mirror your design before printing — the image transfers in reverse, so mirroring ensures text and logos read correctly on the finished mug
- Size your design to fit the printable area of your specific mug: typically 8.5" × 3.75" for an 11 oz straight mug
- Use an ICC color profile calibrated for sublimation if your software supports it — colors shift significantly during heat transfer, so what you see on screen is rarely what you get without profiling
- Avoid pure white in backgrounds — white in sublimation is simply the absence of ink, meaning the mug's own color shows through
- Save your file as a high-resolution PNG or TIFF at 300 DPI minimum
Printing and Wrapping the Transfer
- Load your sublimation paper (printed side will face the mug) into the printer tray with the coated side facing the correct direction — check your paper's instructions
- Print at the highest quality setting your printer allows
- Allow the print to dry for 60–90 seconds before handling — sublimation ink smears when wet
- Wipe your mug clean with isopropyl alcohol on a lint-free cloth — oils and fingerprints block dye penetration
- Wrap the printed transfer tightly around the mug, printed side against the ceramic, aligning the design where you want it
- Secure with heat-resistant tape on all edges — top, bottom, and the seam where the paper overlaps
Pro tip: Always tape the top and bottom edges of the transfer paper to the mug before taping the vertical seam — this prevents the paper from sliding down inside the press and creating a crooked print.
Pressing and Peeling
- Preheat your mug press to the target temperature for your mug size (see the table above)
- Place the wrapped mug in the press and secure the clamp firmly — inconsistent pressure is the leading cause of uneven transfers
- Set your timer and do not open the press early — sublimation is time-sensitive, and under-pressing produces pale, washed-out colors
- When the timer goes off, open the press and immediately remove the mug using heat-resistant gloves
- Peel the transfer paper while the mug is still hot — waiting too long causes the paper to stick and can smear the image
- Set the finished mug on a heat-safe surface and allow it to cool completely before inspecting
What Sublimation Mug Printing Looks Like in Practice
Understanding the mechanics is one thing. Seeing where ceramic cup sublimation actually earns money and delivers results is what sharpens your strategy. Here's how the technique plays out across real use cases.
Custom Gifts and Personalization
Photo mugs, name mugs, and commemorative cups make up the largest share of small-scale sublimation mug production. A family portrait on an 11 oz mug retails for $15–$25 with a production cost under $5 including ink, paper, and the blank. The margin is strong, and the product practically sells itself in gift markets.
- Holiday-themed mugs (Christmas, Mother's Day, Valentine's Day) spike in demand seasonally — batch-printing blanks in advance keeps turnaround fast
- Pet portrait mugs are a consistent top seller on platforms like Etsy
- Personalized name mugs with clean typography and simple color palettes are low-design-effort, high-appeal products
The care and longevity of sublimated products is a legitimate selling point. According to Wikipedia's overview of dye-sublimation printing, the process produces prints that are resistant to fading and are considered permanent under normal conditions — a claim you can honestly make to customers.
Business Merchandise and Branding
Small businesses, real estate agencies, and local service companies regularly order branded mugs as client gifts and staff merchandise. A minimum order of 12–24 mugs is a realistic baseline for B2B pricing discussions.
- Full-wrap designs showcase brand colors far better than traditional screen-printed logos
- Color-changing mugs add a novelty angle that stands out in corporate gift bags
- Two-color designs with the company logo and contact information are fast to produce and easy to reorder
If you're thinking about turning sublimation mugs into a business, the strategies covered in how to start a t-shirt printing business apply directly — pricing models, supplier relationships, and customer acquisition channels translate well across sublimation product categories.
Selling Sublimation Mugs Online
Print-on-demand (POD) platforms handle fulfillment for you, but the margins are thinner than in-house production. If you're producing mugs yourself, direct-to-consumer selling through Etsy, Shopify, or local markets offers significantly better returns. For comparing POD platforms, our Printify vs Printful breakdown shows exactly where the economics diverge for physical merchandise.
Common Sublimation Cup Mistakes and How to Avoid Them
Most failed sublimation mugs can be traced back to one of three root causes. Knowing them in advance is the difference between a 95% success rate and a 70% one.
Using the Wrong Mug or Coating
This is the single most common beginner mistake. Purchasing mugs from general housewares suppliers without confirming sublimation-specific polymer coating produces zero transfer — the dye has nowhere to bond. The mug comes out of the press looking untouched.
- Only buy from sublimation-certified blank suppliers — Condé Systems, JPPlus, and Vapor Apparel are reliable sources
- Mugs that look identical can have completely different coatings — always confirm with the supplier
- Never attempt sublimation on stoneware, hand-thrown pottery, or any natural clay product
Temperature and Timing Errors
Pressing too cool or too briefly produces faded, pale transfers. Pressing too hot or too long burns the coating, shifts colors toward yellow-orange, or leaves a gloss change on the mug's surface.
- Use a calibrated infrared thermometer to verify your press is actually hitting the target temperature — element-based presses often run 10–20°F off from their dial readings
- Always use a timer — guessing on time leads to inconsistency across batches
- New mugs from a new batch may require a test press before committing to a full run — coating thickness varies between manufacturers
Warning: If you start seeing yellow or brown tinting in white areas of your design, your temperature is too high — reduce by 10°F and test again before pressing an entire batch.
Ghosting and Smearing
Ghosting — a blurry double-image effect — happens when the transfer paper shifts during pressing. This is entirely preventable with proper taping technique.
- Use enough tape to fully anchor all four edges of the paper before pressing
- Handle wrapped mugs carefully — any movement of the paper against the mug surface before pressing leaves a pre-transfer ghost
- Do not reuse transfer paper — a pressed sheet has already released its dye and produces ghost marks if accidentally re-pressed
- If a mistake happens mid-project, our guide on removing sublimation ink from a tumbler walks through what's actually recoverable
Troubleshooting Sublimation Cup Problems
Even with a dialed-in process, problems appear. Here's how to diagnose and fix the three most frequent issues.
Faded or Washed-Out Colors
Cause: Under-pressing (too low temp, too little time), wrong ink, or an incompatible mug coating.
Troubleshooting steps:
- Verify your press temperature with an infrared thermometer — a 15°F gap is common in entry-level machines
- Increase press time by 20 seconds and retest with a fresh mug and transfer
- Confirm your ink is sublimation-specific — print a test page and check that colors appear vivid when held up to light before pressing
- Swap to a mug from a confirmed sublimation supplier if coating compatibility is in question
Uneven or Patchy Transfer
Cause: Poor contact between paper and mug, usually from insufficient pressure or paper that's too thick to conform to the curve.
- Increase clamp pressure on your mug press — the paper must make consistent contact across the entire design area
- Switch to a lighter-weight sublimation paper (90–100 gsm) for better wrap on curved surfaces
- Ensure your mug is clean and dry — residual moisture or oils create transfer barriers
- For tapered or unusually shaped mugs, consider upgrading to a 3D vacuum press for uniform pressure distribution
If ink longevity is a concern for your customers, our deep dive into how long sublimation ink lasts covers what actually affects ink permanence — including heat, UV exposure, and washing habits.
Blurry or Doubled Image
Cause: Transfer paper movement during or before pressing. This is the ghosting issue described above.
- Re-examine your taping pattern — every edge must be secured before the mug enters the press
- Check that your mug fits snugly in the press element — a loose fit allows the mug to rock and shift
- Ensure your design file is printed at 300 DPI minimum — a low-resolution source file creates soft edges that look blurry after transfer, and no amount of pressing corrects an underresolved print
Building a Repeatable Ceramic Cup Sublimation Workflow
Running a single mug through the process is easy. Running 50 mugs consistently — with the same color accuracy, alignment, and quality — requires a documented, systematic approach.
Batch Production Strategy
- Print all transfers for a batch before pressing any — this keeps your printer warm and ink flowing consistently
- Pre-wipe all mugs with isopropyl alcohol before the print run starts — don't do it mug by mug or you'll lose track
- Pre-cut tape strips and have them staged before wrapping — fumbling with a tape dispenser while holding a wet transfer is a recipe for smears
- Press in groups of the same mug size so you don't need to adjust temperature between units
- Keep a press log — mug brand, temperature, time, and result — so you have data to reference when troubleshooting
Quality Control Checkpoints
Build these checkpoints into every batch run:
- Design check — verify mirroring and sizing before sending to print
- Print check — hold the printed transfer to a light source and confirm color saturation is strong
- Mug check — inspect for chips, cracks, or surface defects before wrapping (defective mugs waste time and ink)
- Post-press check — evaluate color vibrancy, edge sharpness, and full coverage before packaging
Sublimation mugs that don't pass post-press inspection should be logged with the failure type before discarding — that data tells you whether you have a temperature problem, a paper problem, or a mug sourcing problem.
Expanding Your Product Line
Once your mug workflow is consistent, adjacent sublimation products become easy additions. Tiles, coasters, and keychains use flat press techniques you may already have. Sublimation care guidance also becomes relevant as you expand — our article on how to wash sublimation shirts covers the principles behind heat-sensitive dye care that apply across sublimation product types.
- Color-changing mugs add a premium tier with minimal additional equipment
- Frosted glass sublimation mugs target a younger gift demographic
- Pet bowls and plant pots accept sublimation if they have the correct coating — verify before sourcing in bulk
Frequently Asked Questions
Do all ceramic mugs work for sublimation?
No. Only mugs with a sublimation-compatible polymer coating accept the dye transfer. Standard uncoated ceramic, stoneware, and porcelain mugs will not produce any visible print — the dye simply evaporates without bonding. Always purchase from a supplier that explicitly labels their blanks as sublimation-ready.
What temperature and time should I use for an 11 oz sublimation mug?
The standard setting for an 11 oz straight-sided ceramic mug is 400°F (204°C) for 180 seconds with medium pressure. These are starting-point values — verify your press's actual temperature with an infrared thermometer and adjust time by 10–20 seconds if colors come out too pale or too dark.
Can I use a regular flat heat press for ceramic mugs?
No. A flat heat press cannot make consistent contact with a cylindrical surface. You'll get uneven pressure across the design area, which causes patchy, incomplete transfers. A dedicated mug press — either clam-style or 3D vacuum — is required for reliable results on ceramic cups.
Why is my sublimation mug print faded after washing?
If the print fades after washing, it was likely under-pressed — either at too low a temperature, too short a time, or with a mug whose coating wasn't fully compatible. A correctly pressed sublimation mug withstands hundreds of dishwasher cycles without visible fading. Top-rack dishwasher washing is the safe recommendation for customers.
Do I need to mirror my design before printing?
Yes. Because the transfer paper is placed printed-side-down against the mug, your design transfers in reverse. Mirroring the image before printing ensures that text, logos, and directional graphics read correctly on the finished mug. Most sublimation software and RIP drivers have a built-in mirror option.
Can I sublimate a mug more than once?
Technically possible but not recommended. A second pressing on a previously sublimated mug can partially reactivate the existing dye and cause color bleeding or double-image artifacts. The coating also degrades under repeated high heat. For reprints or corrections, start with a new blank mug.
What's the best way to learn how to print ceramic cups sublimation style as a complete beginner?
Start with an 11 oz straight-sided mug — it's the most forgiving shape and has the most widely available settings guidance. Use a quality sublimation paper, a calibrated mug press, and verified sublimation blanks. Run five test mugs at the baseline settings before committing to production quantities. Every variable you eliminate early (temperature, paper, mug source) makes troubleshooting faster when problems arise.
Next Steps
- Verify your mug blanks — contact your supplier and confirm your cups have a sublimation-specific polymer coating before ordering in bulk. One sourcing confirmation call prevents an entire wasted batch.
- Calibrate your press — use an infrared thermometer to check the actual temperature of your mug press element and compare it to the dial reading. Adjust your target temperature accordingly and document the offset.
- Run five test mugs — press five mugs at the baseline settings for your specific mug size, varying time by 10 seconds across the batch. This tells you your press's sweet spot before you commit to customer orders.
- Build a production checklist — write down your verified settings (temperature, time, pressure, paper type, mug brand) and tape it near your press. Consistency comes from documentation, not memory.
- Expand your product line — once your mug workflow produces consistent results, add one adjacent product (coasters, tiles, or color-changing mugs) to test your process adaptability without overextending your setup.
 |  |  |  |

About Anthony Clark
Anthony Clark spent nine years running a custom printing studio in Phoenix, Arizona, producing sublimation-printed drinkware, heat-pressed apparel, and branded merchandise for sports leagues, small businesses, and online retailers. That hands-on production background means he has calibrated hundreds of heat press cycles, sourced sublimation blanks from over a dozen suppliers, and troubleshot every coating and color-shift problem that shows up when dye meets polyester. He left the shop floor in 2019 to write full-time about the techniques and equipment he used daily. At PrintablePress, he covers sublimation printing and heat press methods.


Get some FREE Gifts. Or latest free printing books here.
Disable Ad block to reveal all the secret. Once done, hit a button below
| | | |