Heat Press vs. Iron: Which is better?
by Anthony Clark · March 29, 2022
Studies show that roughly 60–70% of new heat transfer crafters start their heat press vs iron printing journey with a standard household iron — and a significant number report peeling transfers, scorched fabric, or wasted materials before upgrading. If you've been weighing whether a dedicated machine is actually worth it, or whether your iron can handle your projects long-term, you're asking the right question. Both tools apply heat and pressure to bond designs onto fabric, but the precision, consistency, and results they deliver are genuinely different. For machine reviews, buying guides, and accessories, browse the heat press section on PrintablePress to find what fits your setup.
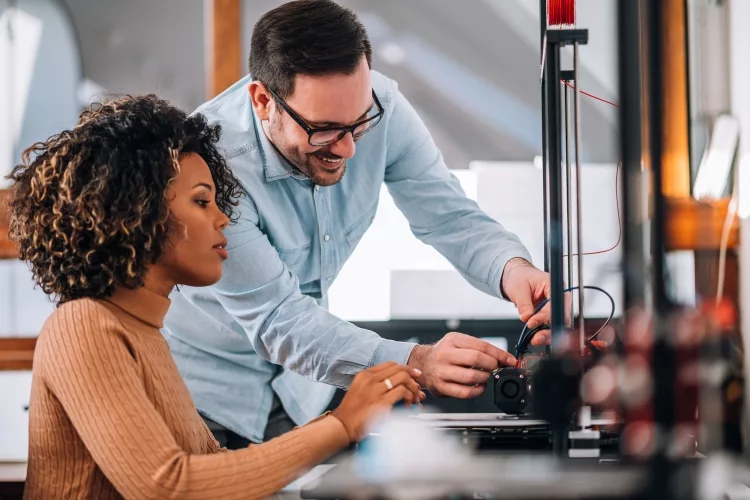
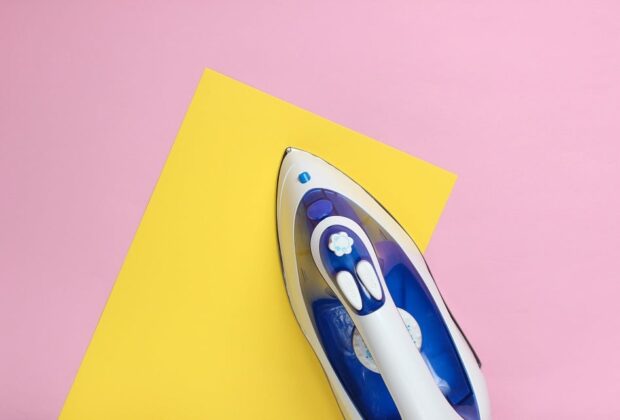
A household iron was built to remove wrinkles. It has a curved soleplate, uneven heat distribution, and no pressure gauge or built-in timer. A heat press was engineered specifically for transfer work — flat heated platen, adjustable pressure knob, and digital temperature and time controls. That core design difference shows up in every transfer you make, whether you're applying one shirt or fifty.
This guide walks through both tools side by side, covering how they work, what they cost, where each one excels, and how to troubleshoot the most common problems. By the end, you'll have a clear picture of which tool makes sense for your specific situation.
Contents
- Where Heat Transfer Printing Comes From
- The Tools and Equipment Each Method Requires
- Step-by-Step: Applying HTV with an Iron vs a Heat Press
- Heat Press vs Iron Printing: Pros, Cons, and Key Differences
- Breaking Down the Real Costs
- Real Scenarios: Which Tool Actually Fits Your Workflow?
- Troubleshooting Common Heat Transfer Problems
Where Heat Transfer Printing Comes From
Heat transfer printing has been a staple of the commercial textile industry for decades — used in garment decoration shops and screen printing facilities long before home crafters had access to affordable HTV. The core principle is unchanged: apply heat and sustained pressure to permanently bond a design onto fabric. What has shifted is who can do it and with what equipment.
How HTV and Sublimation Transfers Work
Heat transfer vinyl uses a heat-activated adhesive backing. When you apply consistent heat and firm pressure, the adhesive melts and bonds the vinyl fibers to the garment. Sublimation transfers work differently — the ink converts to a gas under heat and penetrates polyester fibers at the molecular level, becoming part of the fabric itself rather than sitting on top of it. In both cases, three variables control your results: temperature, pressure, and time. Get all three right, and your transfer bonds well and lasts. Miss on any one of them, and you'll notice it quickly.
Why the Iron Became the Default Starter Tool
When HTV brands began marketing directly to DIY crafters, they pointed to the household iron as a starting point because almost everyone already owned one. It eliminated a barrier to entry and grew the market. The tradeoff was real, though — irons weren't engineered for this kind of work, and inconsistent results became a well-documented frustration for beginners who couldn't figure out why their transfers kept peeling or lifting at the edges.
The Tools and Equipment Each Method Requires
Neither setup is complicated, but understanding what each method actually needs — and where the weak points are — helps you avoid common mistakes before they cost you materials.
What an Iron Setup Requires
- Household iron — Steam function turned off; dry heat only throughout the entire process
- Hard, flat pressing surface — A standard padded ironing board won't work; use a solid wooden board, a firm pressing mat, or a folded towel on a hard table
- Teflon sheet or parchment paper — Protects the vinyl surface and prevents sticking to the soleplate
- Infrared thermometer (optional but valuable) — Most irons don't display actual temperatures, so dialing in the right heat is largely guesswork without one
Temperature inconsistency is the biggest issue with irons, especially when you're working with stretch or performance fabrics. If you're applying transfers to athletic wear or mixed-fiber garments, understanding your HTV options first makes a real difference — see Stretch HTV vs Regular HTV: Which Is Better for Athletic Wear for guidance on which material handles iron heat most reliably.
What a Heat Press Setup Requires
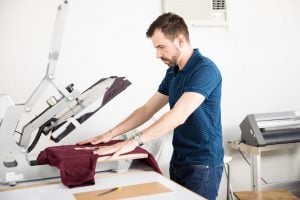
- Heat press machine — Clamshell or swing-away style; entry-level models start around $150–$200
- Heat-resistant foam pad or pressing pillow — Helps maintain even pressure over seams and zippers
- Teflon sheet — Optional but recommended for certain vinyl types and sublimation
- Built-in digital timer and temperature display — No guessing, no extra tools required
Pro tip: Always pre-press your garment for 5–10 seconds before applying any transfer — this removes residual moisture and smooths out fabric wrinkles that can cause adhesion problems.
Step-by-Step: Applying HTV with an Iron vs a Heat Press
Using a Household Iron
- Set your iron to the cotton or linen setting — no steam, ever
- Pre-press the garment for 5–10 seconds to eliminate moisture
- Position your HTV design with the carrier sheet facing up
- Apply firm, even downward pressure — press in overlapping sections of about 3–4 inches each, holding for 10–15 seconds per zone
- Let the design cool slightly, then peel the carrier sheet according to your HTV type (hot peel or cold peel)
- Flip the garment inside out and press from the back for an additional 10 seconds to reinforce adhesion
The most common failure point is uneven pressure. Because you're pressing manually and working in sections, the force you apply varies across the design. Larger designs amplify this problem. For a thorough breakdown of temperature ranges by material, the Beginner's Guide to Heat Press Temperature and Time Settings is a helpful reference even when you're using an iron — the target temperatures are the same, even if achieving them consistently is harder.
Using a Heat Press
- Dial in your temperature and time settings using a heat press temperature chart for your specific vinyl and fabric type
- Pre-press the garment for 5 seconds to remove moisture
- Position your design on the garment and close the press firmly
- The machine counts down and signals when the press time is complete
- Open the press, peel the carrier sheet per your vinyl's instructions, and inspect the transfer
The process is faster, more consistent, and significantly more repeatable. Because the platen applies uniform pressure across the entire design in a single press, you eliminate the zone-by-zone variability that makes iron application so unpredictable on larger designs.
Heat Press vs Iron Printing: Pros, Cons, and Key Differences
| Feature | Household Iron | Heat Press |
|---|---|---|
| Temperature Control | Approximate — dial settings only | Precise — digital readout in °F/°C |
| Pressure Consistency | Manual and uneven across design | Uniform across the full platen |
| Built-in Timer | No | Yes |
| Transfer Durability | Moderate — more wash failures over time | High — complete, consistent adhesion |
| Fabric Safety | Higher risk on synthetics and delicates | Lower risk with correct settings |
| Portability | High — lightweight and compact | Low — heavy, requires table space |
| Learning Curve | Low to start, difficult to master | Slightly higher upfront, easier long-term |
| Best For | Occasional single-item projects | Consistent, repeatable, volume work |
What the Iron Does Well
The iron has genuine advantages. It's portable, low-cost, and already in most homes. For small, simple designs on flat cotton fabric, an iron with proper technique can produce durable, clean results. It's also the only option if you need to apply transfers in a location without a dedicated workspace — at an event, on location, or in a small apartment.
Where the Heat Press Wins
The heat press wins on nearly every technical metric: temperature accuracy, pressure uniformity, repeatability, and transfer longevity. If you're running any kind of volume — even a few dozen shirts a month — the consistency advantage compounds quickly. You spend less time troubleshooting failures and more time producing finished work.

Breaking Down the Real Costs
What an Iron Setup Costs
If you already own an iron, your startup cost is nearly zero. A quality Teflon sheet runs $5–$10, and a firm pressing surface adds another $15–$30 if you don't have one. Total investment: under $40. That's a compelling number for casual use.
The hidden cost is in wasted materials. Failed transfers, scorched shirts, and redone projects add up. If you're going through HTV on a regular schedule, those accumulated failures can quietly cost more than a mid-range heat press would have over the same period. Factor that in before you decide the iron is the economical choice.
What a Heat Press Setup Costs
- Entry-level clamshell press — $150–$250
- Mid-range swing-away press — $250–$400
- Professional-grade units — $500 and up
- Heat-resistant mat or pressing pillow — $15–$30
For most home crafters and small business owners, a mid-range swing-away press offers the best balance of platen size, precision, and longevity. For most regular users, the investment typically pays back in reduced material waste and time efficiency within several months of consistent use. Your mileage depends on how often you press and how much your materials cost per piece.
Real Scenarios: Which Tool Actually Fits Your Workflow?
Casual Crafters and One-Off Projects
If you're decorating a single shirt for a birthday, making a custom tote bag for a friend, or testing out a new HTV color before committing to a bigger project, your iron is probably sufficient. The stakes are low, the volume is low, and a heat press may be more machine than you need right now. That said, even casual crafters benefit from solid technique — and understanding how to manage temperature and timing on an iron dramatically improves your results.
For fabric-specific considerations, the guide on how to heat press polyester covers temperature settings and technique adjustments that apply equally whether you're using a press or an iron on synthetic fabrics.
Small Businesses and Volume Work
Once you're producing more than a handful of items regularly, the math shifts fast. A heat press pays for itself in time savings and material consistency alone. Customers paying for custom apparel expect uniform quality across an order — that's hard to deliver with an iron. If you're applying white HTV on dark shirts at any kind of volume, the pressure uniformity of a heat press makes a visible difference in how clean and crisp each transfer looks, and how well it holds up after washing.
Troubleshooting Common Heat Transfer Problems
Whether you're using an iron or a dedicated machine, a handful of problems come up often enough that knowing how to handle them in advance saves you real time and materials.
Peeling and Lifting Edges
Peeling is almost always caused by insufficient heat, inconsistent pressure, or too-short press time. With an iron, this problem is amplified because you can't guarantee even contact across a large design. To reduce peeling when using an iron: work in overlapping sections, press firmly for at least 15 seconds per zone, always press from the back after the initial application, and make sure you're on a hard flat surface rather than a padded ironing board.
With a heat press, peeling usually points to a calibration issue — either the temperature is reading incorrectly or the pressure isn't making full contact across the platen. Check your settings against a reference chart and test your pressure by pressing a piece of paper; it should come out with an even crease across the full surface.
Scorched or Discolored Fabric
Scorching happens when heat is too high or press time runs too long. Irons are more prone to this because temperature control is imprecise. Polyester and nylon are especially vulnerable — synthetic fibers melt or discolor at temperatures that are perfectly safe for 100% cotton. If you're working with blended or synthetic garments, always reduce your temperature by 10–15 degrees from the cotton baseline and test on scrap fabric first.
Warning: Never use steam mode when applying heat transfers — even trace moisture from a steam-prepped iron can cause bubbling and adhesion failure under your vinyl.
The tool that gives you consistent results every single time will always outperform the tool that simply gets the job done once.
 |  |  |  |

About Anthony Clark
Anthony Clark spent nine years running a custom printing studio in Phoenix, Arizona, producing sublimation-printed drinkware, heat-pressed apparel, and branded merchandise for sports leagues, small businesses, and online retailers. That hands-on production background means he has calibrated hundreds of heat press cycles, sourced sublimation blanks from over a dozen suppliers, and troubleshot every coating and color-shift problem that shows up when dye meets polyester. He left the shop floor in 2019 to write full-time about the techniques and equipment he used daily. At PrintablePress, he covers sublimation printing and heat press methods.


Get some FREE Gifts. Or latest free printing books here.
Disable Ad block to reveal all the secret. Once done, hit a button below
| | | |