How To Laminate At Home
by Karen Jones · March 31, 2020
Lamination protects documents from some elements like moisture and wear and tear. Laminated documents always look new and professional. However, most people wonder whether you must have a laminator to laminate your documents. The good news is that it is not a must to have a laminator to laminate document.
Don’t worry if you urgently need to laminate a document and you don’t have a laminating machine with you. This article has compiled some of the best and easiest ways to laminate documents at home.
Contents
Preparing the Document for Lamination

1. First, measure your document and cut out the laminated paper, adding an extra inch all around. You can make marks around it to show the correct size.
2. Peel off the paper to show the adhesive side and place the document you want to laminate at the center, do the same for the second piece of the paper, allowing one inch to run around the paper.
3. You can now laminate using the machine or your hands. If you are using your hands, ensure you move from left to right to remove air bubbles and prevent wrinkles.
Materials Required for Lamination
Depending on the ways you will use to laminate the documents determines the materials needed. The common materials include the document to be laminated and the laminating paper. Other materials include a pair of scissors or trimmer, ruler, self-adhesive sheets, and clear packing tape.
Benefits of Laminating Your Documents

Here are some of the benefits of laminating your documents. They include:
Gives a Professional Look
Laminated documents look better compared to ordinary ones. Lamination brings out the colors in the document and makes it more vibrant. The laminated document always looks new, unlike an unlaminated sheet that can tear and curl easily, giving a messy look to your documents.
Easy to Clean
You can clean your laminated documents easily. Because the laminate is waterproof, you can wipe the document as they need to look neat at all times. The waterproof feature makes documents also last longer.
Durable and Long-lasting
Lamination makes your documents to be more durable. Ordinary documents can tear easily unlike laminated documents, which will last longer. You will be able to preserve the documents for future use hence saving you both time and money.
Best Ways to Laminate your Documents at Home

These ways include clear packing tape, self-adhesive sheets, a synthetic paper pouch, and an iron.
1. Self-Adhesive Laminating Sheets
It is also known as self-laminating sheets. You don’t need to purchase a personal laminator since these sheets are readily available. They laminate the documents without using any heat. When buying the sheets, ensure you go for those with a grid on the rear side; the grid will help you position the paper correctly.
Steps you need to follow:
- You need to separate the sheet from its backing using nails. Be careful not to touch the part that has the adhesive to avoid your fingerprints being left there.
- Place the document on the sticky backing and use the grid guide to place it in the correct position. Make sure that the border around the document is even.
- Once the paper is aligned, take another piece of adhesive, remove the backing, and stick it to the paper. Make sure that the top adhesive sheet is properly aligned with the bottom adhesive sheet. The document should be enclosed between the two sheets.
- Use a tool like a ruler or your hand to remove any air bubbles, hence preventing wrinkles from appearing.
2. Use a Packing Tape
Suppose you don’t have the cash to take your document to a cyber café for lamination; you can opt for clear packing tape. It is excellent when laminating small items such as decals because they are narrower than the tape’s width. Fold more tape over the document and press it down to remove any air bubbles. Interestingly, the packing tape can be found in the stationery shop or hardware stores.
Steps to follow:
- The clear packing tape is single-ply, with adhesive on one side. Unroll the adhesive tape and place the document on the side with the adhesive tape.
- Place the document in the middle and leave an allowance of around ½ an inch from the tape’s end.
- Place the document on the adhesive side, measure the distance on the tape and length of the document you are laminating.
- Make a mark on the tape and cut it using a paper trimmer or a pair of scissors.
- Fold the free part of the tape over the document, ensuring the document is between the 2 layers of tape. Other people fold it over the document and cut it later, which is okay.
- Press the tape on both sides with your hands to ensure there are no air bubbles inside.
- Lastly, cut the tape at the edge to ensure it is in line with those of the document.
3. Synthetic Paper and an Iron
Synthetic paper is a unique plastic paper that looks like ordinary paper. You can purchase these pouches from a stationery shop.
Follow these steps to laminate your document:
- First, open the synthetic paper and place the document inside, positioning it well in the center and leaving an even space at the edges.
- Place the paper with the document on a flat table, and cover it with a towel.
- Take your iron and put it on medium-high heat – pass over the parts of the towel that cover the bottom of the pouch for about 30 seconds. Be sure to iron all parts evenly. Pressure and heat melt the sensitive adhesive and the two layers stick together.
- Remove the cloth and allow the laminate to cool slightly.
- Remove the towel and let the laminated document cool for a while.
- Finally, after cooling, look at the document to check if there are any loose parts; you can iron it using the procedure until you are satisfied.
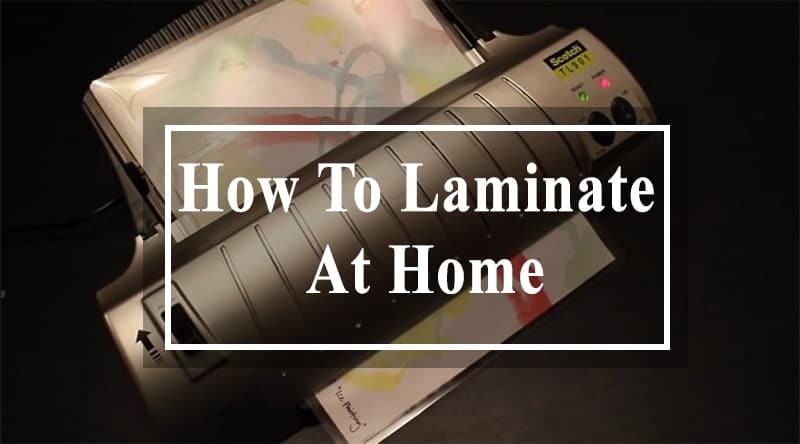
4. At-home Laminator
You can invest in a laminator for your home use. When you have a laminator, you will be able to laminate your documents whenever. Purchase a laminator that will suit your needs and preferences. The standard one can work with documents that are A4 letter size.
Steps to Follow
- Turn on the switch located on the side. Give it a few minutes to warm up; some laminators will indicate when it is ready.
- Position the document inside the laminating paper made of two sheets held together at one end. Place the document at the center to ensure you have an even border all around. You can also use a smaller laminating paper to allow trimming of the edges.
- Next, place the pouch and the document in a carrier with the sealed end getting in first. The sheets are treated to protect adhesive buildup.
- Feed the carrier through the laminator until it is grabbed. Don’t force it into the machine since it must go slowly for the papers to fuse. Allow the case to cool before removing it.
- Trim the edges with scissors or a paper cutter so that a 2mm margin remains all around.
Frequently Asked Questions (FAQs)
Can I use an iron if I don’t have a laminator?
Yes. A laminator only makes the laminating process efficient and comfortable but is expensive. You can also use an iron. Make sure to cover the document uniformly for great results especially, at the corners.
Must I have a laminator to laminate documents?
No. there other ways you can use to laminate your documents. For example, you can use clear wrapping tape or synthetic iron paper with the laminates’ papers.
Can I cut a laminating sheet then use it?
Of course, yes. The sheet will be useful as long there is a border of at least ¼ inch all around the paper to prevent dust, water, and other unwanted elements from getting in.
What is the purpose of laminating documents?
Unlaminated documents are prone to the elements of wear and tear, especially moisture and pressure. The purpose of lamination is to give the paper the strength it lacks and to protect it from wear and tear..
How do I iron a laminating pouch?
First, lay a thin towel on top of the pouch to avoid burning and damaging the plastic.Iron it at a medium heat setting for around half a minute as you apply moderate pressure with your hands.
Conclusion
Laminating is an easy task if you have the instructions with you. You don’t have to spend your cash or time going to a cyber café to have your documents laminated. These ways will work for you if you follow the instructions carefully.
For the experiment, you can use regular paper, not your document, to practice. In the end, you will get great results. You only need an iron box, a ruler and enjoy the DIY methods of laminating from home.
 |  |  |  |

About Karen Jones
Karen Jones spent seven years as an office manager at a mid-sized financial services firm in Atlanta, where she was responsible for a fleet of more than forty inkjet and laser printers spread across three floors, managed ink and toner procurement contracts, and handled first-line troubleshooting for connectivity failures, paper jams, and driver conflicts before escalating to IT. That daily exposure to printers from Canon, Epson, HP, and Brother under real office conditions gave her a practical command of setup, maintenance, and common failure modes that spec sheets never capture. At PrintablePress, she covers printer how-to guides, setup and troubleshooting tips, and practical advice for home and office printer users.


Get some FREE Gifts. Or latest free printing books here.
Disable Ad block to reveal all the secret. Once done, hit a button below
| | | |