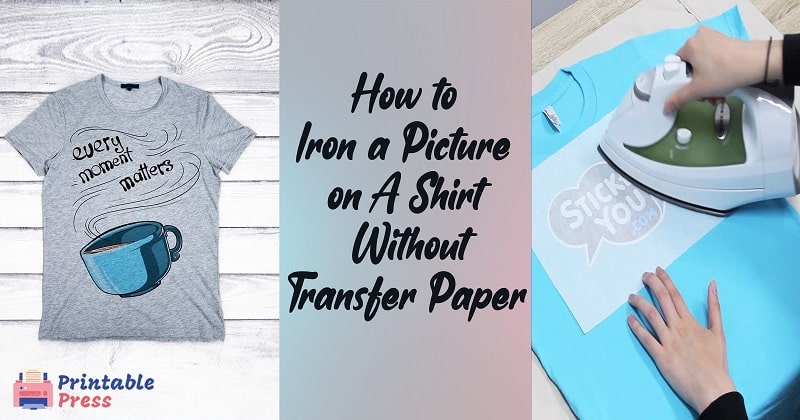
How to Iron a Picture on a Shirt Without Transfer Paper
by Anthony Clark · April 01, 2022
Over 1.5 billion custom t-shirts are produced globally every year — and a surprising number of crafters pull it off without ever buying a specialty product. If you're looking for how to iron a picture on a shirt without transfer paper, you have more practical options than most people realize. From wax paper to freezer paper to fabric paint stencils, there are methods that work with everyday supplies you likely already own. This guide covers each approach honestly, so you can pick the one that fits your materials, your printer, and how long you need the design to last.
The biggest challenge isn't the ironing itself — it's not knowing which paper substitute actually holds up after a few trips through the wash. Some methods fade on the first cycle; others bond surprisingly well if you follow the right steps. Understanding the tradeoffs upfront saves you from wasting a good shirt on a method that wasn't suited to your fabric or printer type. For comparison, our guide on how to print on heat transfer paper shows you the standard store-bought approach if you decide to go that route later.
No matter your experience level, the process is simpler than most tutorials make it sound. You'll need a working printer, a smooth cotton or cotton-blend shirt, and a heat source you already have at home. The rest depends entirely on which method you choose. Let's walk through your options from the easiest starting point to the more involved techniques.
Contents
Methods Ranked From Simple to More Involved
Three main approaches let you iron a picture on a shirt without transfer paper. Each uses a different stand-in material to carry your printed design from paper to fabric. Your best choice depends on your printer type, how crisp you want the result, and how much durability you need.
The Wax Paper Method
This is the most beginner-friendly starting point. Print your image on regular printer paper, then lay a sheet of wax paper face-down over the design. Position this on your shirt, cover with a thin pressing cloth, and press firmly with a hot iron for about 30–40 seconds. The heat causes a slight wax transfer that helps bond the ink to the fabric fibers.
- Works best with: inkjet printers and 100% cotton shirts
- Expected durability: light use, hand-washing recommended
- Best for: one-off projects or testing a design before committing
One honest limitation: wax paper transfers tend to look slightly muted compared to professional results. Colors won't be as vivid and fine details can blur. But for a fast, zero-cost option, it genuinely gets the job done.
The Freezer Paper Method
Freezer paper — the kind with a plastic coating on one side — gives you noticeably more control. You print directly onto the matte uncoated side, then iron the sheet shiny-side-down onto your shirt. The plastic coating briefly bonds with the fabric fibers under heat, acting as a carrier for the ink.
This method produces cleaner edges than wax paper and works particularly well with laser printers and light-colored shirts. The bond is temporary by design, so think of it more as a precision stencil than a permanent print. It's also easy to reposition before you apply heat, which beginners tend to appreciate.
The Contact Paper or Vinyl Route
If you own a cutting machine, this approach changes everything. Cut a stencil of your design from contact paper or heat transfer vinyl, apply it directly to the shirt, layer fabric paint over the open areas, then peel the stencil away once dry. If you've already explored how to cut heat transfer vinyl with a Silhouette Cameo, this workflow will feel familiar.
It skips the printing step entirely and gives you the sharpest, most permanent results of any no-transfer-paper method. The tradeoff is that it takes more time to prepare and requires a few additional materials.
Comparing the Methods Side by Side
Before you commit to one approach, it helps to see how the options stack up across the factors that actually matter — durability, cost, difficulty, and printer compatibility.
| Method | Printer Type | Difficulty | Durability | Approx. Cost |
|---|---|---|---|---|
| Wax Paper | Inkjet | Easy | Low (5–10 washes) | Under $2 |
| Freezer Paper | Inkjet or Laser | Easy–Medium | Low–Medium (10–15 washes) | $3–$5 per sheet |
| Parchment Paper | Inkjet | Easy | Low (similar to wax paper) | Under $2 |
| Vinyl / Contact Paper Stencil | None required | Medium–Advanced | High (50+ washes) | $10–$20 for materials |
| Fabric Paint Stencil | None required | Medium | High with proper drying | $5–$15 |
Pro tip: Always mirror (flip horizontally) your image before printing when using any transfer method — otherwise text and logos will appear backwards on the finished shirt.
What You'll Need Before You Start
Getting your setup right before you iron is more than half the battle. Missing one item — like a pressing cloth — can mean scorched fabric or an incomplete transfer. Running through this checklist first saves frustration later.
The Basics
- A printer (inkjet works best for most no-transfer methods)
- Wax paper, freezer paper, or parchment paper
- A pre-washed 100% cotton or cotton-blend shirt
- A household iron set to medium-high heat
- A firm, flat pressing surface — an ironing board or a folded towel on a hard table
- A thin pressing cloth or clean pillowcase (never iron directly on the paper)
- A piece of cardboard to slip inside the shirt and prevent bleed-through
Helpful Add-Ons
These aren't required, but they make the process smoother and the results more consistent.
- Masking tape to hold the transfer in place before pressing
- Fabric paint or fabric medium if you're going the stencil route
- A heat press machine if you plan to do this regularly — browse our heat press guides to find options at every budget level
One important note on shirt material: natural fibers like cotton absorb ink far more reliably than synthetics. If your shirt is polyester or a heavy poly-blend, results will likely disappoint with these methods. For polyester, sublimation is the better route — see our guide on how to do sublimation with Cricut for a step-by-step walkthrough.
How to Iron a Picture on a Shirt Without Transfer Paper — Step by Step
Technique is where most failed transfers actually go wrong. Two people can use the exact same materials and get completely different outcomes based on how they handle the iron and how well they prep. These steps apply to the wax paper and freezer paper methods, which cover most beginners.
Preparing Your Image and Shirt
Start with your design. High-contrast images with bold colors transfer more cleanly than photographs with gradients or very fine details. Resize your image to fit the shirt section you're targeting — typically no wider than 10–12 inches for a chest print.
Print the image mirrored on your chosen paper. Pre-wash the shirt and let it dry fully before starting — this removes chemical stiffeners (called sizing) added during manufacturing that can block ink adhesion. Once dry, press the shirt flat to remove all wrinkles. Wrinkles under the transfer cause uneven pressure and patchy results. For a refresher on basic ironing technique and temperature settings, our guide on how to iron a shirt covers the fundamentals well.
The Ironing Process
- Lay the shirt flat on your pressing surface.
- Slip a piece of cardboard inside the shirt between the front and back layers.
- Position your printed design face-down on the shirt exactly where you want it.
- Tape the corners lightly with masking tape to prevent shifting.
- Cover with your pressing cloth.
- Press the iron firmly using small circular motions for 30–45 seconds. Apply steady, even pressure — do not slide the iron back and forth.
- Let everything cool for 60 seconds before peeling the paper back slowly from one corner.
- Check coverage. If any areas look faint or incomplete, replace the paper and repeat.

Mistakes That Ruin the Result
A handful of errors account for the vast majority of failed transfers. Most of them are completely preventable once you know what to watch for. Here are the ones that come up most often.
Temperature and Timing Errors
- Too cool: The ink won't bond — you'll get a patchy, faded result.
- Too hot: You risk scorching the fabric or fusing the paper permanently to the shirt.
- Too fast: Lifting the iron before 25–30 seconds almost always means incomplete transfer.
- Sliding instead of pressing: This smears the image before it sets.
Cotton shirts generally handle a medium-high setting well, around 300–350°F (150–175°C). Synthetic-blend shirts need lower temperatures. When in doubt, test on a scrap piece of the same fabric before committing to your actual shirt. According to Wikipedia's overview of heat transfer printing, temperature consistency is the single most critical factor in achieving a reliable bond between ink and textile substrate.
Image and Paper Prep Mistakes
- Forgetting to mirror the image before printing (your text will read backwards on the shirt)
- Printing on glossy photo paper — glossy coatings don't transfer, use matte only
- Skipping the cardboard layer inside the shirt (ink bleeds through to the back)
- Not pre-washing the shirt (sizing residue blocks proper adhesion)
- Using too much water or steam on the iron (moisture interferes with the heat-bond process)
Of these, forgetting to flip the image is by far the most common first-timer mistake. Make it a habit to preview the mirrored version on screen before hitting print.
Making Your Print Last Through Washes
A transfer that looks sharp on day one but fades after the second wash isn't really a success. Durability with no-transfer-paper methods is lower than professional printing by nature — but proper care can push that lifespan noticeably further.
Care Habits That Extend Print Life
- Turn the shirt inside out before every wash
- Use cold water on a gentle cycle
- Skip the dryer when possible — air dry flat instead
- Avoid bleach or enzyme-based detergents near the printed area
- Don't iron directly over the design on future washes
With these habits, wax paper and freezer paper transfers typically last 10–20 washes before visible fading begins. Vinyl stencil and fabric paint methods can hold up for 50 or more washes with the same care routine — particularly if you learn how to dry acrylic paint properly, since the same curing principles apply to fabric-based paints.
When to Touch Up or Redo
When fading starts, you have two realistic options. The first is a quick touch-up: place the original printed transfer back over the faded design as precisely as possible and repeat the ironing process. This works better than you might expect for simple solid designs. The second option is starting fresh on a new shirt.
If you find yourself redoing the same design repeatedly, that's a signal to consider investing in proper materials. Our full walkthrough on how to print on heat transfer paper covers the step-by-step process using store-bought transfer sheets that bond far more durably from the first press.
Frequently Asked Questions
Can I use parchment paper instead of wax paper to iron a picture on a shirt?
Yes, parchment paper works as a substitute, though results can be slightly less consistent than wax paper. Parchment is heat-resistant and won't melt to your shirt, making it a safe alternative. The transfer quality depends heavily on your printer's ink output and the cotton content of your shirt — expect similar durability to the wax paper method.
Does the wax paper method work with a laser printer?
The wax paper method is generally designed for inkjet printers. Laser printers use heat to fuse toner to paper during the printing process, which changes how the ink behaves under a second application of heat. Freezer paper tends to work more reliably with laser printers — the plastic coating acts as a better carrier for toner-based images.
How long does a no-transfer-paper iron-on typically last?
Durability varies by method. Wax paper and parchment transfers generally last 5–15 washes before noticeable fading. Freezer paper results are similar, maybe slightly better with careful washing. Vinyl stencil and fabric paint methods can last 40–60 washes or more with proper care like cold washing and air drying. None of these methods match professional screen printing for long-term durability.
Do I need to seal the design after ironing it on?
For wax and freezer paper methods, no sealant is needed — though some crafters apply a thin layer of fabric medium over the dried design to add a small durability boost. For fabric paint stencil methods, allowing the paint to cure fully before washing (usually 24–72 hours depending on the paint brand) is more important than any topcoat application.
What shirt material works best for these methods?
100% cotton gives you the most reliable results across all no-transfer-paper methods. The natural fibers absorb ink and bond with the transfer material more readily than synthetics. Cotton-polyester blends (like 50/50) also work reasonably well. Avoid pure polyester or performance fabrics — the ink won't bond properly with those fibers, and heat can damage synthetic materials more easily.
Can I iron a picture onto a dark-colored shirt using these methods?
Standard inkjet printing on wax or freezer paper doesn't show up well on dark shirts because the ink isn't opaque — it relies on the shirt's light background to reflect the colors correctly. For dark shirts, a fabric paint stencil approach works much better since you can choose opaque paints in any color. There are also specialty dark-fabric transfer sheets available if you want a printed-image result on a dark background.
Final Thoughts
Now that you know exactly how to iron a picture on a shirt without transfer paper, pick one method that matches what you already have at home and give it a try on an old shirt first. Start with the wax paper approach if you want the lowest barrier to entry, or move straight to the vinyl stencil method if you want results that genuinely last. Whatever you choose, head over to our heat press section to explore tools that can take your custom printing to a more consistent and professional level when you're ready for the next step.
 |  |  |  |

About Anthony Clark
Anthony Clark spent nine years running a custom printing studio in Phoenix, Arizona, producing sublimation-printed drinkware, heat-pressed apparel, and branded merchandise for sports leagues, small businesses, and online retailers. That hands-on production background means he has calibrated hundreds of heat press cycles, sourced sublimation blanks from over a dozen suppliers, and troubleshot every coating and color-shift problem that shows up when dye meets polyester. He left the shop floor in 2019 to write full-time about the techniques and equipment he used daily. At PrintablePress, he covers sublimation printing and heat press methods.


Get some FREE Gifts. Or latest free printing books here.
Disable Ad block to reveal all the secret. Once done, hit a button below
| | | |