How to Clean a Printer – A Complete Guide
by Karen Jones · March 30, 2022
Last month, I pulled out my inkjet to print some craft labels and what came out looked like a tiger had dragged its paw across the page — nothing but streaks, smears, and faded blobs where sharp text should have been. If that sounds familiar, you're not alone. Knowing how to clean a printer is one of those skills that saves you money, frustration, and a whole lot of wasted paper. Whether you're printing everyday documents, photo projects, or materials for crafting, a clean printer delivers consistent, beautiful results every time. For more help keeping your setup running smoothly, browse our complete collection of printer guides.
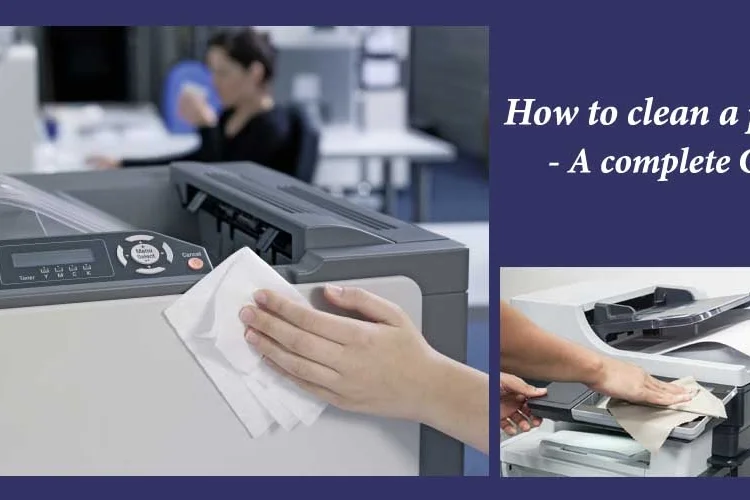
Most printer problems trace back to one root cause: buildup. Dust, dried ink, paper fibers, and residue from the paper path all accumulate over time and start interfering with how your machine operates. The good news? You can fix most of these issues yourself, without any special training or expensive service calls. A targeted cleaning routine — even a quick one — makes a noticeable difference in print quality and extends the life of your machine considerably.
This guide walks you through everything: how to spot when your printer needs attention, which tools to use, the real difference between a light cleanup and a deep clean, and how to build habits that keep problems from coming back. It applies to inkjet printers, laser printers, and photo printers alike — so whatever you've got sitting on your desk, you'll find something useful here.
Contents
Signs Your Printer Is Telling You It Needs a Clean
Printers don't exactly raise their hand when something's wrong, but they do communicate — through print quality. When your output starts looking worse than it should, that's almost always your machine asking for some attention. The tricky part is knowing which symptom points to which problem, because the fix for a clogged nozzle is very different from the fix for a dirty paper path. Catching these signals early is what separates a five-minute cleanup from a full afternoon of troubleshooting.
Streaky Lines and Faded Colors
Horizontal white lines running through your prints, colors that look washed out, or entire color channels disappearing from your output — these are the classic signs of a clogged printhead. The printhead is the component that sprays ink onto the page, and in inkjet printers, it's lined with tiny nozzles that can dry out if the machine sits unused for even a week or two. When that happens, dried ink blocks the nozzle and the ink simply can't flow properly.
Before you assume it's a cleaning problem, rule out the obvious: check your ink levels. A lot of frustrating troubleshooting sessions end with the realization that a cartridge simply ran out. You can learn how to check ink levels on an HP printer in just a few clicks — and most other brands work similarly through their printer software or control panel. Once you've confirmed your cartridges aren't the culprit, cleaning is the next logical step.
Smearing, Bleeding, and Stubborn Paper Jams
Ink that smears right after printing usually points to one of two things: the wrong paper type for your printer settings, or dirty rollers picking up ink residue and redepositing it on fresh pages. Laser printer users sometimes see toner smearing as well — typically a sign that the fuser unit (the heated component that bonds toner permanently to paper) needs attention or is nearing the end of its life.
Frequent paper jams can also be a cleaning problem rather than a mechanical one. Rubber feed rollers wear down over time and collect dust and paper lint, causing them to lose grip. A thorough cleaning of the rollers often eliminates "mystery jams" that seem to happen for no apparent reason. If your printer keeps jamming on pages that look perfectly fine, dirty rollers are a prime suspect and the easiest thing to address before calling for service.
The Right Tools for Cleaning Your Printer
You don't need a specialty kit to clean a printer effectively. Most of what you need is probably already around your house. That said, using the wrong materials can cause real damage — permanently scratching surfaces, degrading rubber components, or leaving behind residue that makes things worse. Knowing what's safe and what isn't before you start is genuinely important.
What You'll Actually Need
For the majority of cleaning tasks, you'll want lint-free cloths or microfiber towels, isopropyl alcohol (at least 70% concentration), cotton swabs, distilled water, and a can of compressed air. Compressed air is particularly useful for blowing dust out of the interior without touching any delicate components. A printhead cleaning solution — available from most printer manufacturers — is worth keeping on hand for more stubborn ink clogs.
| Tool / Supply | Best Used For | Notes |
|---|---|---|
| Lint-free microfiber cloths | Wiping exterior, glass, rollers | No shedding — safe on all surfaces |
| Isopropyl alcohol (70%+) | Cleaning rollers, printhead contacts | Avoid using on painted exterior panels |
| Cotton swabs | Detailed cleaning around nozzles and contacts | Use gently — never force into gaps |
| Distilled water | Dampening cloths, rinsing components | Tap water leaves mineral deposits |
| Compressed air | Blowing dust from interior and vents | Hold can upright; use short bursts only |
| Printhead cleaning solution | Dissolving dried ink from clogged nozzles | Brand-specific formulas work best |
What Not to Use
Steer clear of paper towels, regular tap water, bleach-based cleaners, and any abrasive scrubbing pads. Paper towels feel harmless but they shed tiny fibers that can end up exactly where you don't want them — inside nozzles and around sensitive contacts. Tap water contains minerals that leave deposits inside your machine and on precision components. Harsh household cleaners can strip plastic coatings, dissolve rubber rollers, or corrode metal parts. None of those outcomes are worth the convenience.
Pro tip: Always unplug your printer before doing any hands-on cleaning inside the machine. It takes three seconds and eliminates any risk of an electrical issue while you work.
Quick Wins: Fast Fixes That Work Right Now
Before you commit to a full deep clean, try these faster approaches first. They take between five and fifteen minutes, require no disassembly, and solve the majority of common print quality problems. Most people find that one of these quick steps is all they actually needed — the deep cleaning techniques are reserved for situations where these simpler fixes don't do the job.
Use Your Printer's Built-In Cleaning Cycle
Almost every inkjet printer has a built-in printhead cleaning utility, and this should always be your first move when print quality drops. You access it through your printer's software on your computer — usually listed under "Maintenance," "Tools," or "Device Settings" — or directly through the printer's own control panel. The cleaning cycle works by pushing ink through the nozzles at higher pressure to flush out dried clogs and restore normal flow.
Run the cycle once, then print a nozzle check pattern or a test page. If quality improves, you're done. If not, run it a second time. Most manufacturers recommend running the cycle no more than two or three times in a row — after that point, you're burning through ink without meaningful additional benefit and you may be better off with manual cleaning. Understanding how inkjet printers work gives you a much clearer picture of why these cycles matter and what's actually happening inside the machine when you run one.
Wipe Down the Exterior and Paper Path
This step takes five minutes and often resolves smearing and paper feed issues immediately. Open the paper tray and rear access panel (if your model has one), then use a lint-free cloth lightly dampened with isopropyl alcohol to wipe down the rubber feed rollers. Rotate them by hand so you clean the entire surface — not just the visible portion. Do the same inside the paper tray itself, which accumulates dust and paper lint faster than most people expect.
For the printer's outer casing, a dry or barely damp cloth is all you need. If your printer has a flatbed scanner on top, clean the glass with a microfiber cloth and a small amount of glass cleaner — but apply the cleaner to the cloth first, not directly to the glass, to prevent liquid from seeping into the edges and damaging the seal beneath.
Basic Cleaning vs. Deep Cleaning: Know the Difference
There's a meaningful gap between a quick maintenance wipe-down and a true deep clean. Knowing which one your situation actually calls for saves you time and protects your printer from unnecessary handling. For most people in most situations, basic cleaning handles around 80% of problems. Deep cleaning is reserved for serious, persistent clogs and printers that have been neglected for an extended period.
Light Maintenance: The Everyday Approach
Light cleaning means running the software cleaning cycle, wiping down the rollers, dusting the paper path, and clearing any paper debris from the interior. This process takes between ten and twenty minutes and should happen every one to three months depending on your print volume. If you print photos regularly — for craft projects, sublimation transfers, or creative work — lean toward the more frequent end of that range. For context, understanding how to print on photo paper correctly also plays a role in keeping your printer cleaner, since matching your settings to the paper type reduces ink pooling and paper-path residue.
Light cleaning is also exactly what you should do after any extended period of printer inactivity. If your machine has been sitting unused for a month or more, run a cleaning cycle and print a test page before loading it up with an important job. Ink sitting in idle nozzles dries faster than most people realize, and a two-minute cleaning cycle prevents a twenty-minute frustration session later.
Deep Cleaning the Printhead
When the built-in cleaning cycle doesn't fix the problem after two rounds, you need to move to manual printhead cleaning. On many inkjet models, the printhead is removable — you can lift it out, soak it in warm distilled water or a dedicated printhead cleaning solution for thirty minutes to an hour, then gently blot it dry with a lint-free cloth. The key word there is blot. Never scrub the nozzle plate, even lightly — the nozzles are microscopic and any lateral force can cause permanent damage.
Laser printers have an entirely different set of cleaning needs. Instead of ink nozzles, you're dealing with toner powder and a drum unit — a rotating cylinder coated with a light-sensitive material that transfers toner to the page. If your laser printer is producing faint prints or consistent lines, cleaning the drum with a dry lint-free cloth is often the fix. For a deeper understanding of what you're working with, our guide on how laser printers work explains the mechanics clearly. According to Wikipedia's overview of inkjet printing, printhead technology varies significantly between manufacturers, which is a key reason why some machines are far more prone to clogging than others.
One important note for inkjet users with permanently-attached printheads (common in many Canon and Epson models): you can still manually clean it, but the process looks different. Use a syringe or dropper to apply cleaning solution directly to the nozzle plate and let it soak in place rather than removing the entire assembly. Set the printhead over a folded paper towel to absorb the dissolved ink as it drains through.
Making Clean Printing a Long-Term Habit
The best cleaning session is the one you don't have to do because you've kept up with regular maintenance. A few straightforward habits dramatically reduce how often you'll deal with serious clogs, smearing, or degraded print quality. Think of it the same way you approach maintaining other equipment — just like keeping up with cleaning a heat press prevents residue buildup and extends its working life, your printer responds the same way to consistent care.
Building a Simple Cleaning Schedule
Consistency matters far more than intensity. A quick monthly wipe-down prevents the kind of buildup that leads to more time-consuming deep cleans down the road. Here's a practical framework: if you print daily, clean monthly. If you print a few times a week, a cleaning every two to three months is sufficient. If you print occasionally — once a week or less — run a software cleaning cycle before each major job and do a full physical cleaning every three to four months.
One habit that surprises most people: print something, even just a test page, at least once a week if you own an inkjet. Regular use keeps ink flowing through the nozzles and prevents the drying that makes clogs inevitable. It sounds counterintuitive to print just for the sake of it, but it genuinely affects how long your printer ink lasts by eliminating the wasteful forced cleaning cycles that drain cartridges without producing anything useful. Consistent care pays off in machine longevity too — a well-maintained printer can serve you for many years, which matters when you consider how long printers typically last with proper upkeep versus without it.
Smart Storage and Ink Habits
Where and how you store your printer has a real impact on how often you'll need to clean it. Keep the machine in a room with stable temperature and humidity. Extreme heat accelerates ink drying, and high humidity causes paper to absorb moisture, stick together, and feed poorly. Cover the printer with a simple cloth or dust cover when it's not in use — this keeps dust out of the paper tray and away from interior vents, which is one of the most passive and effective forms of maintenance available to you.
On the ink side, using your printer manufacturer's recommended cartridges makes a genuine difference in how cleanly the machine runs. Third-party inks vary widely in quality, and some formulations are more prone to clogging nozzles or leaving residue on the paper path. That's not a blanket condemnation of all third-party options — some are excellent — but if you're dealing with recurring clogging problems and you've been using off-brand cartridges, that's worth investigating seriously. Also, replace cartridges before they run completely dry. Running a cartridge bone-empty introduces air into the printhead, and air in the printhead means clogs.
Frequently Asked Questions
How often should I clean my printer?
For daily users, a basic cleaning once a month is a solid baseline. If you print a few times a week, every two to three months works well. Occasional users should run a software cleaning cycle before any important job and do a full physical cleaning every three to four months. When in doubt, more frequent is better than less.
Do inkjet and laser printers need different cleaning methods?
Yes, and the differences matter. Inkjet printers require nozzle and printhead cleaning, with an emphasis on clearing dried ink clogs. Laser printers need attention focused on the toner cartridge, drum unit, and fuser assembly. The underlying principle is the same — regular maintenance prevents bigger problems — but the tools and techniques are distinct for each type.
What if the built-in cleaning cycle doesn't fix the clog?
Run it a second time, then print a nozzle check pattern to assess what's still blocked. If the problem persists after two cycles, move to manual cleaning with a printhead cleaning solution. Soaking a removable printhead in warm distilled water for 30 to 60 minutes resolves most severe clogs. For permanently attached printheads, apply solution directly to the nozzle plate with a dropper and let it soak in place.
Why is my printer smearing ink on every page?
Smearing usually comes from one of three sources: dirty paper feed rollers picking up and redistributing ink, an incompatible paper type paired with the wrong printer settings, or — in laser printers — a fuser unit that's failing or worn out. Start by cleaning the rollers with isopropyl alcohol and verifying your paper type settings before assuming the problem is more complex than it is.
Final Thoughts
Knowing how to clean a printer properly is one of the most practical things you can do for your entire print setup — it protects your investment, improves output quality, and keeps small problems from turning into expensive repairs or premature replacements. Start today: run your printer's built-in cleaning cycle, wipe down the rollers with a microfiber cloth, and set a recurring calendar reminder to do a full cleaning every couple of months. Your future self — the one who's printing sharp, clean results without any drama — will be very glad you did.
 |  |  |  |

About Karen Jones
Karen Jones spent seven years as an office manager at a mid-sized financial services firm in Atlanta, where she was responsible for a fleet of more than forty inkjet and laser printers spread across three floors, managed ink and toner procurement contracts, and handled first-line troubleshooting for connectivity failures, paper jams, and driver conflicts before escalating to IT. That daily exposure to printers from Canon, Epson, HP, and Brother under real office conditions gave her a practical command of setup, maintenance, and common failure modes that spec sheets never capture. At PrintablePress, she covers printer how-to guides, setup and troubleshooting tips, and practical advice for home and office printer users.


Get some FREE Gifts. Or latest free printing books here.
Disable Ad block to reveal all the secret. Once done, hit a button below
| | | |