How to Attach Patches Without Sewing
by Marcus Bell · March 29, 2022
Ever stare at a patch on your jacket and wonder if there's a better way to get it on there without threading a needle? There is — and it's faster and more durable than you'd expect. Whether you're customizing a denim jacket, decorating a bag, or adding branded artwork to your t-shirt printing projects, knowing how to attach patches without sewing gives you a reliable toolkit that works across almost every fabric type. No needle, no thread, no dropped stitches.
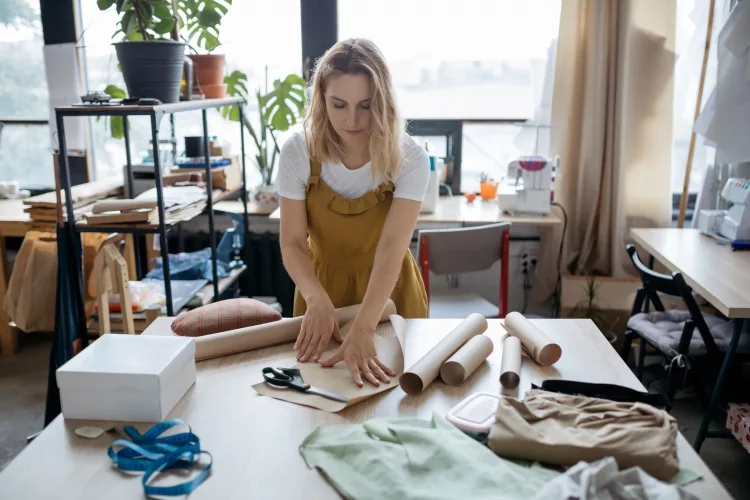
The no-sew approach isn't just a beginner shortcut. Experienced garment decorators, crafters, and tactical gear enthusiasts reach for iron-on adhesives, fabric glue, and Velcro regularly — especially when speed, scale, or awkward curved surfaces make stitching impractical. These methods are used in military uniform patches, custom streetwear, cosplay costumes, and everyday bag customization worldwide.
This guide walks you through every no-sew method worth knowing: the right tools, the exact steps, and the insider techniques that separate a patch that lasts years from one that peels off after the first wash. By the end, you'll know exactly which method fits your fabric, your patch type, and your timeline.
Contents
- Why No-Sew Patch Attachment Actually Works
- The Tools You Need to Attach Patches Without Sewing
- From Quick Projects to Professional-Grade Results
- Step-by-Step: Three Core Methods Explained
- Real Surfaces, Real Results: Where No-Sew Patches Shine
- Pro Tips for a Clean, Professional-Looking Finish
- Fixing the Most Common Patch Problems
- Making Your No-Sew Patches Last for the Long Haul
Why No-Sew Patch Attachment Actually Works
A Brief History of Iron-On and Adhesive Patches
Patches have been part of clothing culture for centuries — originally as repairs, then as identity markers for scouts, military units, and sports teams. The modern iron-on patch emerged in the mid-20th century when heat-activated adhesive backing became commercially available. Scout organizations and uniform suppliers adopted it quickly because of how consistently it bonded without requiring sewing skills at scale.
Today's no-sew adhesives are dramatically stronger than early versions. Thermoplastic adhesives — the coating on most iron-on patches — create a polymer bond that fuses fabric fibers together when heat and pressure are applied. According to Wikipedia's overview of adhesives, thermoplastic bonds are technically reversible when reheated, which is why patches can be repositioned with a second heat pass before final commitment. That's genuinely useful when you're dialing in placement on an expensive garment.
When Skipping the Needle Makes Sense
No-sew methods outperform traditional stitching in several real-world scenarios:
- Curved or irregular surfaces — bags, hats, and shoes are nearly impossible to stitch cleanly without a machine
- Removable patches — Velcro lets you swap designs instantly, ideal for uniforms or seasonal gear
- Thin or delicate fabrics — stitching puckers silk or chiffon; adhesives don't
- Fast turnaround — iron-on patches take under five minutes; hand-stitching a single patch takes 20–30 minutes
- High-volume decoration — when you're applying patches to dozens of garments, adhesive and heat press methods scale in ways that needlework never can
The Tools You Need to Attach Patches Without Sewing
Heat-Based Tools
Your heat source dramatically affects bond quality. These are the three main options and what each one does best:
| Tool | Temperature Control | Pressure Control | Best For | Typical Cost |
|---|---|---|---|---|
| Household Iron | Limited (dial settings) | Manual arm pressure | Small patches, casual projects | $20–$60 |
| Heat Press Machine | Precise digital readout | Even, calibrated | Professional results, bulk decoration | $200–$600+ |
| Heat Gun | Approximate only | None (handheld) | Curved surfaces, 3D objects | $25–$80 |
For professional garment decoration, a heat press machine delivers consistent, repeatable results that a household iron can't match. For a one-off jacket project, your iron works perfectly well — you just need to compensate with longer pressing time and manual pressure.
Pro tip: Always use a thin cotton pressing cloth between your iron and the patch. Direct iron contact can scorch embroidered patches or melt synthetic materials in seconds.
Adhesive Options
Not all fabric adhesives are created equal. These are the products that actually hold up under washing and daily wear:
- Permanent fabric glue — Aleene's Fabric Fusion and similar products create a flexible, wash-resistant bond that moves with the fabric
- Heat-activated adhesive web — HeatnBond and Pellon 805 are thin fusible films that activate under iron heat, perfect for patches without backing
- Fusible webbing tape — narrow adhesive strips for edge bonding on irregular patch shapes
- Liquid stitch — a brush-on adhesive designed for fabric edges and patch perimeters
- Double-sided fabric tape — temporary hold only; good for positioning, not for washing
Surface Prep Essentials
Adhesion fails on dirty, damp, or softener-coated fabric. Every successful no-sew patch job starts with the same three prep steps:
- Wash and dry the garment without fabric softener — softener deposits a coating on fibers that blocks adhesive contact
- Iron the target area completely flat — any wrinkle prevents full surface contact between the patch and fabric
- Let the area cool to room temperature before applying pressure-sensitive or adhesive-backed patches
From Quick Projects to Professional-Grade Results
Starting Simple: Fabric Glue and Iron-On
If you've never attached patches before, fabric glue and iron-on methods are your natural starting points. Both require minimal tools, are widely available at craft stores, and deliver solid results across most fabric types. There's no learning curve that will slow you down on your first project.
Fabric glue is the most forgiving of the two. You apply it, press the patch in place, weight it overnight, and let it cure. Most brands are fully wash-resistant within 24–72 hours after application. Iron-on patches are even faster — the initial bond forms in under five minutes.

The trade-off is longevity on challenging surfaces. Fabric glue on heavy denim or canvas lasts years. On nylon or tight-weave polyester — fabrics with low porosity — the bond weakens faster. If your project involves synthetic fabric, reviewing how heat transfer paper compares to vinyl for synthetic surfaces gives useful context; the same adhesion principles that affect heat transfers affect patches.
Stepping It Up: Heat Press and Velcro
Once you're comfortable with the basics, two advanced options unlock professional-grade results: heat press bonding and hook-and-loop (Velcro) attachment.
A heat press applies calibrated heat and even downward pressure across the entire patch surface at once. The result is a uniform edge-to-edge bond with no lifting corners and no bubbles. If you're getting into heat press temperature and time settings, most iron-on patch adhesives bond cleanly at 300–320°F with 10–15 seconds of dwell time — though always check the patch manufacturer's spec first.
Velcro gives you the ability to remove and reattach patches at will. You bond the hook side to the garment and the loop side to the patch back, then snap them together. The trade-off is a slightly raised profile and visible Velcro edges when the patch is removed. For gear that stays on, it's not an issue.
Step-by-Step: Three Core Methods Explained
Iron-On Method
The iron-on method works for any patch with heat-activated adhesive backing. Follow these steps precisely — each one matters:
- Pre-heat your iron to the cotton/linen setting with steam completely off
- Place the garment on a hard, flat surface — an ironing board is fine, but a wooden table covered with a towel works equally well
- Position the patch adhesive-side down on the fabric in your desired location
- Cover with a thin cotton pressing cloth to protect the patch face
- Press firmly with the iron — no sliding or rocking — for 30–45 seconds
- Lift the iron, let everything cool for 60 seconds, then flip the garment and press again from the inside for another 30 seconds
- Allow to cool completely before handling or folding the garment
That second press from the inside of the garment is the step most tutorials skip entirely. It drives the adhesive deeper into the fabric fibers from below and dramatically increases long-term adhesion. It adds 90 seconds to the process and is absolutely worth it.
Warning: Steam causes iron-on adhesive to bubble and bond unevenly. Turn off steam mode completely before pressing any patch — even the "burst of steam" feature on your iron can ruin the bond.
Fabric Glue Method
Fabric glue is the right tool for patches without heat-activated backing — embroidered uniform patches, vintage patches, or custom-printed fabric patches all fall into this category. It's also the best choice for surfaces that can't handle iron heat.
- Apply a thin, even layer of permanent fabric glue to the entire back surface of the patch, covering edges fully
- Press the patch firmly onto the pre-ironed, clean garment surface
- Cover with a piece of wax paper and place a heavy book on top — a dictionary or textbook is ideal
- Leave completely undisturbed for at least 24 hours — 48 hours on thick or multi-layer fabrics
- Remove the wax paper and allow another full 24 hours before the first wash
The wax paper and weight step is non-negotiable. Without it, patch edges curl upward as the glue dries, creating weak points along the perimeter that fail in the wash every time. The weight keeps everything flat while the adhesive cross-links and cures.
Velcro Method
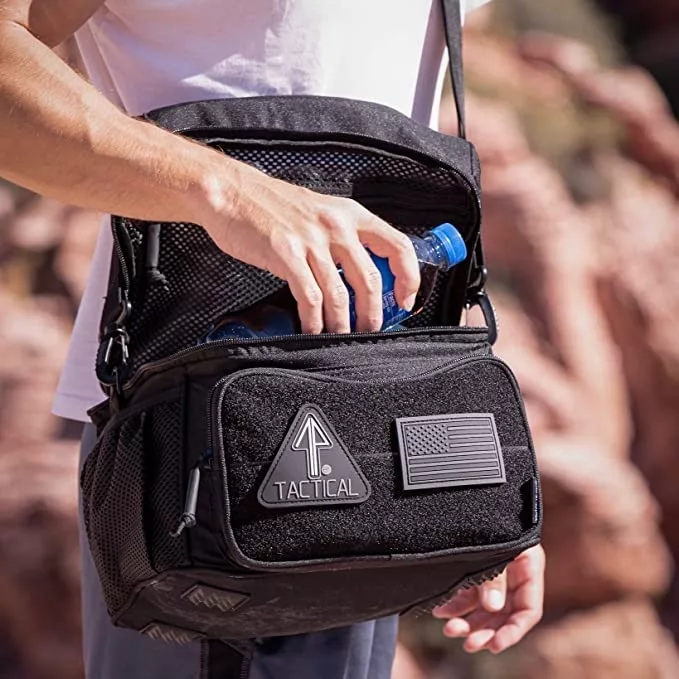
The Velcro method is ideal for patches you want to remove or swap regularly — think tactical gear, team jerseys, or seasonal jacket decorations. Most tactical patches already come with hook-side Velcro backing, which simplifies the setup considerably.
Here's how to attach patches without sewing using Velcro:
- Cut the hook side (rough) of the Velcro strip to match the exact footprint of the patch
- Bond the hook side to the garment surface using iron-on Velcro tape or permanent fabric glue
- Bond the loop side (soft) to the back of the patch using the same method
- Allow both bonds to cure fully — 24 hours minimum before attaching and testing the patch
- Press the patch to the garment surface — the hook-and-loop connection clicks into place
Self-adhesive peel-and-stick Velcro exists and looks convenient, but it doesn't survive washing on fabric. Always use iron-on or glue-bonded Velcro for any application where the garment will be laundered.
Real Surfaces, Real Results: Where No-Sew Patches Shine
Denim and Canvas
Denim and canvas are the ideal surfaces for attaching patches without sewing. Both are tightly woven, heat-stable, and have enough surface texture for adhesives to grip effectively. Iron-on patches on quality denim regularly survive 50+ wash cycles when applied with proper technique and heat. The dense weave gives the thermoplastic adhesive something solid to fuse into.
Canvas bags — tote bags, backpack front panels, messenger bags — perform equally well. The flat panel surface makes iron-on and glue methods easy to execute cleanly without dealing with curves or structural foam. If you've explored vinyl cutting for garment customization, you'll recognize the same fabric compatibility principles at work — natural fiber surfaces outperform synthetics for adhesive bonding across the board.
Backpacks and Tactical Gear
Backpacks, tactical vests, and MOLLE-system gear often include Velcro loop panels specifically engineered for patch attachment. On this type of gear, the Velcro method is standard — most tactical patches arrive pre-loaded with hook-side Velcro, so you only need to bond the loop side to the gear surface and you're done.
For bags without built-in Velcro panels, iron-on adhesive patches bond well to canvas and natural fiber bag exteriors. On tight-weave nylon — a common bag material — lightly roughing the surface with 220-grit sandpaper before applying adhesive significantly improves grip on an otherwise non-porous surface. It takes 30 seconds and makes a measurable difference.
Tip: On bag straps and pocket flaps that flex constantly, apply a thin bead of fabric glue around the patch perimeter edge after the iron-on bond cures. That dual-system approach handles flex stress far better than a single adhesive layer alone.
Hats and Accessories
Hats present the most challenging no-sew surface because of their curved structure and variable materials. Structured baseball caps with foam-backed panels can warp permanently under direct iron heat — fabric glue is always the safer choice here. Apply, press, weight the hat overnight on a rounded form to maintain the cap shape.
Beanies and unstructured soft hats accept iron-on patches on their flat panel sections if you insert a curved pressing form inside — a rounded jar, a coffee can, or a wooden knob works. This creates the stable flat surface your iron needs. Always test a small hidden area of the hat material first; some synthetic hat fabrics melt at iron temperatures before the adhesive even activates.
Pro Tips for a Clean, Professional-Looking Finish
Placement and Alignment
Placement errors are permanent with iron-on and glue methods. Take the time to get it right before you commit heat or adhesive to fabric.
- Use masking tape to temporarily position the patch and step back to evaluate from multiple angles and distances
- For center-chest placement, fold the garment in half vertically to find the true center, then measure equal distances left and right from the fold
- On sleeves, align the patch with the fabric grain line — patches placed at even a slight angle to the weave appear visibly crooked, even when your ruler said otherwise
- Photograph your positioning under good lighting before pressing — the camera catches misalignment that your eye misses when you're standing directly over the work
- For matching patches on both sleeves, measure from the shoulder seam to the top edge of each patch and confirm both measurements are identical
The photography step sounds like overthinking, but every experienced decorator uses it. A $0 iPhone photo saves a $60 jacket.
Finishing for Durability
Even a correctly applied iron-on patch benefits from a durability-enhancing finish step once the initial bond cures:
- Apply clear fabric sealant (like Fray Check or Dritz No-Fray) around the entire perimeter edge of the patch — this seals the adhesive edge against moisture infiltration during washing
- For patches in high-friction zones — outer sleeves, bag straps, trouser knees — add a stitch at each corner only. Four corner stitches take two minutes and extend patch life by years without requiring any real sewing skill
- Wash the garment inside-out on cold, gentle cycle for the first three washes to allow the bond to fully stabilize before exposure to normal agitation
Fixing the Most Common Patch Problems
Patch Won't Bond
When a patch refuses to stick, the cause is almost always one of four things:
- Fabric softener residue — softener and dryer sheet coatings block adhesion at the fiber level. Wash the garment twice with plain detergent and hot water before trying again.
- Insufficient heat or pressure — older irons run significantly cooler than their dial indicates. If your iron's cotton setting isn't delivering consistent adhesion, press longer or use an iron thermometer to verify actual temperature.
- Paper backing still on the patch — patches labeled "iron-on" sometimes have a thin release paper protecting the adhesive side. Look for a slightly shiny or waxy layer on the patch back and peel it before pressing.
- Incompatible fabric — waterproof coatings, tight synthetics, and stretch fabrics don't bond well with standard adhesives. Switch to Velcro or use a specialized stretch-fabric adhesive.
Edges Lifting After Washing
Edge lifting after one or two washes is the most common patch failure mode. Address it immediately before the lifted section catches on clothing and peels the patch further:
- Lift the loose edge slightly and apply a small drop of Liquid Stitch or fabric glue underneath, working it as far under the edge as you can
- Press firmly with a finger and hold for 60 seconds
- Cover with wax paper and weight it for 2–4 hours
- Once cured, apply clear fray sealant along the entire perimeter edge to prevent future moisture infiltration
If edges are lifting on multiple sides simultaneously, the original adhesion failed surface-wide. Remove the patch completely, clean the fabric surface thoroughly, identify the root cause (usually softener residue or a synthetic fabric), and re-apply using the appropriate method.
Making Your No-Sew Patches Last for the Long Haul
Care Instructions That Protect the Bond
How you wash and dry patched garments is the single biggest factor determining how long no-sew bonds survive. Follow these care rules consistently:
- Always wash cold — hot water weakens thermoplastic adhesives incrementally with every cycle
- Use a gentle or delicate cycle — reduced mechanical agitation means less stress on patch edges
- Turn garments inside-out — this shields the patch face from direct water pressure and reduces surface abrasion against other garments
- Air dry when possible — dryer heat at high or medium settings softens iron-on adhesive bonds over dozens of cycles, gradually reducing edge adhesion
- Never dry clean patched garments — solvent chemicals dissolve most fabric adhesives completely
- Skip fabric softener in every wash cycle — the coating accumulates on fibers around the patch edges and weakens adhesion from the outside in
Combining Methods for Maximum Hold
The most durable no-sew patch application combines two methods: iron-on adhesive across the full patch body, plus edge sealing with fabric glue. This hybrid approach targets the two distinct failure modes separately. The iron-on handles core adhesion across the full surface area; the fabric glue bead along the edges handles the flex stress and moisture infiltration that cause peeling.
For patches on high-use items — gym bags, work vests, kids' backpacks, tactical gear — add four corner stitches as a third layer after both adhesives cure. You're technically using a needle, but four small anchor stitches in the corners of the patch take two minutes and extend total patch life dramatically. This layered adhesion strategy is the same logic that professional garment decorators apply when reliability is non-negotiable. If you're ever scaling up to volume garment decoration, understanding how heat press compares to screen printing for different decoration types will help you build the right workflow around it.
Frequently Asked Questions
Can you permanently attach patches without sewing?
Yes. Iron-on adhesive patches create a permanent bond on natural fibers like cotton, denim, and canvas. When applied correctly with adequate heat and pressure, the thermoplastic adhesive fuses with the fabric fibers and can survive 50 or more wash cycles. Permanent fabric glue also creates a wash-resistant bond that becomes permanent once fully cured over 24–48 hours.
What is the strongest no-sew method for attaching patches?
For permanent attachment, a heat press with iron-on adhesive delivers the strongest bond because it applies even heat and calibrated pressure simultaneously across the entire patch surface. For removable patches, heavy-duty iron-on Velcro bonded with fabric glue on both the garment and patch provides the strongest swappable hold without permanent commitment.
Does fabric glue work on all fabric types?
Fabric glue performs best on natural and semi-natural fibers — cotton, denim, canvas, linen, and wool blends. On low-porosity synthetics like nylon, polyester, or waterproof-coated fabrics, the bond is weaker because adhesive can't penetrate the fiber structure. For those surfaces, iron-on Velcro with edge glue performs more reliably than fabric glue alone.
How long does iron-on patch adhesive take to fully cure?
The initial tack bond forms within minutes of pressing, but full cure strength develops over 24–48 hours as the thermoplastic adhesive fully cross-links with the fabric fibers. Washing the garment before 24 hours have passed can weaken the bond significantly. Wait the full period before laundering, especially on thicker or multi-layer fabrics.
Can you remove an iron-on patch after it's been applied?
Yes, with careful reheating. Press the iron over the patch for 15–20 seconds to soften the adhesive, then slowly peel from one corner while the adhesive is still warm. Most patches release cleanly. Any adhesive residue left on the garment can be removed with a cotton ball dampened with rubbing alcohol once the fabric cools completely.
Do iron-on patches work on stretch fabrics like jersey or spandex?
Standard iron-on patches don't perform reliably on high-stretch fabrics because the rigid adhesive cracks under repeated flexing. For stretch materials, use a specialized stretch-fabric adhesive or mount the patch with a small Velcro button that flexes with the fabric. A zigzag stitch is also an option if stitching is acceptable — it moves with the stretch instead of fighting it.
Can you attach patches to leather or faux leather without sewing?
Yes, but not with standard fabric glue. Use leather-specific contact cement or a flexible epoxy adhesive instead. Apply adhesive to both surfaces, allow it to tack up for two to three minutes, then press together firmly and clamp or weight for several hours. Avoid iron-on methods on leather entirely — the heat damages the surface finish and can cause bubbling or permanent discoloration.
Key Takeaways
- You can reliably attach patches without sewing using three proven methods — iron-on adhesive, fabric glue, and Velcro — each suited to different fabrics, patch types, and permanence requirements.
- Surface preparation is the most critical factor in adhesion success: always wash without softener, iron the area flat, and let the fabric cool before applying any patch.
- For the most durable bond, combine iron-on adhesive across the patch body with a fabric glue bead along the edges, especially on high-use items like bags, vests, and outerwear.
- Wash patched garments cold, inside-out, on a gentle cycle and air dry to protect no-sew adhesive bonds through long-term use.
 |  |  |  |
About Marcus Bell
Marcus Bell spent six years as a production manager at a small-batch screen printing shop in Austin, Texas, overseeing everything from film output and emulsion coating to press registration, squeegee selection, and garment finishing. He expanded into vinyl cutting and Cricut projects when the shop added a custom apparel decoration line, giving him direct experience with heat transfer vinyl application, weeding techniques, and the real-world differences between Cricut, Silhouette, and Brother cutting machines. At PrintablePress, he covers screen printing, vinyl cutting and Cricut projects, and T-shirt printing and decoration techniques.


Get some FREE Gifts. Or latest free printing books here.
Disable Ad block to reveal all the secret. Once done, hit a button below
| | | |