Types of Fabric Painting
by Marcus Bell · April 04, 2022
I still remember the afternoon I ruined a perfectly good white cotton tee with cheap craft-store paint — it cracked after one wash and peeled off in sad little flakes. That one failure pushed me to actually research what I was doing. Knowing the different types of fabric painting is the foundation for getting results that hold up over time. Whether you're personalizing a shirt, decorating canvas bags, or working on a home décor project, your method determines your outcome. Explore our t-shirt printing hub for the full picture on custom apparel techniques.

Fabric painting covers a surprisingly wide range of techniques — from freehand brushwork to stenciling, tie-dye, screen printing, and specialty finishes like puff or metallic effects. Each approach has its own materials, prep requirements, and ideal use cases. Jumping in without knowing which method suits your fabric and design leads to wasted time and materials.
This guide walks you through every major fabric painting technique, tells you when to use each one, and gives you actionable steps to get professional-looking results. If you're ready to take tie-dye seriously, check out our guide on professional tie-dye techniques for shirts for a deep dive into that specific method.
Contents
- When to Choose Fabric Painting — and When to Skip It
- The Main Types of Fabric Painting Explained
- How Fabric Painting Fits Into Your Long-Term Craft Strategy
- Tips That Actually Make a Difference
- Best Practices for Clean, Long-Lasting Results
- Getting Started: A Step-by-Step Walkthrough
- Common Mistakes That Ruin Fabric Painting Projects
- Frequently Asked Questions
- Final Thoughts
When to Choose Fabric Painting — and When to Skip It
Not every project calls for fabric painting. Knowing when it's the best tool — and when it's not — saves you from frustration and wasted supplies.
When Fabric Painting Is the Right Call
Fabric painting works best when:
- You're creating one-of-a-kind pieces where uniqueness matters more than consistency
- You're working on natural fibers like cotton, linen, or canvas that absorb paint well
- You want a handmade, artistic look that machine printing can't replicate
- Your design involves large areas of color, abstract shapes, or freehand elements
- You're working on home décor items — cushions, curtains, tote bags — rather than wearable apparel that sees heavy washing
- You're on a limited budget and want maximum creative freedom with basic tools
It's especially well-suited for educational settings, kids' craft projects, and custom gifts where the handmade quality is part of the appeal.
When You Should Consider Another Method
Fabric painting has real limitations. Skip it when:
- You need 100 identical prints — screen printing or heat transfer handles that far better
- You're working on stretchy synthetic fabrics like polyester — most fabric paints don't adhere well and crack under repeated stretching
- Your design has very fine detail, like small text or complex photo-realistic gradients
- You need the garment to be production-ready quickly — fabric paint requires extended drying and curing time
- Your client or customer expects a commercial-grade, perfectly consistent finish
For designs with photo-realistic detail on polyester, sublimation printing is a much smarter choice. For sharp, repeatable designs on cotton, look into screen printing or heat transfer before committing to paint.
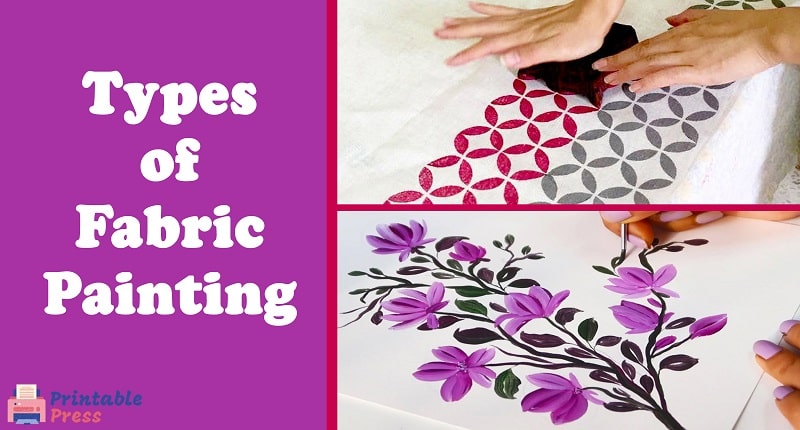
The Main Types of Fabric Painting Explained
There are more ways to paint fabric than most people realize. Here's a clear breakdown of every major approach, what makes each one unique, and where each one shines.
Acrylic Fabric Paint
Acrylic fabric paint is the most common starting point for beginners. It's water-based, widely available, and comes in hundreds of colors. Unlike regular craft acrylics, fabric-specific versions contain flexible polymers that bond with textile fibers instead of sitting on top and cracking.
- Best for: cotton, canvas, denim, felt
- Application: brush, sponge, stencil, stamp
- Durability: high when heat-set properly
- Wash resistance: excellent after curing
Key techniques using acrylic fabric paint include:
- Freehand painting — direct brushwork for illustrative and artistic designs
- Stenciling — tape or adhesive stencils for clean, repeatable patterns
- Block printing — carved foam or rubber blocks dipped in paint for stamped repeating motifs
- Sponge dabbing — soft-edged gradients and organic texture effects
Fabric Dye vs. Fabric Paint
People often confuse fabric dye with fabric paint — they're very different things. Fabric dye (such as fiber reactive dye, RIT, or procion dye) chemically bonds with the fiber itself, permanently changing its color without adding a surface layer. Fabric paint coats the surface of the fibers rather than bonding inside them.
What this means for you:
- Dye produces a softer hand feel — the fabric doesn't feel any different after dyeing
- Paint can add stiffness, especially when applied thickly or in multiple layers
- Dye works only on natural fibers: cotton, wool, silk, linen
- Paint works on a broader range of fabrics, including some synthetics
- Dye is harder to control for detailed designs; paint is easier to use with brushes and stencils
According to Wikipedia's overview of textile printing, the history of applying color and pattern to fabric dates back thousands of years — and the core tension between surface coating and fiber-bonding methods has always existed in the craft.
Specialty Paints
Beyond basic acrylics, a whole category of specialty fabric paints opens up creative possibilities:
- Puff paint (dimensional paint) — raises up from the surface when heat-activated, creating a 3D textured effect; popular for outlines, lettering, and raised logos
- Metallic and glitter paints — add shimmer and shine; ideal for dance costumes, holiday items, and statement pieces
- Glow-in-the-dark paint — absorbs light and re-emits it in the dark; great for novelty items and kids' clothing
- Fabric spray paint — delivered in an aerosol for soft, even coverage and smooth gradient effects without visible brushstrokes
- Screen printing ink — technically a paint-based system designed for use with a mesh screen; excellent for sharp, high-volume, repeatable designs
Comparing Methods at a Glance
Use this table to quickly match your project requirements to the right method:
| Method | Best Fabric | Durability | Difficulty | Startup Cost | Best For |
|---|---|---|---|---|---|
| Acrylic fabric paint | Cotton, canvas, denim | High (heat-set) | Beginner | Low | Freehand, stenciling, stamping |
| Fiber reactive dye | Natural fibers only | Very high | Intermediate | Low–Medium | Tie-dye, solid color, immersion |
| Puff / dimensional paint | Cotton, canvas | Medium | Beginner | Low | 3D outlines, raised lettering |
| Fabric spray paint | Most fabrics | Medium | Beginner | Low | Large areas, soft gradients |
| Screen printing ink | Cotton, poly blends | Very high | Advanced | Medium–High | Bulk, repeatable sharp designs |
| Metallic / glitter paint | Most fabrics | Medium | Beginner | Low | Decorative accents, novelty items |
How Fabric Painting Fits Into Your Long-Term Craft Strategy
Fabric painting starts as a hobby for most people. But if you want to sell your work or build a craft-based income, you need to think strategically about which methods scale and which don't.
Scaling From Hobby to Small Business
Not every type of fabric painting scales the same way:
- Freehand painting and tie-dye scale poorly — each piece takes significant time and varies from the last, making pricing and volume difficult
- Stenciling scales reasonably well — once you have a stencil, you can replicate a design across multiple pieces efficiently
- Block printing is a solid middle ground — it has a handmade feel with some repeatability built in
- Screen printing scales best of all — once a screen is made, you can print dozens of identical pieces in a short session
If you're designing apparel to sell, take the time to read through our guide on tips for designing a great t-shirt — the design choices you make upfront directly determine how well any painting or printing method will execute your vision.
Building a Repeatable System
Whether you're selling or just making gifts regularly, consistency matters. Build a system around your chosen method:
- Keep a dedicated workspace with all supplies organized and within reach
- Write down your process — paint brands, dilution ratios, drying times, heat settings
- Test on scrap fabric before every new project or whenever you switch to a new paint batch
- Photograph results and track what works and what doesn't across different fabrics
- Batch similar tasks — cut all stencils at once, prep all fabric in one session, paint in a single dedicated block of time
This approach eliminates hours of troubleshooting over time. Small investments in process consistency pay off quickly when you're working across multiple pieces.
Tips That Actually Make a Difference
Prep Tips
Most failures in fabric painting happen before you ever pick up a brush. Prep is everything.
- Pre-wash your fabric — always wash and dry new fabric without fabric softener before painting. Softener leaves a coating that blocks paint adhesion.
- Iron the fabric completely flat — wrinkles create uneven surfaces that ruin stencil edges and brushwork
- Insert a piece of cardboard or foam board inside garments to prevent bleed-through to the back layer
- Tape all stencil edges down firmly to prevent paint from bleeding underneath the design
- Mix your paint thoroughly before applying — pigment settles at the bottom of the bottle over time
- If you're diluting paint for a watercolor-style effect, add textile medium (not plain water) to maintain paint flexibility and adhesion
Application Tips
- Apply paint in thin, even layers rather than one thick coat — multiple thin layers give better coverage and far less cracking
- Use a stiff stencil brush with a stippling motion (straight up and down tapping, not sweeping) to prevent paint from seeping under stencil edges
- Let each layer dry fully before adding the next — rushing this is the most common cause of muddy colors and blurred designs
- For spray paint, keep the can 8–12 inches from the fabric and use short overlapping passes to avoid drips
- If you make a mistake while paint is still wet, blot it up immediately with a damp cloth — never rub, which spreads the paint further
- Use painter's tape to mask off areas you don't want painted when you need clean, hard straight lines
Best Practices for Clean, Long-Lasting Results
Heat Setting and Curing
Heat setting is non-negotiable if you want your fabric painting to survive the wash. Follow these steps every single time:
- Wait at least 24 hours after painting before heat setting — the paint must be completely dry all the way through, not just surface-dry
- Use a dry iron (no steam) set to the temperature appropriate for your specific fabric type
- Place a pressing cloth or parchment paper between the iron and the painted surface to protect both
- Press firmly for 3–5 minutes per section — keep the iron moving in slow, steady strokes
- Alternatively, use a heat gun for 30–60 seconds per area — keep it moving constantly to avoid scorching
- Some paint brands cure in a clothes dryer — always check the manufacturer's instructions for your specific product
Washing and Care
- Wait 72 hours after heat setting before the first wash — this allows the paint to fully cure and bond with the fibers
- Wash painted items inside out in cold water on a gentle cycle
- Avoid bleach and harsh detergents — they break down paint polymers over repeated washes
- Air dry when possible; if using a dryer, stick to a low heat setting
- Do not dry clean painted fabrics unless the paint manufacturer specifically permits it
- Touch up small chips or cracks with a thin layer of matching paint, then re-heat-set the repaired area
Getting Started: A Step-by-Step Walkthrough
Ready to actually start painting? This walkthrough covers a standard stenciled design on a cotton t-shirt using acrylic fabric paint — one of the most beginner-friendly combinations available and a great foundation for exploring other types of fabric painting later.
What You'll Need
- Pre-washed 100% cotton t-shirt
- Acrylic fabric paint in your chosen colors
- Stencil (store-bought or cut from cardstock or acetate film)
- Stencil brush or dense foam sponge
- Cardboard or foam board to insert inside the shirt
- Painter's tape
- Pressing cloth or parchment paper
- Dry iron or heat gun
- Palette or flat plate for paint
- Paper towels for dabbing off excess paint
The Process
- Prep your shirt — wash, dry, and iron it flat. Insert cardboard inside to create a firm, stable surface.
- Position your stencil — center it on the shirt where you want the design. Tape all edges down firmly.
- Load your brush — dip the stencil brush lightly into paint, then dab off the excess on a paper towel until the brush is almost dry.
- Apply paint with a stippling motion — press the brush straight down in short, repeated taps. Never sweep across — that pushes paint under the stencil edges and blurs the design.
- Build up color in thin layers — let each layer dry for 10–15 minutes before adding the next. Two to three thin layers produce richer, more even color than one thick coat.
- Carefully remove the stencil — peel it away slowly while the final layer is still slightly tacky. Pulling while slightly wet often gives cleaner edges than waiting until the paint is fully dry.
- Let the design dry completely — leave it flat for at least 24 hours before touching it.
- Heat set — use a dry iron with a pressing cloth, applying firm, even pressure for 3–5 minutes per section.
- Wait 72 hours before putting the shirt through its first wash.
Common Mistakes That Ruin Fabric Painting Projects
Mistakes Before You Paint
- Skipping the pre-wash — new fabric has sizing (a starch-like factory finish) that actively blocks paint adhesion. This one step prevents the majority of peeling problems.
- Using regular craft acrylic paint instead of fabric-specific paint — craft acrylics dry rigid and crack on flexible fabric after washing
- Painting on a soft, unstable, or wrinkled surface — your fabric needs to be taut and flat for accurate results
- Not testing on scrap fabric first — especially important with new paint brands, new colors, or unfamiliar fabric blends
- Choosing the wrong paint type for the fabric — metallic and glitter paints don't adhere reliably to stretchy knit fabrics
Mistakes During and After
- Applying paint too thickly in a single coat — this causes cracking, uneven drying, and poor adhesion at the edges
- Moving the stencil before the paint has set — even the smallest shift smears the design irreversibly
- Skipping heat setting entirely — no heat set means no durability. This is the single most common reason painted fabric fades and peels after the first wash.
- Washing the item within 72 hours of heat setting — the paint needs that time to fully cure
- Using hot water or high dryer heat on freshly painted fabric — high heat degrades paint polymers before they've fully bonded with the fibers
- Storing wet or damp painted items folded — the paint transfers directly onto adjacent fabric layers
Frequently Asked Questions
What is the best type of fabric paint for beginners?
Acrylic fabric paint is the best starting point for most beginners. It's widely available, affordable, and easy to work with using basic brushes or sponges. Brands like Tulip, Jacquard Textile Color, and DecoArt SoSoft are reliable choices that bond well with cotton and canvas when heat-set correctly after drying.
Can you use regular acrylic paint on fabric?
You can, but it's not recommended for anything you plan to wash regularly. Regular craft acrylic paint dries rigid and cracks on flexible fabric. If you only have regular acrylics on hand, mix in a textile medium to add flexibility and improve adhesion — but for the best results, use fabric-specific paint from the start and avoid the workaround altogether.
How do you make fabric paint permanent?
Heat setting is what makes fabric paint permanent. After your paint has dried completely for at least 24 hours, press it with a dry iron through a pressing cloth for 3–5 minutes per section. This process bonds the paint polymers with the fabric fibers and dramatically improves wash resistance. Skip heat setting and even the best fabric paint will fade and peel within a few washes.
What fabric is best for fabric painting?
100% cotton is the best fabric for most types of fabric painting. It absorbs paint evenly, tolerates heat setting well, and produces vibrant, consistent color. Canvas and linen are also excellent choices. Avoid slick synthetics like nylon or performance polyester — most fabric paints don't adhere to them reliably, and the high heat required for curing can damage or warp those fabrics.
Final Thoughts
You now have a clear map of the different types of fabric painting — from acrylic paints and fiber reactive dyes to specialty effects like puff, metallic, and spray finishes. Pick the method that matches your fabric type, your design complexity, and your production goals, then follow the prep and heat-setting steps without cutting corners. Your designs deserve to last more than one wash cycle. Head over to our guide on silk screen printing if you're ready to take your work to the next level with a method built for volume, precision, and professional results.
 |  |  |  |
About Marcus Bell
Marcus Bell spent six years as a production manager at a small-batch screen printing shop in Austin, Texas, overseeing everything from film output and emulsion coating to press registration, squeegee selection, and garment finishing. He expanded into vinyl cutting and Cricut projects when the shop added a custom apparel decoration line, giving him direct experience with heat transfer vinyl application, weeding techniques, and the real-world differences between Cricut, Silhouette, and Brother cutting machines. At PrintablePress, he covers screen printing, vinyl cutting and Cricut projects, and T-shirt printing and decoration techniques.


Get some FREE Gifts. Or latest free printing books here.
Disable Ad block to reveal all the secret. Once done, hit a button below
| | | |