How to Print on Transfer Paper for a T-Shirt
by Anthony Clark · April 02, 2022
Picture this: you spend an afternoon cutting stencils by hand for a custom gift shirt, only to end up with crooked edges and ink-stained fingers. There is a much easier way. Learning how to print on transfer paper for a t-shirt gives you crisp, professional designs in under 30 minutes, using the printer you already own. For a broader look at heat-based fabric methods, visit our heat press resource hub.
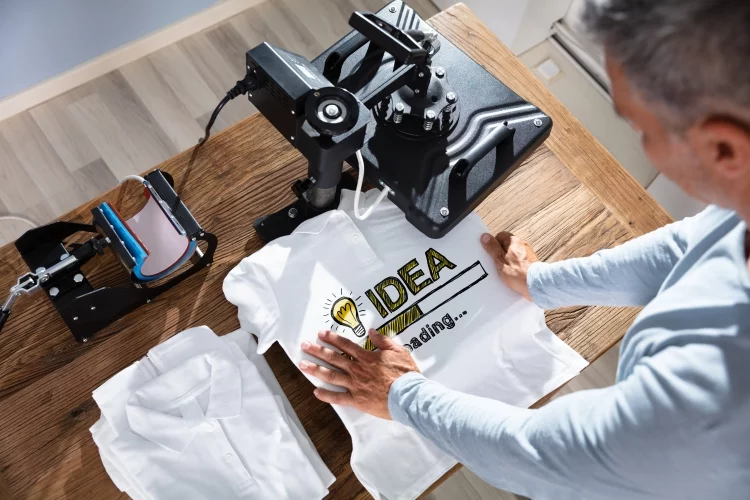
Transfer paper is a coated sheet that carries your printed design onto fabric using heat. You print the image with your inkjet or laser printer, place the sheet face-down on a shirt, and press with heat. The ink bonds to the fabric fibers, the backing peels away, and you are left with a clean, durable graphic.
The process is popular with home crafters, small businesses, and school groups because startup costs are low and the results look sharp. Before you begin, it helps to know that paper type, printer choice, and fabric color all affect your final result. Get those three things right and your design survives dozens of washes.
Contents
- What You Need to Print on Transfer Paper for a T-Shirt
- Light vs. Dark Transfer Paper: A Quick Comparison
- How to Print on Transfer Paper for a T-Shirt Step by Step
- Real Results: What to Expect from Transfer Paper Printing
- Creative Uses for T-Shirt Transfer Paper
- How to Care for Your Transfer-Printed T-Shirt
- Frequently Asked Questions
- Next Steps
What You Need to Print on Transfer Paper for a T-Shirt
Getting set up does not require a studio full of gear. A few core items cover the vast majority of projects.
Inkjet vs. Laser: Which Printer Works Best?
Your printer type determines which transfer paper you buy. They are not interchangeable.
- Inkjet printers — The most common choice for home use. Use inkjet-specific transfer paper. Produces vibrant, full-color results. Works with virtually every consumer model from Epson, Canon, and HP.
- Laser printers — Use toner-based transfer paper. Colors can appear slightly less saturated but the bond is often more durable. Excellent for bold text and graphics.
Not sure which type you own? Check the side of the printer or the original box. Inkjet printers use liquid ink cartridges; laser printers use powdered toner. If your printer takes cartridges you squeeze or shake, it is inkjet.
For detailed guidance on printing on specialty media and how your printer handles non-standard paper, our article on how to print on heat transfer paper walks through settings and common mistakes by printer brand.
Other Supplies You Will Need
- Transfer paper matched to your printer type (light or dark — covered in the next section)
- A 100% cotton or cotton-blend t-shirt — pure cotton gives the best adhesion
- A household iron set to the highest heat with steam turned off, or a heat press
- A hard, flat pressing surface — a wooden board works better than a padded ironing board because it does not absorb pressure
- Scissors or a craft knife for trimming close to design edges
- Parchment paper or a Teflon sheet to protect the design during pressing
Light vs. Dark Transfer Paper: A Quick Comparison
Choosing the wrong paper type is the single most common beginner mistake. Your shirt color decides everything here.
| Feature | Light Transfer Paper | Dark Transfer Paper |
|---|---|---|
| Best shirt color | White or very light fabrics | Dark or colored fabrics |
| Background | Transparent — shirt color shows through white areas | Opaque white base — blocks shirt color entirely |
| Mirror printing required | Yes — flip image before printing | No — print design as-is |
| Feel on fabric | Thin, minimal texture | Slightly thicker, slight plastic texture |
| Color vibrancy | Excellent on white shirts | Good; depends on design contrast |
| Price | Slightly cheaper | Slightly more expensive |
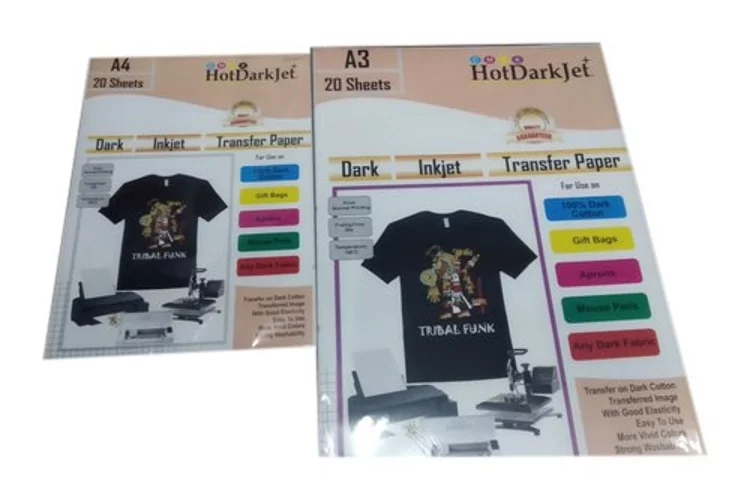
Light paper is transparent — any white in your design shows the shirt color beneath it. Dark paper has a white coating that blocks the shirt color entirely, which is why it works on black or navy fabric.
The rule is simple: white or very pale shirt — use light paper. Any other color — use dark paper. When you are unsure, go dark. You cannot add color back to a faded print, but you can always trim away extra backing.
How to Print on Transfer Paper for a T-Shirt Step by Step
Follow these stages in order. Rushing or skipping any step is why most transfers crack, peel, or look uneven after washing.
Preparing Your Design
- Use a high-resolution file — at least 300 DPI (dots per inch). A blurry screen image printed at low resolution will look pixelated on fabric. PNG files with transparent backgrounds transfer most cleanly.
- Mirror the image if you are using light transfer paper. In your print dialog, select "flip horizontal" or "mirror image." Skip this step entirely for dark paper.
- Set print quality to "Best" or "Photo." Draft or standard modes leave visible dot patterns in your design.
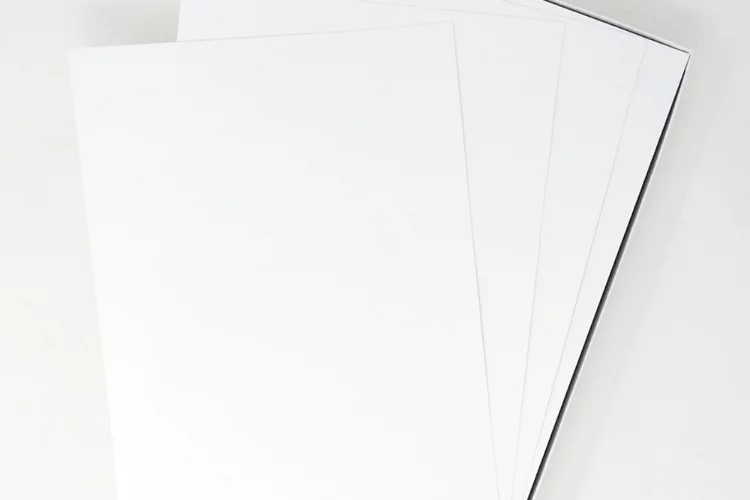
- Load the transfer sheet coated-side down into the printer tray. The coated (print) side has a slight sheen — hold the sheet at an angle to see the difference.
- Print a test copy on regular paper first. Confirm the size and position before using a transfer sheet.
Pressing and Transferring
- Pre-press the shirt with a dry iron for 10–15 seconds. This removes moisture and wrinkles that cause uneven bonding.
- Trim the transfer paper close to your design edges. A tight trim minimizes the visible border (called "carrier film") on the finished shirt.
- Place the design face-down on the shirt in the exact position you want.
- Press with firm, even pressure. For a household iron: maximum heat, no steam, 30–45 seconds per section. For a heat press: follow manufacturer temperature and time settings for your paper brand.
- Let the transfer cool fully before peeling. This is the step most people rush. Peeling warm tears the design.
- Peel the backing slowly at a low angle. If it resists, press for another 10 seconds and try again.
Pro tip: A heat press gives far more consistent pressure and temperature than a household iron — if you plan to make more than a handful of shirts, it pays for itself quickly in better results and fewer wasted transfers.
Real Results: What to Expect from Transfer Paper Printing
Transfer paper produces different outcomes depending on your tools and fabric. Here is an honest breakdown of what you actually get.
Home Iron vs. Heat Press
- Home iron: Works well for personal projects and one-off gifts. Edges may occasionally lift after repeated washing if pressure was uneven during application. You can reinforce a loose edge by pressing again with parchment paper over the design.
- Heat press: Produces commercial-grade results. Consistent pressure and precise temperature settings reduce peeling dramatically. If you are making shirts for events or to sell, this is the standard tool used by print shops.
Results by Fabric Type
- 100% cotton — Best results. The ink bonds tightly and the transfer feels natural against skin after washing.
- 50/50 cotton-polyester blend — Good results with a slightly stiffer feel on the transfer area.
- 100% polyester — Transfer paper does not bond reliably to synthetic fibers. Sublimation printing is a better fit for polyester garments.
According to Wikipedia's article on iron-on transfers, the technique has been in commercial use since the mid-20th century — which means it is well-tested and reliable when the right materials are matched together.
Creative Uses for T-Shirt Transfer Paper
Once you have the basic process down, you will find yourself reaching for transfer paper for a wide range of projects.
- Custom gift shirts — birthdays, bachelorette parties, family reunions
- Team uniforms — sports leagues, school clubs, company events
- Small-batch merchandise — print samples or limited runs without minimum order requirements
- Kids' art on wearables — scan a drawing and transfer it directly onto a shirt or tote bag
- Last-minute event shirts — faster turnaround than screen printing for small quantities
Beyond T-Shirts
Transfer paper works on any natural-fiber fabric, not only shirts. You can apply the same technique to:
- Canvas tote bags and pouches
- Pillowcases and fabric panels
- Aprons and tea towels
- Denim jackets (increase pressing time slightly for thicker fabric)
If you want to skip paper entirely and explore direct-to-garment or screen-based methods, our guide on printing on t-shirts without a transfer sheet covers those alternatives in detail.
How to Care for Your Transfer-Printed T-Shirt
A properly applied transfer lasts for years — but only with the right washing habits. Most failed transfers fail because of poor aftercare, not poor application.
Washing Instructions
- Turn the shirt inside out before every wash. This protects the transfer surface from friction and direct agitation in the drum.
- Wash in cold water on a gentle cycle. Hot water softens the adhesive layer and causes premature peeling.
- Avoid bleach and fabric softener — both degrade the transfer coating over repeated cycles.
- Air dry when possible. If you use a dryer, choose the lowest heat setting.
Ironing and Storage
- Never iron directly on the printed side. Flip the shirt inside out first, or place a cloth over the design before pressing.
- Store shirts folded flat. Stacking heavy items on top of transfer-printed shirts over long periods can cause the print surface to stick to the fabric beneath it.
For ironing technique and fabric heat settings that apply directly to this process, our guide on how to iron a shirt covers the temperature and pressure fundamentals worth knowing.
Frequently Asked Questions
Do I need to mirror my design before printing?
Only if you are using light transfer paper. Light paper requires you to flip the image horizontally before printing so the design reads correctly once it is pressed onto the shirt. Dark transfer paper does not require mirroring — you print the design exactly as it appears on screen.
Can I use any inkjet printer for transfer paper?
Yes. Any standard inkjet printer works with inkjet transfer paper, including budget models. The key is setting your print quality to the highest available option. Avoid using inkjet transfer paper in a laser printer — the toner heat process is different and will damage both the paper and the machine.
How long does a transfer last before it starts peeling?
A correctly applied transfer on 100% cotton, washed cold and air-dried, lasts 50 or more washes without significant fading or peeling. The most common cause of early failure is washing in hot water or ironing directly on the printed surface.
What temperature should I set my iron for transfer paper?
Set your iron to the highest heat setting with the steam function completely off. Most transfer paper brands require 375–400°F (190–205°C) for a full bond. Check the specific instructions on your paper packaging because temperatures vary slightly by brand.
Why does my transfer paper have a visible border around the design?
This is the carrier film — the clear coating surrounding your printed design. Trimming close to the design edges before pressing reduces the visible border significantly. On light paper, the film is nearly invisible on white shirts. On dark shirts with dark paper, a tight trim is especially important for a clean finish.
Next Steps
- Identify your printer type (inkjet or laser) and buy the matching transfer paper — light for white shirts, dark for everything else.
- Create or download a high-resolution PNG design (300 DPI minimum) and run a test print on regular paper before using your transfer sheet.
- Practice the press-and-peel process on an old shirt first so you know the right heat level and timing before working on a shirt that matters.
- After your first successful transfer, wash the shirt inside out in cold water and check the result — this confirms your settings are dialed in before you print a larger batch.
- Explore our heat press guide if you plan to scale up — consistent temperature and pressure make a measurable difference in durability and finish quality.
 |  |  |  |

About Anthony Clark
Anthony Clark spent nine years running a custom printing studio in Phoenix, Arizona, producing sublimation-printed drinkware, heat-pressed apparel, and branded merchandise for sports leagues, small businesses, and online retailers. That hands-on production background means he has calibrated hundreds of heat press cycles, sourced sublimation blanks from over a dozen suppliers, and troubleshot every coating and color-shift problem that shows up when dye meets polyester. He left the shop floor in 2019 to write full-time about the techniques and equipment he used daily. At PrintablePress, he covers sublimation printing and heat press methods.


Get some FREE Gifts. Or latest free printing books here.
Disable Ad block to reveal all the secret. Once done, hit a button below
| | | |