How To Clean Cricut Mat
by Karen Jones · March 30, 2022
Most crafters toss their Cricut mat after just 5 to 10 uses — but knowing how to clean Cricut mat correctly can extend that same mat to 40 or more uses before it genuinely needs replacing. That's real money saved, and it only takes a few minutes of your time. A dirty mat doesn't just lose stickiness. It causes shifted cuts, torn paper, and projects that fall apart mid-run. Before you add a replacement to your cart, try cleaning it first. You'll be surprised what comes back to life. For a broader look at how the cutting process actually works, check out How Does Vinyl Cutting Work — understanding how your blade interacts with the mat surface makes every maintenance decision clearer.

Your Cricut mat grips material through a pressure-sensitive adhesive — a type of glue that sticks when you press material onto it and releases when you peel. Over time, dust, lint, and tiny paper fibers coat that adhesive layer and block it from doing its job. Cleaning your mat means removing that interference layer, not restoring the adhesive itself. That's a critical distinction, and it completely changes how you should approach the process.
Taking care of your cutting equipment pays off across every project you run. The same logic behind consistent printer maintenance applies here. If you've read through our guide on How to Clean a Heat Press, you already know the pattern: light, regular care beats emergency overhauls every single time. Let's get into exactly what that looks like for your Cricut mat.
Contents
What You've Heard About Cleaning Cricut Mats — And Why It's Wrong
Crafting communities are full of well-meaning advice. Some of it works. Some of it silently destroys your mat while you think you're helping it. Before you reach for any product or tool, it's worth clearing up the two myths that cause crafters the most grief — because acting on either one costs you a perfectly usable mat.
Dish Soap Is Not the Answer
Dish soap feels like a logical choice. It's gentle on dishes, it cuts through grease, and it's already in your kitchen. But on a Cricut mat, dish soap strips the adhesive. It doesn't just lift debris off the surface — it pulls the stickiness right along with it. After one wash with dish soap, many crafters find their mat won't hold even heavyweight cardstock. The same goes for hand soap, scented wipes, all-purpose spray cleaners, and anything containing surfactants or added fragrance. These products are designed to break down surface bonds — and on your mat, that's exactly the bond you're trying to protect.
Warning: Dish soap, scented baby wipes, and household cleaners all degrade your mat's adhesive. Stick to unscented baby wipes or plain water — that's all the chemistry your mat needs.
You Don't Need to Replace It Yet
The second myth is that a mat loses stickiness because the adhesive is worn out, making replacement the only option. In most cases, the adhesive is still fully intact — it's just buried under a thin layer of lint, paper dust, and fiber. A single proper cleaning session restores 80 to 90 percent of a mat's original grip. The mat you're about to throw away is probably just dirty. Give it one thorough cleaning before you decide.
When to Clean Your Mat — And When to Move On
Timing matters as much as technique. Clean your mat too rarely and the debris compacts and becomes much harder to lift. Clean it too aggressively and you wear down the adhesive faster than normal use would. The goal is staying ahead of buildup without overdoing it.
Signs It's Time to Clean
Your mat needs cleaning when your material doesn't lie flat on the surface, when you can see visible lint or paper fibers on the adhesive, or when your cuts start coming out jagged or shifted slightly off your design. If you're cutting vinyl and the blade is dragging material sideways instead of slicing cleanly through it, that's a clear signal. As a practical rule, clean your mat every 3 to 5 uses. Don't wait for performance to degrade — clean proactively and you'll rarely deal with a real problem.
Signs It's Time to Replace
After a thorough cleaning and a complete air dry, if your mat still won't hold lightweight paper flat, the adhesive layer is genuinely depleted and replacement is the right call. You should also replace your mat if it's warped, if it has deep score marks from repeated blade passes, or if the surface has begun peeling or flaking at the edges. No cleaning method restores adhesive that's physically worn through. Knowing the difference between a dirty mat and a dead one saves you the frustration of cleaning something that was always headed for the bin.
How to Clean Your Cricut Mat, Step by Step
This process works for the three most common Cricut mat types: LightGrip (blue), StandardGrip (green), and StrongGrip (purple). The FabricGrip mat has its own requirements covered in the maintenance section below. You don't need any specialized products — everything on this list is cheap and easy to find.
What You'll Need
- A soft plastic scraper (the one that came with your Cricut machine is ideal)
- Unscented baby wipes — no aloe, no added fragrance
- A lint roller
- A clean soft cloth or paper towel for blotting
The Cleaning Process
Start with the lint roller. Roll it firmly across the entire mat surface to pull up loose lint, hair, and paper fibers sitting on top of the adhesive. This first pass removes the bulk of the surface debris before you introduce any moisture. It takes about 30 seconds and makes a bigger difference than most people expect. Don't skip it — wet debris is harder to remove than dry debris, and starting dry keeps the cleaning process cleaner overall.
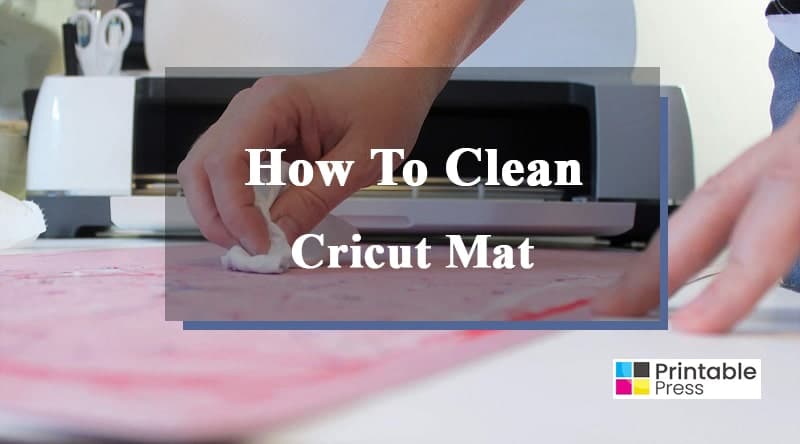
Next, take an unscented baby wipe and gently clean the mat in small circular motions, working from one corner to the other so you cover every section. Don't press hard. The goal is to loosen and lift debris, not push it deeper into the adhesive. When your wipe turns visibly gray or brown, switch to a fresh one. Once you've covered the whole surface, let the mat air dry completely — usually 10 to 15 minutes. The stickiness returns as the mat dries. Don't rush this step with a hair dryer or by rubbing it with a towel. Heat and friction both damage the adhesive surface. Just let it sit.
Pro tip: Always air dry your mat face-up on a clean, flat surface. Drying it face-down or leaning it against a wall lets dust settle right back onto the adhesive while it's still slightly tacky.
For mats with stubborn adhesive residue — like the kind left behind by glitter cardstock or sticker-backed paper — a small amount of rubbing alcohol on a cotton pad can handle those specific spots. Use it only on those areas and not across the whole mat, and only on StandardGrip or StrongGrip mats. LightGrip mats are too delicate for alcohol, even in small quantities.
Cleaning Mistakes That Ruin Your Mat
The cleaning process is genuinely straightforward, but a few specific mistakes show up constantly — and they all follow the same pattern of doing more harm than good. These are the ones worth memorizing before you clean a single mat.
Using the Wrong Products
The mat's adhesive reacts to chemistry in ways that aren't always obvious. Products that seem mild — scented baby wipes, hand sanitizer, spray-on cleaners — contain fragrances, alcohols, or surfactants that break down the adhesive bond faster than normal use does. The table below breaks down which methods are safe and which ones to avoid across different mat types.
| Cleaning Method | Safe For | Avoid On | Effectiveness |
|---|---|---|---|
| Lint roller | All mat types | N/A — always safe | High (loose debris) |
| Unscented baby wipes | LightGrip, StandardGrip, StrongGrip | FabricGrip | High (general buildup) |
| Plain water + soft cloth | All mat types | N/A — always safe | Moderate |
| Rubbing alcohol (spot use) | StandardGrip, StrongGrip | LightGrip, FabricGrip | High (adhesive residue) |
| Dish soap | None | All mat types | Strips adhesive |
| Scented wipes or household cleaners | None | All mat types | Degrades adhesive |
The Scrubbing Trap
Pressing hard or scrubbing with force feels like you're doing a thorough job, but it has the opposite effect. Aggressive scrubbing pushes debris deeper into the adhesive layer and can physically deform the mat's surface texture. Over repeated cleanings, it also stretches the mat slightly — which affects how flat your material lies when it's loaded into the machine. Light, consistent circular pressure is all you need. Think of it as dusting rather than scouring.
A worn-out blade makes this problem worse. A dull blade drags material across the mat instead of slicing through it cleanly, adding unnecessary stress to the adhesive surface every single cut. Replacing your blade regularly is a genuine part of mat maintenance. If you're evaluating different material options for your vinyl projects, our breakdown of Heat Transfer Paper vs. Vinyl covers the trade-offs clearly.
Long-Term Mat Care and Storage
Cleaning is a reactive fix. Storage and daily habits are proactive ones. The crafters who get the longest life out of their mats do both. Your mat's adhesive performs best when it's protected between uses from dust, light, and temperature fluctuations — not just cleaned after they've already done their damage. You can find more equipment care tips in our Printer Guides section, which covers maintenance across all your printing and cutting tools.
Daily Habits That Extend Mat Life
Always replace the protective cover sheet — the clear plastic film that ships with every mat — after each use. If you've lost yours, store the mat face-down on a clean, flat surface or slide it into a large plastic sleeve. Keep your mat away from direct sunlight, which dries out the adhesive over time even without any use at all. And always peel your material away from the mat, not the other way around. Hold the mat flat with one hand and lift the material up and back with the other. Bending the mat over the edge of your material creates micro-tears in the adhesive layer that accumulate with every project and can't be reversed through cleaning.
Cleaning the Fabric Mat

The FabricGrip mat (pink) is a different beast. It uses a different adhesive formulation designed specifically for soft, lightweight fabrics, and it needs a gentler approach than the other three mat types. Do not use baby wipes on the FabricGrip mat — moisture compromises the fabric adhesive much faster than it would on a StandardGrip or StrongGrip surface. Use a lint roller only. Roll it gently across the surface to pull up fabric fibers, fuzz, and dust between projects. That single step handles the vast majority of the debris that accumulates on a fabric mat during normal use.
If the mat picks up something wet or particularly stubborn, a barely damp cloth — not a wipe, just lightly moistened — can address the specific area. Let it air dry completely and fully before loading any fabric. The FabricGrip mat also has a shorter natural lifespan than the other types. If yours no longer holds lightweight muslin or thin cotton flat after repeated lint rolling, it's time for a replacement. No cleaning technique brings back a depleted fabric mat adhesive.
Frequently Asked Questions
How often should I clean my Cricut mat?
Clean your mat every 3 to 5 uses, or immediately any time you notice material not lying flat, visible lint or debris on the surface, or cuts coming out jagged or off-center. Regular light cleaning prevents heavy buildup that becomes much harder to remove over time.
Can I use baby wipes on all Cricut mat types?
You can safely use unscented baby wipes on LightGrip (blue), StandardGrip (green), and StrongGrip (purple) mats. Do not use baby wipes on the FabricGrip (pink) mat — the moisture degrades its adhesive faster than it would on the standard mat types. Use a lint roller only on the fabric mat.
Why is my mat still not sticky after I cleaned it?
If your mat won't grip material after a thorough cleaning and a complete air dry, the adhesive is genuinely depleted rather than just dirty. No cleaning product restores adhesive that's physically worn out. A mat that fails after proper cleaning is ready to be replaced.
Can I re-apply adhesive to restore a Cricut mat?
Some crafters apply a thin layer of repositionable spray adhesive — such as Zig 2-Way Glue or Krylon Easy-Tack — to restore grip on a depleted StandardGrip or StrongGrip mat. It works as a short-term fix, but requires very even application and can make the mat too aggressive for delicate materials like vellum or thin tissue paper.
How do I keep my mat cleaner between uses?
Replace the protective cover sheet after every single project. Store your mat away from direct sunlight and dusty surfaces. Always peel material away from the mat — never bend the mat over the edge of your material. These three habits alone extend the time between cleanings significantly.
Next Steps
- Grab a lint roller and a pack of unscented baby wipes right now and clean your current mat — you'll likely see a meaningful improvement in grip within 15 minutes.
- Check whether your protective cover sheet is still usable. If it's lost or cracked, start storing your mat face-down on a clean flat surface immediately until you can order a replacement.
- Identify which mat type you're using and note how many uses it has on it — set a mental benchmark so you're replacing mats proactively at around 40 uses rather than reactively after failures.
- Build a lint-roll step into the start of every crafting session, not just when cuts start going wrong. Thirty seconds of prevention beats 15 minutes of troubleshooting every time.
- Explore the full Printer Guides library for maintenance routines covering your other cutting and printing equipment — consistent care across all your tools is what keeps your projects running smoothly.
 |  |  |  |

About Karen Jones
Karen Jones spent seven years as an office manager at a mid-sized financial services firm in Atlanta, where she was responsible for a fleet of more than forty inkjet and laser printers spread across three floors, managed ink and toner procurement contracts, and handled first-line troubleshooting for connectivity failures, paper jams, and driver conflicts before escalating to IT. That daily exposure to printers from Canon, Epson, HP, and Brother under real office conditions gave her a practical command of setup, maintenance, and common failure modes that spec sheets never capture. At PrintablePress, she covers printer how-to guides, setup and troubleshooting tips, and practical advice for home and office printer users.


Get some FREE Gifts. Or latest free printing books here.
Disable Ad block to reveal all the secret. Once done, hit a button below
| | | |