T-Shirt Printing Materials Checklist for Beginners
by Marcus Bell · April 04, 2022
Nearly 60% of first-time t-shirt printers waste their starter budget on materials that don't match their chosen printing method — ending up with cracked, faded, or peeling results before they've sold a single shirt. If you're just getting started, having a solid t-shirt printing materials checklist before you buy anything is the single most important step you can take. This guide covers everything you need for your t-shirt printing journey — from blank shirts to tools and consumables — so you can skip the costly trial and error.
The world of t-shirt printing can feel overwhelming at first. Heat transfer, sublimation, screen printing, vinyl cutting — each method uses a completely different set of materials. Buying the wrong transfer paper or the wrong type of shirt fabric can mean your design won't stick, won't last, or won't look the way you imagined. Getting clear on what you actually need before you spend a dollar saves you from frustration and wasted money.
The good news? The core materials list is shorter than most beginners expect. Once you understand which method you're using and which fabrics work with it, the checklist practically builds itself. This guide breaks everything down by experience level, printing method, and common pitfalls — so you walk away knowing exactly what to buy and why.
Contents
- Understanding the Foundations of T-Shirt Printing
- Your T-Shirt Printing Materials Checklist: Starter vs. Pro Setup
- When Each Printing Method Works — and When It Doesn't
- T-Shirt Printing Myths That Waste Your Money
- Common Mistakes Beginners Make with Their Materials
- Frequently Asked Questions
- Key Takeaways
Understanding the Foundations of T-Shirt Printing
T-shirt printing isn't one single process — it's a family of techniques, each with its own materials, tools, and ideal use cases. Before you assemble your checklist, it helps to know what each method actually involves. The three most common are heat transfer printing, sublimation printing, and screen printing. Each works differently at a chemical level, and that's exactly why materials matter so much.
The Three Main Printing Methods
Heat transfer printing uses a heat press to bond a printed design onto fabric using pressure and heat. Sublimation printing — a process where ink converts from solid to gas and bonds permanently with polyester fibers — works best on light-colored, polyester-rich fabrics. Screen printing uses a mesh screen coated with light-sensitive emulsion to push ink directly onto the shirt. It's the method of choice for large print runs with bold, opaque colors. Understanding which method you're using tells you exactly which materials appear on your t-shirt printing materials checklist. For a solid technical overview of how screen printing works at its core, the Wikipedia article on screen printing is worth a quick read.
Why Fabric Type Changes Everything
The shirt itself is your most important material — more important than any machine or ink you buy. Cotton works best with plastisol inks and inkjet heat transfer paper. Polyester, or a poly-cotton blend above 65% polyester, is what sublimation needs to produce vibrant, permanent results. Tri-blend shirts (cotton, polyester, rayon) are popular for vintage aesthetics but can be tricky with any method. Always check the fabric content label before buying blank shirts in bulk. A mismatch between your fabric and your ink or transfer type is the fastest way to ruin an entire batch of shirts and flush your materials budget down the drain.
Your T-Shirt Printing Materials Checklist: Starter vs. Pro Setup
The gap between a beginner setup and a professional one is smaller than most people expect. Both require the same core categories of materials — what changes is the quality, scale, and specialization of each item. Here's a breakdown of what you actually need at each stage, with approximate costs so you can plan your budget honestly.
What Beginners Need to Start
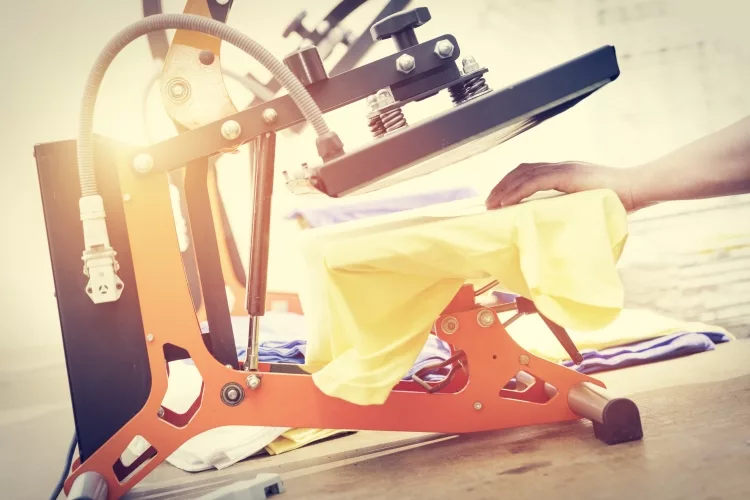
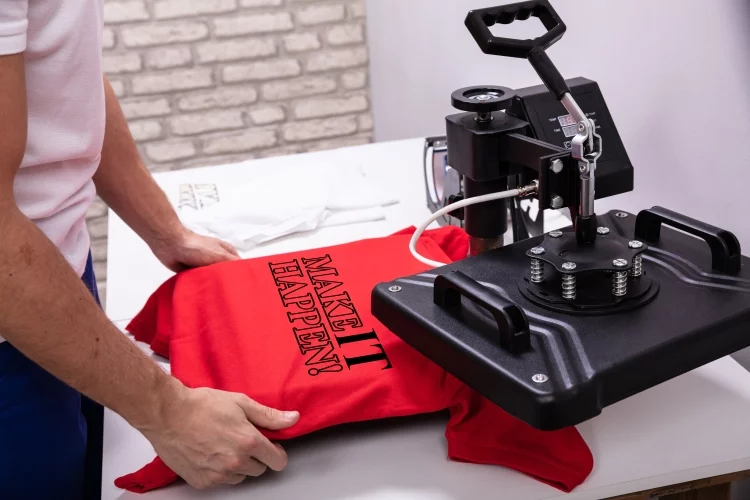
If you're starting with heat transfer paper — the most beginner-friendly method — your checklist is genuinely short. You need an inkjet printer, heat transfer paper compatible with your printer's ink type, a heat press machine or household iron, blank shirts in the right fabric for your method, and a piece of Teflon sheet or parchment paper to protect the transfer during pressing. That's it. You don't need a $500 machine to make your first shirts. Check out our guide to types of heat press machines to find the right press for your budget and project size.
Pro tip: Always do a test press on a scrap piece of fabric before applying your design to a finished shirt — heat settings vary by transfer paper brand, and one test can save you from ruining an entire batch.
When You're Ready to Level Up
Once you've outgrown basic heat transfer printing, the materials list grows — but so does the quality and durability of your output. Sublimation introduces dedicated sublimation printers, specialty inks, sublimation paper, and polyester blanks. Screen printing brings in mesh screens, photosensitive emulsion, squeegees, and plastisol inks. Each upgrade requires its own dedicated materials — they aren't interchangeable between methods. Our comparison of sublimation vs heat transfer is a great starting point if you're deciding which direction to grow into next.
| Material | Beginner Setup | Pro / Advanced Setup | Approx. Cost |
|---|---|---|---|
| Printer | Standard inkjet | Sublimation or DTG printer | $80–$2,000+ |
| Transfer Paper | Inkjet heat transfer paper | Sublimation paper or DTF film | $15–$60 per pack |
| Press | Household iron | Clamshell or swing-away heat press | $0 vs. $150–$500 |
| Inks | Standard inkjet cartridges | Sublimation, plastisol, or water-based inks | $20–$200+ |
| Blank Shirts | Any cotton t-shirt | Polyester blanks (sublimation) or ring-spun cotton (screen) | $3–$15 each |
| Finishing Tools | Parchment or Teflon sheet | Screens, squeegees, emulsion, flash dryer | $5 vs. $200–$1,000+ |
When Each Printing Method Works — and When It Doesn't
Choosing the right printing method isn't just about preference — it's about matching the technique to your project's specific needs. Each method shines in certain situations and fails badly in others. Knowing the difference upfront saves you materials, time, and real money.
When Heat Transfer Makes Sense
Heat transfer printing is the right call when you're printing small quantities — one-offs, custom orders, or samples. It's also ideal for detailed, full-color designs with gradients, because inkjet printers handle complex artwork far better than most beginner screen setups. If you're fulfilling on-demand orders without holding inventory, heat transfer keeps your upfront costs near zero. Make sure you pair it with the right printer for heat transfer paper — not every inkjet produces the ink density transfers need to look sharp and last through washing.
When to Skip Heat Transfer and Choose Something Else
Heat transfer starts to lose its edge when you're printing more than 24 shirts of the same design. At that scale, screen printing becomes more cost-effective per shirt, even after accounting for screen and emulsion setup costs. Sublimation is the better choice when you want prints that are truly permanent and wash-proof — sublimation ink bonds with polyester fibers at a molecular level rather than sitting on top of the fabric. Dark or black shirts are a hard no for sublimation, which only works on white or very light-colored polyester. If your customers want prints on dark shirts, heat transfer with opaque white-backed paper or screen printing are your two real options.
Warning: Never load standard sublimation paper into an inkjet printer running regular dye or pigment ink — the results will be muddy and unusable, and you risk permanently clogging your printhead.
T-Shirt Printing Myths That Waste Your Money
There's a lot of bad advice floating around online about t-shirt printing materials. Some of it comes from outdated tutorials shot years ago, some from sellers pushing overpriced gear to beginners who don't know better yet. Here are the myths worth busting before they cost you anything.
Myth: Any Inkjet Printer Works for Transfer Printing
Standard inkjet printers do produce prints on heat transfer paper — but the results vary enormously by printer model and ink type. Pigment-based inks produce sharper, more durable transfers than dye-based inks. Dye inks tend to bleed and fade faster after repeated washing. Before you commit to any transfer paper brand, check whether your specific printer uses dye or pigment ink cartridges. Some transfer papers are engineered specifically for one ink type and perform poorly with the other — a mismatch you won't notice until you've already pressed a dozen shirts.
Myth: Expensive Supplies Always Mean Better Prints
Price is a signal, not a guarantee. Some mid-range transfer papers and inks outperform premium-branded alternatives in real-world wash tests. What matters far more than price is compatibility — the right paper for your ink type, the right ink for your fabric, the right temperature and timing for your press. A $20 pack of transfer paper pressed at the correct temperature and peeled at the right moment beats a $60 pack mishandled by ten degrees every single time. Research compatibility first, test before you scale, and let results guide your buying decisions. Compatibility beats cost every time.
Common Mistakes Beginners Make with Their T-Shirt Printing Materials

Even with a complete t-shirt printing materials checklist in hand, beginners regularly make a handful of predictable mistakes. Most of them happen not because of bad materials, but because of misuse. Here's what to watch for so you don't repeat the most common beginner errors.
Using the Wrong Transfer Paper for the Method
There are two main types of heat transfer paper: one formulated for light fabrics and one for dark fabrics. Light-fabric transfer paper is transparent — it works on white or pastel-colored shirts. Dark-fabric transfer paper has an opaque white backing layer that makes colors pop on any shirt color, including black. Using light-fabric paper on a dark shirt produces nearly invisible, ghostly results. It sounds obvious written out, but this is the most common and most expensive beginner mistake by a wide margin. Read the label, match the paper to the shirt color, and you've already avoided the single most wasteful error on the entire checklist.
Skipping Pre-Press and Post-Press Steps
Pre-pressing your shirt for five to ten seconds before applying the transfer removes moisture and smooths out wrinkles — both of which cause transfers to peel, bubble, or fail to adhere evenly. Skipping this step saves you ten seconds and costs you a shirt. Post-press, the correct peel method matters just as much. Hot peel and cold peel transfer papers have very different timing requirements, and peeling at the wrong moment tears your design or leaves residue on the fabric. Follow the manufacturer's peel instructions exactly — it's the difference between a crisp, professional-looking result and a ruined transfer you have to throw away.
Frequently Asked Questions
What is the most beginner-friendly t-shirt printing method?
Heat transfer paper printing is the easiest starting point. You only need an inkjet printer, transfer paper, and a heat press or iron. The learning curve is short, and your upfront cost is low compared to screen printing or sublimation setups.
Can I use a regular iron instead of a heat press machine?
Yes, a household iron works for small batches and practice runs. The downside is inconsistent pressure and temperature, which makes results less predictable. A dedicated heat press delivers even pressure and accurate temperature control, producing more consistent transfers every time.
What kind of shirts work best for sublimation printing?
Sublimation requires shirts with a high polyester content — at least 65%, ideally 95–100% polyester. The fabric must also be white or very light-colored. Dark shirts or natural fabrics like cotton will not produce vibrant sublimation results because the dye has nothing to permanently bond with.
Do I need a special printer for heat transfer printing?
Not necessarily a special printer, but the right ink type matters. Pigment ink produces more durable transfers than dye ink. Check your current printer's ink type before buying transfer paper — some brands are designed specifically for pigment-ink printers and won't work as well with dye-ink models.
How long do heat transfer prints last on a shirt?
A properly applied heat transfer print on the correct fabric lasts 50 or more wash cycles with the right care. Wash shirts inside out in cold water and avoid high-heat drying. Poor application, wrong paper type, or washing in hot water dramatically shortens the lifespan of any transfer.
What is the difference between light and dark transfer paper?
Light transfer paper is transparent and designed for white or light-colored shirts — the shirt color shows through areas without ink. Dark transfer paper has an opaque white layer that covers the shirt fabric entirely, making it suitable for any shirt color including black and navy.
How much does it cost to set up a beginner t-shirt printing station?
A basic heat transfer setup — entry-level heat press, a pack of transfer paper, and blank shirts — can cost as little as $150 to $250 total. A sublimation or screen printing setup costs significantly more, typically starting around $400 to $600 for the essential equipment and supplies.
Is it necessary to pre-press a shirt before applying a transfer?
Yes. Pre-pressing for five to ten seconds removes moisture and wrinkles from the fabric. Moisture trapped under a transfer prevents proper adhesion and causes bubbling or peeling. It takes less than ten seconds and it directly affects whether your finished shirt looks professional or amateurish.
Key Takeaways
- Your t-shirt printing materials checklist starts with choosing your printing method — heat transfer, sublimation, or screen printing — because each method requires entirely different supplies that cannot be swapped between them.
- Fabric content is your most critical material choice: cotton works for heat transfer and screen printing, while sublimation requires high-polyester, light-colored blanks to bond properly.
- Compatibility between your printer's ink type, your transfer paper, and your shirt fabric matters more than the price tag on any individual product.
- Pre-pressing your shirt and following the correct peel timing are non-negotiable steps — skipping them is the number one reason beginner transfers fail, regardless of material quality.
 |  |  |  |
About Marcus Bell
Marcus Bell spent six years as a production manager at a small-batch screen printing shop in Austin, Texas, overseeing everything from film output and emulsion coating to press registration, squeegee selection, and garment finishing. He expanded into vinyl cutting and Cricut projects when the shop added a custom apparel decoration line, giving him direct experience with heat transfer vinyl application, weeding techniques, and the real-world differences between Cricut, Silhouette, and Brother cutting machines. At PrintablePress, he covers screen printing, vinyl cutting and Cricut projects, and T-shirt printing and decoration techniques.


Get some FREE Gifts. Or latest free printing books here.
Disable Ad block to reveal all the secret. Once done, hit a button below
| | | |