Professional Tie-Dye Techniques for Shirts
by Marcus Bell · April 04, 2022
Fiber reactive dyes bond permanently to cotton at a molecular level, yet fewer than one in five hobbyists ever switches away from the inferior all-purpose dyes sold at grocery stores — and every washed-out, faded shirt shows the difference. If you want to learn how to tie dye shirts professionally, that single supply upgrade separates amateur results from the vivid, long-lasting color you see on high-end custom apparel. Whether you're adding tie-dye as a creative outlet or building it into your existing t-shirt printing operation, this guide walks you through the exact techniques and systems the pros rely on.

The gap between a department-store kit and a professionally dyed shirt isn't artistic talent. It's chemistry and process control. Professional tie-dye uses fiber reactive dyes, sodium carbonate as a fixative (called soda ash), and deliberate folding or binding methods that produce repeatable patterns. Once you understand the system, you can hit the same result batch after batch.
This guide covers the complete process, clears up the myths that trip up most beginners, breaks down real costs, and helps you decide when tie-dye is the right decorating method — and when it isn't.
Contents
- How to Tie Dye Shirts Professionally: The Full Process
- Tie-Dye Myths That Are Costing You Good Results
- Breaking Down the Real Costs of Professional Tie-Dye
- Building a Sustainable Tie-Dye Practice
- How to Wash and Care for Tie-Dyed Shirts
- Tie-Dye Techniques Compared Side by Side
- When Tie-Dye Is the Right Call — and When It Isn't
How to Tie Dye Shirts Professionally: The Full Process
Professional tie-dye is systematic, not complicated. Every step exists for a specific chemical reason, and shortcutting any one of them produces predictably poor results.
Gather Your Supplies First
You need four core materials: fiber reactive dye (Procion MX is the industry standard), soda ash (sodium carbonate — not baking soda), urea (a humectant that keeps dye moist during curing), and 100% cotton shirts at minimum 80% natural fiber content. Avoid high-polyester blends; polyester fibers won't absorb fiber reactive dye and will show as pale, blotchy streaks. Pre-wash every blank shirt once before dyeing to remove sizing (the starch treatment applied during manufacturing that blocks dye penetration).
Round out your setup with squeeze bottles for precise dye application, rubber bands or sinew (waxed nylon cord preferred by most professionals), chemical-rated gloves, and a sealed plastic bag or bin for curing. None of this is expensive — see the cost breakdown below — but having everything staged before you start prevents rushed decisions mid-process.
Pre-Soak and Fold
Mix your soda ash solution at 1 cup per gallon of warm water. Soak shirts for 20 minutes, then wring them out — damp but not dripping. This alkaline pre-soak raises the fabric's pH, activating the bonding sites where fiber reactive dye attaches permanently. Skipping this step is the single most common tie-dye mistake. Shirts look acceptable initially, then lose 30–40% of their color vibrancy after the first few washes.
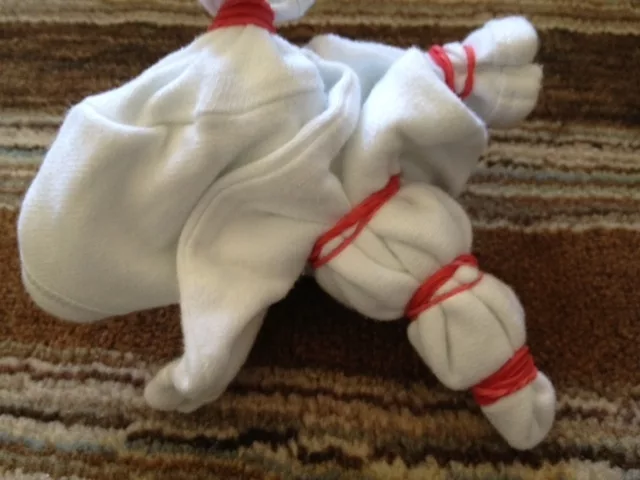
Fold or bind while the fabric is still damp. For the classic spiral: pinch the shirt's center, twist until it coils into a flat disc, then secure with three rubber bands crossing at the center. Accordion folding produces bold parallel stripes. Crumple folding creates the organic, all-over texture most people recognize as traditional tie-dye. Each technique works at a professional level — consistent results come from deliberate placement of your resist, not luck.
Pro tip: If your shirt dries out before you start applying dye, mist it lightly with plain water first — damper fabric takes color more evenly than dry fabric.
Apply Dye and Cure
Mix your dyes with urea water (1 tablespoon urea per cup of water) and load into squeeze bottles. Apply colors section by section, working light to dark to avoid contamination. Saturate each section fully — hesitant, thin application causes pale, uneven results. Press each dye-loaded section gently with gloved fingers to push color into the folds.
Seal the dyed shirt in a plastic bag and cure for 8–24 hours at room temperature (70°F or warmer). Longer cure equals deeper, more saturated color. Cold temperatures slow the chemical reaction, so in a cool studio either warm the space or extend your cure time. After curing, rinse cold until the water runs clear, then machine wash hot — that first hot wash removes all unfixed dye and sets the color permanently.
Tie-Dye Myths That Are Costing You Good Results
A lot of bad tie-dye advice circulates online, mostly from people who learned from grocery-store kits. These three myths are worth clearing up before they become habits.
Myth: Any Dye Will Work
All-purpose dyes like Rit are direct dyes — they sit on top of cotton fibers rather than bonding to them, and they wash out progressively with every launder. Fiber reactive dyes actually become part of the fiber itself. According to Wikipedia's overview of reactive dyes, fiber reactive dyes achieve permanence through a nucleophilic substitution reaction with the hydroxyl groups in cellulose — a chemical bond that soap and water can't break. Direct dyes fade noticeably within 10–15 washes. Properly fixed fiber reactive dyes hold color for the life of the garment.
Myth: More Rubber Bands Means Better Patterns
Beginners pile on rubber bands thinking tighter resistance creates more defined patterns. What creates definition is the deliberate placement of your resist — rubber bands, sinew, or clamps that physically block dye — not the quantity. Two precisely placed rubber bands on a spiral fold produce a cleaner result than eight applied randomly. Study your fold, identify where you want the white space, and place resist with intention.
Myth: You Can Skip the Cure Time
Rinsing after two hours instead of the full 8–24 produces shirts that look fine until the first wash, then drop dramatically in vibrancy. The dye-fiber reaction needs time to complete fully. Professional dyers don't rush curing. Neither should you.
Breaking Down the Real Costs of Professional Tie-Dye
One real advantage of tie-dye over other custom apparel methods is the low startup barrier. No heat press, no printer, no specialty equipment — just chemistry and time.
Startup Supplies
A basic professional tie-dye setup runs between $80 and $150: a starter kit of Procion MX dyes in 6–10 colors, 5 lbs of soda ash, urea, squeeze bottles, gloves, and miscellaneous materials. That's a fraction of what screen printing or sublimation printing requires. If you've reviewed the real cost of sublimation printing, you know equipment alone can run into thousands of dollars before you print a single shirt. Tie-dye's entry cost is minimal.
Per-Shirt Cost at Scale
Once your startup supplies are in hand, ongoing per-shirt costs are low. Here's a realistic breakdown at small-batch scale:
| Item | Cost Per Shirt | Notes |
|---|---|---|
| Blank 100% cotton shirt | $3.50 – $6.00 | Gildan 5000 or Bella+Canvas 3001 |
| Fiber reactive dye | $0.40 – $0.80 | Varies by color count and saturation |
| Soda ash | $0.05 – $0.10 | Extremely low cost at bulk pricing |
| Urea | $0.05 | Optional but recommended for deep color |
| Gloves, bags, misc. | $0.10 – $0.20 | Amortized across a batch |
| Total per shirt | $4.10 – $7.15 | Before labor and markup |
Custom tie-dye shirts routinely retail for $20–$40, which makes this one of the higher-margin custom apparel methods available to small producers. At a batch of 20 shirts, your material cost stays well under $8 per piece.
Building a Sustainable Tie-Dye Practice
If you plan to produce tie-dye shirts regularly — for a shop, events, or commissions — workflow systems matter as much as technique. Sustainable production means consistent results without supply shortfalls or burnout.
Batching for Efficiency
Professional tie-dyers batch their work. Pre-soak and fold 20 shirts at once, dye them in a single session, cure overnight, then rinse and wash in bulk the next morning. This cuts your time-per-shirt dramatically compared to handling each shirt individually. Batching also improves color consistency because you're mixing one dye solution for the entire run rather than re-mixing repeatedly. Keep a simple log of your dye formulas — brand, color name, mix ratio, cure conditions — so you can replicate any colorway exactly when a customer reorders.
Sourcing Blank Shirts
Your shirt choice affects dye results more than most people expect. Heavier cotton (6 oz+) absorbs dye more deeply and shows richer saturation than lightweight shirts. Ring-spun cotton (fibers twisted for smoothness) produces a slightly more even dye surface than open-end spun cotton. Test two or three blanks side by side before committing to a bulk supplier. If you're building a tie-dye brand, the same marketing logic that applies to any decorated apparel business applies here — the strategies in this guide on t-shirt business marketing translate directly to a tie-dye-focused operation.
How to Wash and Care for Tie-Dyed Shirts
Professional dye application handles the chemistry. But how you — and your customers — care for tie-dyed shirts determines how long the color stays vivid in practice.
The Critical First Wash
The first wash after curing and rinsing should be hot — as hot as your machine allows — with a small amount of unscented detergent. This wash removes all unfixed dye. Skip it, and that residual loose dye will transfer to other garments in future laundering. Some professional dyers add a tablespoon of Synthrapol (a textile surfactant that suspends loose dye particles in the wash water) to pull out every bit of excess color. Wash freshly dyed shirts alone or only with similar dark colors for this first machine wash — never with whites or light garments.
Long-Term Care
After the first wash, ongoing care is straightforward. Wash inside out in cold water to reduce surface abrasion on the dyed fabric. Avoid chlorine bleach entirely — it strips color aggressively. Line dry or tumble on low. Properly fixed Procion MX dye on 100% cotton is exceptionally stable; the shirt's fibers will wear out long before a professionally applied dye job fades.
Warning: Never wash freshly dyed shirts alongside white or light-colored garments until you've completed the full cure, cold rinse, and first hot wash sequence — residual loose dye bleeds heavily at this stage.
Tie-Dye Techniques Compared Side by Side
Each classic tie-dye technique produces a visually distinct result. Choosing the right fold for your project is as important as selecting the right dye colors.
Technique Overview
| Technique | Pattern Style | Difficulty | Best For |
|---|---|---|---|
| Spiral | Radiating swirl from center point | Easy | Classic all-over designs, beginner batches |
| Accordion Fold | Bold parallel stripes | Easy | Geometric, modern looks |
| Crumple / Scrunch | Organic, random texture | Easy | High-volume, fast batches |
| Bullseye | Concentric rings | Medium | Centered graphic designs |
| Shibori (Japanese resist) | Precise geometric or linear | Medium–Hard | Premium, artisan-positioned products |
| Ice Dye | Soft watercolor-like blends | Medium | Pastel and painterly aesthetics |
Choosing Based on Your Goal
For volume production with fast, repeatable results, spiral and crumple are your workhorses. For products positioned at a higher price point, shibori (a Japanese resist-dyeing tradition with centuries of history) or ice dye creates a visual language that justifies premium retail pricing. This is where tie-dye differs fundamentally from methods like screen printing or heat press decoration — tie-dye's inherent variability is a feature, not a limitation, and customers frequently pay more for pieces they know aren't identical.
When Tie-Dye Is the Right Call — and When It Isn't
Tie-dye excels in specific contexts. Outside those contexts, a different method will serve your project better. Knowing the difference saves time and prevents disappointed clients.
Ideal Use Cases
Tie-dye is the right method when your customer wants handcrafted uniqueness and you're working with 100% natural fiber blanks. It performs exceptionally well for small-batch custom orders, event merchandise (music festivals, summer camps, charity runs), and retail products positioned as handmade. Every shirt is genuinely unique — and that story supports premium pricing without additional marketing effort.
When to Choose a Different Method
Avoid tie-dye when precise, reproducible graphics are required. If a client needs an identical logo printed on 200 shirts, screen printing or heat transfer is your method — not tie-dye. Similarly, tie-dye doesn't work on high-polyester fabrics. If you're decorating moisture-wicking athletic shirts (typically 100% polyester), sublimation printing is the correct choice because it bonds dye to polyester fibers. Poly-cotton blends below 80% cotton produce blotchy, uneven results with fiber reactive dyes. Know your substrate before you commit to a dye method. The wrong chemistry on the wrong fabric wastes your time, your dye, and your client's blank.
Frequently Asked Questions
What is the best dye for professional tie-dye?
Procion MX fiber reactive dye is the industry standard. It forms a permanent covalent bond with cotton and other natural cellulose fibers, producing wash-fast color that won't progressively fade like all-purpose dyes. Dharma Trading and Jacquard both produce high-quality Procion MX formulations widely used by professional dyers.
How long should tie-dye cure before rinsing?
Cure your tie-dyed shirts for a minimum of 8 hours and up to 24 hours at room temperature (70°F or warmer). Longer cure time produces deeper, more saturated color. In cool conditions, extend your cure time or warm the space — cold temperatures slow the dye-fiber reaction and can prevent complete bonding.
Do I need to use soda ash for tie-dye?
Yes. Soda ash (sodium carbonate) raises the fabric's pH, activating the chemical bonding sites where fiber reactive dye attaches permanently to cotton. Without a soda ash pre-soak, the dye rinses out almost entirely after the first wash. This step is not optional — it's the chemistry that makes professional tie-dye permanent.
Can you tie-dye polyester shirts?
Standard fiber reactive dyes don't bond to polyester. Polyester requires disperse dyes applied with heat — similar chemistry to sublimation printing. Results on polyester are rarely as vivid as on cotton, and the process is significantly more complex. For professional results on polyester garments, sublimation is the better route.
How do you prevent tie-dye colors from muddying?
Muddy colors result from applying complementary colors — red and green, blue and orange, yellow and purple — directly adjacent to each other. Leave thin white-space gaps between sections, or place neutral colors between complements. Apply light colors before dark ones, and avoid oversaturating dye to the point where it bleeds across section boundaries during the cure phase.
How many shirts can you tie-dye in a single day?
An experienced dyer working alone can produce 20–40 professionally dyed shirts per session. The practical limit is cure time, not dyeing time. Pre-soak and fold shirts the evening before, dye them in the morning, cure overnight, and rinse and machine wash the following morning. This rhythm produces consistent batches without rushing any phase.
How do you wash tie-dye for the first time?
After curing, rinse under cold running water until the runoff runs clear. Then machine wash hot with a small amount of detergent — alone or with similar dark colors only. This first hot wash removes all unfixed dye and completes the color-setting process. After the first wash, switch to cold water and wash inside out for all future laundering.
What fabric content works best for tie-dye?
100% cotton produces the best results — deepest saturation, most vibrant color, and best wash-fastness. Cotton-linen and cotton-rayon blends also dye well with fiber reactive dyes. Poly-cotton blends remain workable down to about 80% cotton before dye uptake becomes noticeably patchy. Pure polyester requires completely different dye chemistry and is not suitable for standard tie-dye methods.
Final Thoughts
Learning how to tie dye shirts professionally comes down to one commitment: use the right chemistry, follow the process without shortcuts, and practice your folding until your hands know the steps automatically. Start with a batch of 6–12 shirts using Procion MX dye and the spiral technique, document your dye formulas, and refine from there. Pick up your supplies this week, run your first professional batch, and you'll understand within a single session why experienced dyers never go back to grocery-store kits.
 |  |  |  |
About Marcus Bell
Marcus Bell spent six years as a production manager at a small-batch screen printing shop in Austin, Texas, overseeing everything from film output and emulsion coating to press registration, squeegee selection, and garment finishing. He expanded into vinyl cutting and Cricut projects when the shop added a custom apparel decoration line, giving him direct experience with heat transfer vinyl application, weeding techniques, and the real-world differences between Cricut, Silhouette, and Brother cutting machines. At PrintablePress, he covers screen printing, vinyl cutting and Cricut projects, and T-shirt printing and decoration techniques.


Get some FREE Gifts. Or latest free printing books here.
Disable Ad block to reveal all the secret. Once done, hit a button below
| | | |