How to Use Tracing Paper
by Anthony Clark
Have you ever used tracing paper before? If not, then you're in for a treat! Tracing paper is a great way to transfer images and patterns from one surface to another. In this blog post, I'll show you how to use tracing paper to create your own designs. Let's get started!
Contents
- What is a good tracing paper?
- Tools that you need for tracing
- Steps to use tracing paper
- Set up the tracing paper on top of desired image
- Tapping down the image with masking tape
- Trace out the image onto the tracing paper using a graphite pencil
- Removing the tracing paper
- Transferring the drawing onto a sheet of paper
- Inverting the traced drawing onto a new medium
- Rubbing the surface of the traced paper for the final drawing
- Removing tracing paper to get the desired image pattern
- Finishing the traced image into the final form
- Expert Tip for Using Tracing Paper
- Transferring Your Design Onto Fabric With the Help of Tracing Paper
- Transferring your design onto wood with the help of tracing paper
- Benefits of Using a Tracing Paper
- Conclusion on Best Ways to Use a Tracing Paper
What is a good tracing paper?

Tracing paper is a thin paper that is used for tracing drawings and designs. It is available in different colors, but the most common type is white. Tracing paper can be found at most art supply stores. When choosing tracing paper, you should consider the weight and thickness of the paper. Heavier tracing papers are less likely to tear, while thinner tracing papers are easier to fold. You should also consider the color of the paper. Some people prefer white tracing paper because it doesn't show up on top of your design, while others prefer colored tracing papers for a more colorful project.
Tools that you need for tracing
Besides the tracing paper of good quality, the few more tools that you need for the tracing and these are given below:
- A graphite pencil (a soft lead or an HB 2 pencil will be preferred)
- Colored pencils
- Scissors
- Blank sheet of paper
- Masking tape
- Desired sketch or drawing to be traced
Steps to use tracing paper
Finally, coming onto the stage of tracing the image; what you need to do is to follow the steps given below;
1. Set up the tracing paper on top of desired image

In the first step, you can draw the image or word on a blank sheet of paper or take any desired sketch or image that you want to trace.
2. Tapping down the image with masking tape
First take the image or design that you want to transfer onto the paper then take a tracing paper and place it right on top of the image. After placing the tracing paper on top of the image/drawing that you want to trace, tape it down with care so that it don't shift or move during the process of tracing. Keep in mind that the tracing paper must completely cover the image for easy tracing. If the tracing paper and the image that is to be traced are not of equal size then adjust them accordingly so that any of them don't move in order to cause disruption in the process of tracing.
3. Trace out the image onto the tracing paper using a graphite pencil
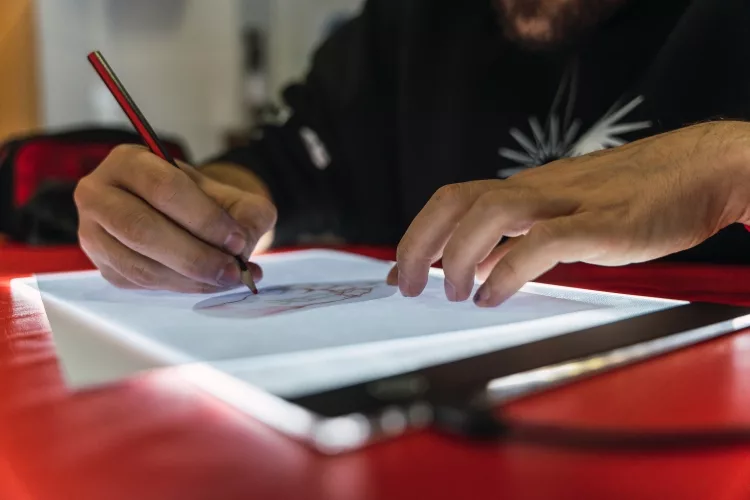
Now, carefully trace out the lines from your desired image onto the tracing paper with the help of a pencil. You can perfectly trace out the image by following the lines that you see on the original image. Don't try to trace the shading of the image but focus on the lines mainly.
- If the tracing paper accidentally slips or moves from the place then simply place the tracing paper back on its position by following the lines that are already traced out. In this case you won't miss the rest of the shape that you were following.
- In case of any mistake you can erase the traced lines with the help of an eraser but try to be gentle as during the process of erasing you don't tear the tracing paper because it's a very thin paper.
4. Removing the tracing paper
By peeling off the tape that you had used for keeping the tracing paper and original image on place, take out the tracing paper and keep it along with the original image so that you could notice either the image is perfectly traced out or not. Side by side look into both of the images that you've traced and the one to be traced out. Notice if there's any point or line that is missing except the shading then put the tracing paper back onto the image and trace over the missing line.
5. Transferring the drawing onto a sheet of paper
Now take a blank sheet of paper where you want to transfer the traced image. It could be in the form of a canvas, a sketchbook paper or any kind of medium where the pencil will show up on clearly. Try to use a light colored paper or sheet so that the pencil could show up.
6. Inverting the traced drawing onto a new medium
Put your traced drawing faced down onto the new medium and tape it with the help of a masking tape or any other office tape. Set the position of traced paper onto the medium in a way that is lined up according to your original drawing/image. Keep in mind before proceeding to the next step that the position of the traced paper must be faced down.
7. Rubbing the surface of the traced paper for the final drawing
For this step what you need to do is to simply rub the surface of the traced paper with the help of any hard object e.g. back of the pencil or the end of any marker. Now, to transfer the traced image, apply pressure by rubbing the lines of traced image. In this way, the traced image will be transferred onto the next medium below the tracing paper when we apply pressure onto the back surface of the tracing paper.
8. Removing tracing paper to get the desired image pattern
Keep the tracing paper aside and after peeling off the tape a faded print of the image could be seen onto the new medium. That is a raw form of your desired image and if there is something that is missing like some points or lines that are faded during the process or didn't showed up during the transfer, you can easily fill them with pencil.
9. Finishing the traced image into the final form
Finally, to make the image more defined go over the traced lines so that a clear form of image could be seen. Your drawing is complete and you can keep it the way it is already or make it more interesting and colorful with the help of colored marker, ink or paints.
Expert Tip for Using Tracing Paper
If you're looking for a way to improve your drawing or sketching skills, try using tracing paper. Tracing paper is a thin paper that's transparent, which makes it perfect for copying or tracing images. You can find tracing paper at most art stores, and it's a great tool to have in your artist's toolkit.
To use tracing paper, place the image you want to copy on top of the tracing paper and trace over the image with a pencil. Be sure to press hard enough so that the image transfers to the tracing paper. Then, you can use the tracing paper as a guide to drawing or sketching the image yourself.
Tracing paper is also great for creating color palettes. Simply place a few colors next to each other on the tracing paper and trace around them. This will create a color palette that you can use when painting or drawing.
So if you're looking for a way to improve your drawing skills, give tracing paper a try! It's a simple tool that can make a big difference in your artwork.
Transferring Your Design Onto Fabric With the Help of Tracing Paper
If you're looking to transfer a design onto fabric, tracing paper can be a great help. Trace the outline of your design onto the tracing paper, then place the tracing paper over your fabric. Pin it in place, then use a needle or sharp pencil to trace over the lines of the design. When you're done, remove the tracing paper and iron the design onto your fabric. Make sure to use a pressing cloth so that the heat from the iron doesn't damage your fabric.
This method of tracing the design can work on all types of fabrics that includes fine wool, angora, silk, leather or any other materials.
Transferring your design onto wood with the help of tracing paper
Tracing paper is a great way to transfer your design onto wood. It's easy to use and makes the process a lot simpler. Here's how to do it:
- Start by drawing your design on tracing paper. Make sure it's big enough to fit onto your piece of wood.
- Place the tracing paper over the wood and secure it in place with tape.
- Use a pen or pencil to trace over the lines of your design.
- Remove the tracing paper and you'll be left with a copy of your design on the wood!
- Paint or stain the wood however you like. Your design will be permanently etched into the surface.
Benefits of Using a Tracing Paper
Tracing paper is a great way to improve your drawing and sketching skills. It allows you to see the outline of what you are drawing, making it easier to make accurate lines and shapes. Additionally, tracing paper can be used to copy images or designs, which can then be used as references for future drawings. Tracing paper is also a great tool for artists who want to create more detailed works of art. By using tracing paper as a guide, they can create smaller, more precise details that would be difficult to achieve if they were working directly on the canvas or paper. Overall, tracing paper is a versatile tool that can help artists of all skill levels improve their artwork.
Conclusion on Best Ways to Use a Tracing Paper
A tracing paper is a versatile tool that can be used in many different ways to improve your quilting skills. By using a tracing paper, you can easily transfer designs and patterns to your fabric, make accurate measurements, and correct mistakes. Try out these tips the next time you are quilting to see how much easier they make the process.
 |  |  |  |

About Anthony Clark
Anthony Clark always had a passion for digital drawing and printing ever since he was young. He would wander around his parents' house in Phoenix, Arizona drawing various things with his older digital tablet. Be it just a memory collection or a portrayal of anything: objects, parents, school, events, etc. He received his BA in Graphic Design at San Jose State University - the heart of Silicon Valley. Now Mr. Clark is excited to present his experience coupled with some colorful dips to help shape the future of printing.
Thoughts on "How to Use Tracing Paper"
 |  |  |  |
Get some FREE Gifts. Or latest free printing books here.
Disable Ad block to reveal all the secret. Once done, hit a button below
 |  |  |  |