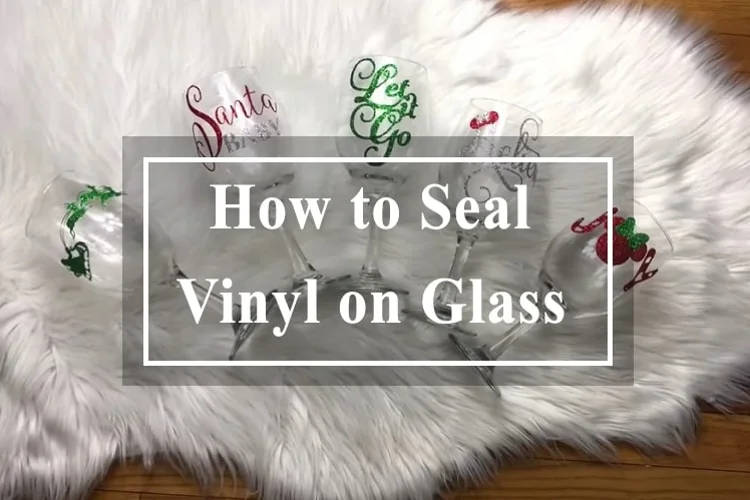
How to Seal Vinyl on Glass
by Marcus Bell · April 02, 2020
When it comes to obtaining various decorative pieces of glassware, most people resort to simply purchasing it from whatever source they have locally or perhaps somewhere on the Internet.
Now, while there’s nothing wrong in doing that if you like personalized cups and glasses, the truth is that you can make some of your own fairly easily – and you don’t need any fancy printing equipment or expensive machinery to do so.
More often than not, crafting a cup or a glass with a personalized slogan, symbol, or image on it is as simple as simply placing a specialized sticky foil on the thing, so that when the glue dries up, you have the thing that’s on it permanently stuck on the surface of the object in question.
Contents
In this article, we’re going to take you through the process of doing exactly this. As you will see, even a complete rookie can learn to do this with ease, and as far as the equipment necessary to do this – it’s fairly easy to obtain and it won’t set you back an arm and a leg, either.
Here’s the deal.
Clean the Glass Thoroughly

Before you can start applying the vinyl onto the glass you’ve picked, you must clean it meticulously.
The reason behind this is those tiny dirt particles will get trapped underneath the vinyl if you stick it on an unwashed glass. This can then result in the vinyl not sticking to the glass surface as hard as it’s supposed to, which means it will start peeling fairly quickly.
To clean the glass for this purpose, it’s recommended you should wash the glass with water, let it dry, then carefully clean it with alcohol to disinfect it and remove any remaining dust particles, and then let it dry again.
Remember, the glass needs to be completely clean and completely dry before you can stick the vinyl onto it.
Pick the Design You Want to Put on the Glass
Whether you want your wine glass, cup, or whatever piece of drinkware you’re using to feature a big smiley face, a logo, or some message, it’s important to pick the design that’s of appropriate size for what you’re trying to accomplish.
For example, if the glass you want to print the message on is pretty small and a big chunky message can technically fit on its surface, you better think again.
The thing is, even if you do manage to fit this design onto the surface, you’ll have to be extra careful to avoid wrinkling, warping, or some rogue air bubbles getting entrapped under the vinyl. If this happens, the letters on the design (or lines of a picture) can get warped, which then beats the purpose of fitting them there in the first place.
Other than that, once you’ve placed the vinyl onto such a surface, getting rid of it will be way more difficult than placing it was, so you want to make sure that you succeed in placing the thing correctly in the first go, so to speak.
Use High-Quality Vinyl
When it comes to choosing the right vinyl for the task, you need to make sure you pick a pack of vinyl with a strong adhesive.
Once you’ve placed the vinyl, you’ll have to wash the glass it’s on. A vinyl with a weak adhesive will, therefore, probably keep the design up for some time, but sooner or later, this design will start peeling off when you venture to wash the glass.
So, it’s better to dish out a little bit more money to get a high-quality vinyl that will permanently sit well with the glass than get a cheaper one and then have to reattach it later on when it starts peeling off.
Typically, the manufacturers of these vinyl sheets will point out the details of its quality and make in the descriptions of their products (if you’re shopping online), so what you may want to look for would be how well it can tackle heat, washing, and how long can it last outdoors.
Use ‘Transfer’ Tape
The way to place the vinyl you’ve prepared onto the glass is via a piece of the so-called ‘transfer tape’. This clear, see-through tape is specially designed to hold the vinyl in place and not to peel off any of the paint or piece of vinyl when you remove it.
Now, the important thing to remember when doing this would be to try to match the size of the vinyl design itself to the transfer tape, so that the transfer tape is slightly larger than the design.
This will come in handy if your design contains multiple pieces of vinyl that you cannot put all at the same time.
Also, when you transfer the vinyl onto the tape, make sure to use a scraper to press the vinyl into the tape, so it doesn’t come off as you’re transferring it onto the glass.
Depending on the curvature of your glass and where you’ve decided to place the design, you may have some difficulties avoiding wrinkling and air bubbles. To work around this, you can make small incisions along with the transfer tape (especially if it’s large) while of course making sure not to hurt the vinyl underneath it.
Once you’ve placed the transfer tape onto the surface you’re trying to ‘enrich’ with your vinyl design, make sure to again press the transfer tape and the vinyl underneath it with a scrapper or a similar tool, so that the vinyl gets properly stuck to the surface.
When removing the transfer tape, do so gently and slowly to avoid peeling off the vinyl too, in case the adhesive didn’t kick in all the way, so to speak.
Fill the Glass with Liquid
In case you’re not sure how to align the design to your glass so that it sits at a perfect angle and that it doesn’t end up slanted on one side, here’s a trick you can use.
Before transferring the vinyl design onto the glass, fill the glass with water. Assuming your desk (or some other surface you’re working on) is perfectly flat, the water level will act as a line that tells you what the optimal angle is for placing your vinyl.
After you’ve done this, you needn’t worry about misaligning your design relative to your glass.
Also, the great thing about this simple trick is that you won’t have to draw on your glass with a marker or some other tool. (Of course, marking this line is also perfectly fine if you can remove it easily.)
Carefully Place the Design on the Glass
Using the waterline as your indicator (unless you’ve marked the glass with an easy-to-remove marker – then use that line), place the design on it so that its bottom is exactly at the water level.
Then carefully apply some pressure to align all of the design so that its lower end sits precisely where the water level is. This way, you will ensure that you’ve placed the vinyl design at the right angle.
That said, we should point out here that the amount of water you will need to do this depends on the size of the design. The larger the vinyl is, the less water you should use, of course.
What’s more, in case you don’t want your vinyl to sit perfectly parallel to the waterline, you can come up with some other way of positioning the design to your liking. If you are steady-handed, you might not even need any particular way to ensure you’ve placed the vinyl correctly.
With experience, you will develop a natural ‘feel’ to where the vinyl is supposed to go, so you may need to use the water line or other helping means only if you’re a complete rookie.
Remove the Transfer Tape
Once you’re happy with the position of the design and the adhesive’s done its job, you can remove the transfer tape to reveal your masterpiece.
As we mentioned earlier, while the adhesive will do a pretty good job of sticking the vinyl onto the glass, you should still be cautious not to jerk the transfer tape off too violently, because it might still take off some parts of the vinyl that haven’t clung to the glass as well as the bulk of it.
The thing with the transfer tape is that its manufacturers intentionally make the adhesive pretty weak so that removing it can be a piece of cake once you no longer need it. So, as long as you’re careful, you needn’t worry you’ll unintentionally remove the vinyl along with the transfer tape.
All in all, sealing vinyl on glass is an interesting do-it-yourself activity that anyone can practice at home. All you need is some transfer tape, some vinyl, and a way to cut that vinyl into the shape you want.
For the rest, following the instructions from above will suffice in helping you get some excellent results. We hope you found this article helpful and we wish you plenty of success in your vinyl-related glass-decorating exploits.
 |  |  |  |
About Marcus Bell
Marcus Bell spent six years as a production manager at a small-batch screen printing shop in Austin, Texas, overseeing everything from film output and emulsion coating to press registration, squeegee selection, and garment finishing. He expanded into vinyl cutting and Cricut projects when the shop added a custom apparel decoration line, giving him direct experience with heat transfer vinyl application, weeding techniques, and the real-world differences between Cricut, Silhouette, and Brother cutting machines. At PrintablePress, he covers screen printing, vinyl cutting and Cricut projects, and T-shirt printing and decoration techniques.


Get some FREE Gifts. Or latest free printing books here.
Disable Ad block to reveal all the secret. Once done, hit a button below
| | | |