SLA vs DLP: Which 3D Printing Technology Is Right for You?
by Karen Jones · April 03, 2022
Resin 3D printers have seen more than a 300% surge in consumer adoption over the past decade — and the debate at the heart of that boom is SLA vs DLP 3D printing. If you've landed on a spec sheet and found yourself lost between "laser-cured" and "projector-based" options, you're asking exactly the right question. Both technologies build objects from liquid photopolymer resin, layer by layer, but they use fundamentally different light sources to do it. Our printer guides cover the full printing landscape, but right here we're going deep on these two resin heavyweights.
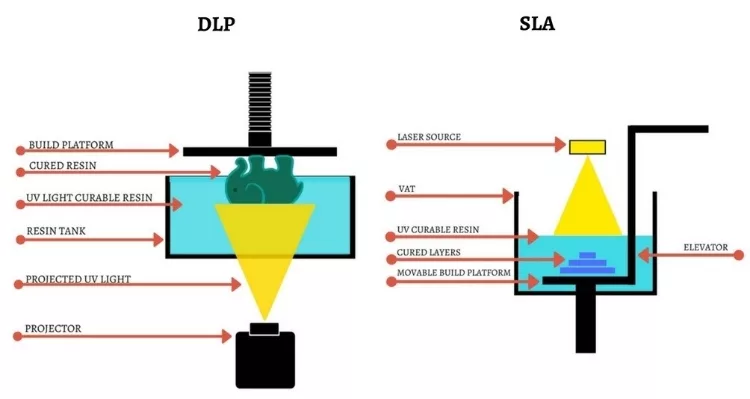
SLA (Stereolithography Apparatus), first patented in 1984 and widely regarded as the founding technology of commercial 3D printing, uses a focused UV laser that sweeps across a resin vat, tracing each layer point by point. DLP (Digital Light Processing) replaces that laser with a digital projector — it flashes the image of an entire layer all at once, curing the full cross-section simultaneously. That single difference touches everything from print speed to surface quality to how much you'll spend keeping the machine running.
If you've compared materials for FDM machines, our guide to PLA vs. PETG gives useful context on how technology choices ripple into your workflow — but SLA and DLP step into a different tier of precision and chemistry altogether. Here's a clear breakdown so you can choose with confidence.
Contents
Strengths and Weaknesses of Each Technology
No technology wins on every metric. Understanding where each approach genuinely thrives — and where it falls short — is the fastest path to matching the right printer to your actual workflow.
Where SLA Excels
SLA's laser-based approach delivers uniform resolution across the entire build platform. Because the laser has a fixed spot size, you get the same crisp detail at the outer edges of a large print as you do in the center — something DLP can struggle with as objects approach the limits of its build area. SLA also tends to produce slightly smoother surfaces on organic curved shapes, since the round laser spot naturally blends transitions between cure points.
SLA printers are also more compatible with a wider range of specialty resins — engineering-grade, flexible, castable, and biocompatible formulations. If your workflow demands precise material properties, you'll find more options on the SLA side of the market. And if you're used to evaluating tool trade-offs for crafting work — like the comparison between Silhouette vs Cricut cutting machines — you'll recognize this same pattern: the more precise tool usually comes with more flexibility on materials and a slightly steeper learning curve.
Where DLP Has the Edge
Speed is DLP's headline advantage. When a projector flashes a full-layer image, it doesn't matter whether that layer is mostly empty or completely filled — cure time stays constant. A print that takes three hours on an SLA machine can finish in under 90 minutes on a comparable DLP unit. For studios producing multiple parts per day, that throughput difference adds up fast.
DLP light sources also tend to outlast SLA lasers. Over thousands of hours, a laser gradually loses power and eventually needs replacing. A projector's LED element generally holds up longer before output drops to a point where print quality suffers.
| Feature | SLA | DLP |
|---|---|---|
| Light source | UV laser | Digital projector |
| Resolution consistency | Uniform across build area | Better at smaller print sizes |
| Print speed | Slower — traces each layer | Faster — full-layer flash |
| Surface finish on curves | Excellent | Very good; slight stepping possible |
| Specialty resin support | Broader range | Good, some limitations |
| Light source lifespan | Moderate | Generally longer |
| Entry-level price | $200–$500+ | $150–$400+ |
| Best for | Large parts, engineering models | Small detailed parts, batch printing |
Getting the Best Results from Your Resin Printer
Whether you choose SLA or DLP, a handful of techniques separate consistently great prints from frustrating failures. These apply to both technologies and are worth building into your process from day one.
Dialing In Your Print Settings
Exposure time is the single most critical variable in resin printing. Too little, and layers won't fully cure — prints delaminate or fail mid-job. Too much, and you lose fine detail as resin bleeds beyond the intended boundary. Most manufacturers provide recommended exposure settings for their own resins, but if you're using a third-party formulation, run a small calibration test print before committing resin to a full job.
Print orientation matters enormously for both technologies. Angling your model reduces layer lines on visible surfaces, distributes stress more evenly through your supports, and minimizes the suction force pulling on the FEP film at the bottom of the vat. Five minutes planning orientation before you hit print is one of the highest-return habits you can build early on.
Pro tip: Always run a calibration print when switching to a new resin brand — even one rated for your machine — because exposure sweet spots vary more between products than most manufacturers acknowledge.
Post-Processing Like a Pro
Post-processing is where many beginners inadvertently lose quality they worked hard to achieve. Wash your prints thoroughly in isopropyl alcohol or a dedicated wash solution — typically five to ten minutes of gentle agitation. Inadequate washing leaves a tacky resin film that weakens the final cure and creates surface defects. After washing, let prints air-dry briefly before placing them in a UV curing station. Under-cured prints are brittle and prone to cracking; thin geometry that's over-cured can warp. Getting this balance right makes a visible difference in the finished part.
Choosing the Right Technology for Your Project
The best way to make this decision is to map each technology to the work you actually do. Let's walk through the most common use cases and be honest about where each one fits.
When SLA Is the Better Fit
SLA earns its place when you need consistent detail across a large build area. Product design and engineering rely on SLA for prototypes that must meet precise dimensional tolerances. Dental labs — one of the fastest-growing professional segments in resin printing — often standardize on SLA because crown models, surgical guides, and aligners require accuracy at the sub-millimeter level.
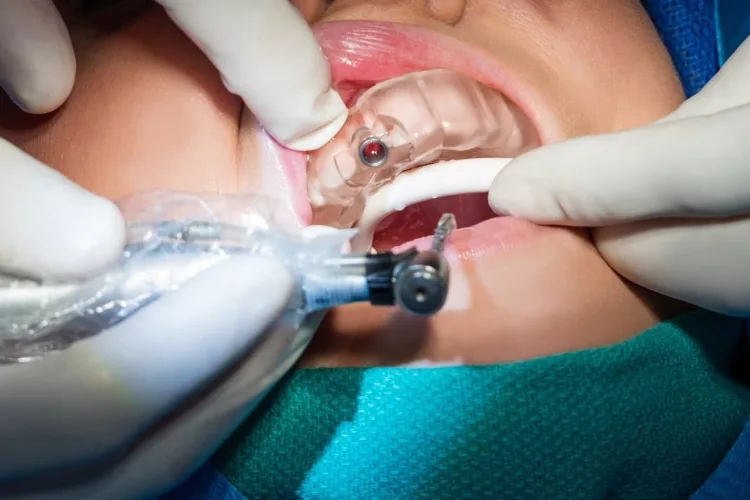

Healthcare applications — anatomical models, hearing aid shells, prosthetic components — also benefit from SLA's edge-to-edge resolution consistency. If you're printing objects that span most of your build platform, SLA is generally the safer choice.
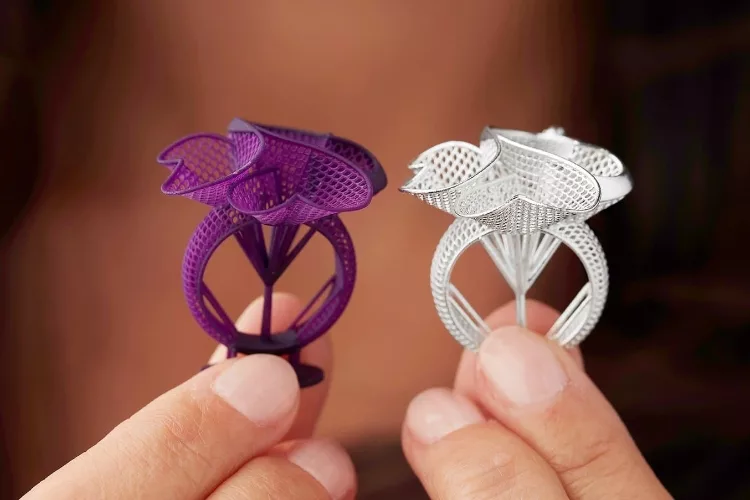
When DLP Makes More Sense
DLP shines at small, intricate objects — especially when you need to produce several at once. Tabletop game miniatures, jewelry masters, educational models, and entertainment props are natural fits. Just as the decision between screen printing, sublimation, and digital printing comes down to your volume and material, the SLA vs DLP choice often reduces to throughput versus uniformity across a large surface.
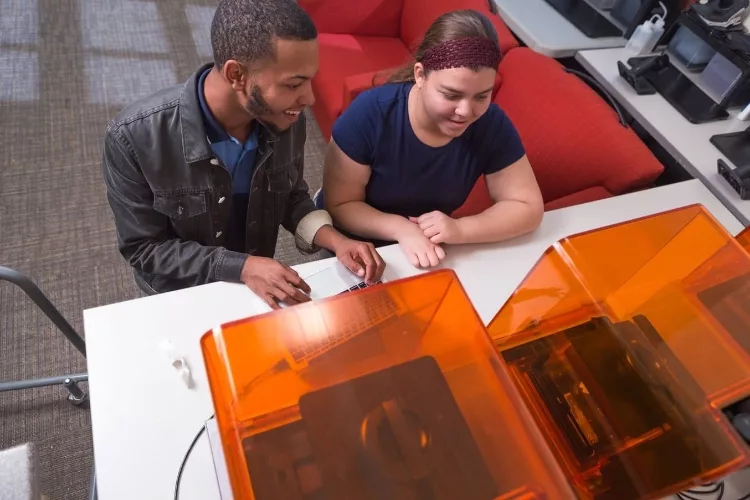

In education settings, DLP's faster turnaround means students can print, evaluate, and iterate within a single session — a genuine pedagogical advantage when class time is limited. For entertainment and prop work, batching multiple small components on one build plate incurs no speed penalty whatsoever.
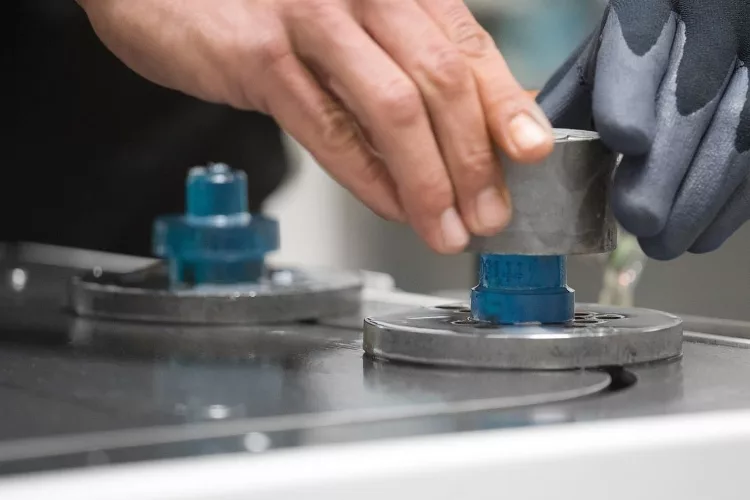
The Real Costs: SLA vs DLP Budget Breakdown
Sticker price is only part of the picture with resin printing. Your total cost of ownership includes resin, consumables, replacement parts, and the time you invest in post-processing. Here's what to realistically plan for.
Upfront Hardware Investment
Entry-level DLP printers now start around $150–$300 for capable hobbyist machines. Entry-level SLA units typically run $200–$500, though professional systems from brands like Formlabs reach $3,000–$12,000 for industrial-grade output. DLP professional systems occupy a similar premium tier. For most hobbyists and small studios, the entry-level price gap is narrow enough that it shouldn't be the deciding factor — focus instead on build volume, native XY resolution, and how broad the compatible resin ecosystem is for that machine. Our top printer reviews break down specific models with side-by-side specs to help you build a shortlist.
Resin, Consumables, and Hidden Expenses
Standard resin runs $30–$80 per liter, with engineering, dental, and specialty formulations reaching $100–$300 per liter. The FEP film at the base of your resin vat needs periodic replacement — roughly every two to six liters depending on your print habits — at $5–$20 per sheet. Factor in isopropyl alcohol or a dedicated wash solution, a UV curing station ($20–$80), and nitrile gloves as non-negotiable ongoing expenses that both technology types share equally.
SLA lasers gradually lose output power and eventually require replacement at $50–$200 depending on the model. DLP light sources last longer on average but still degrade over thousands of hours. Much like evaluating the long-term running cost of laser vs inkjet printing for 2D work, the consumable math for resin printers rewards honest planning before you buy.
Keeping Your Resin Printer Running Smoothly
Resin printers demand more hands-on care than filament machines. The chemistry involved means small consistent habits at the end of each session prevent large expensive problems down the road.
Post-Print Care and Safety Habits
After every session, remove uncured resin from the vat and filter it back into the bottle. Never leave liquid resin sitting in the vat for more than a day or two — it can partially cure on the FEP film, create uneven spots, and corrupt your next print from the very first layer. Ventilation is not optional. Resin fumes are a genuine health concern, and an activated carbon air purifier is worth the investment if you print regularly. Keep gloves, paper towels, and a cleanup container within arm's reach before starting any session — not somewhere across the room when you need them in a hurry.
Long-Term Upkeep
Inspect your FEP film regularly for clouding, fine scratches, or micro-holes. A compromised FEP is the most common cause of failed prints and can allow uncured resin to contact your build platform's lead screw mechanism — an expensive and messy repair. Replace it proactively at the first sign of damage rather than waiting for a failed print to confirm it.
For SLA users, run a periodic test print to gauge laser output. If fine details that used to print cleanly are starting to look fuzzy or washed out, the laser may be losing power. For DLP users, inspect the projector lens for resin splatter or dust — clean it gently with a lint-free microfiber cloth and nothing abrasive. Keep the machine level at all times, store resin bottles in a dark cool space, and shake them well before each pour. With consistent habits, a quality resin printer from a reputable brand can deliver thousands of reliable print hours before it needs significant attention.
Frequently Asked Questions
Is SLA or DLP better for beginners?
DLP is often recommended for first-time resin printer owners because of its faster print times and typically lower entry cost — early mistakes hurt less when your machine and resin investment are smaller. That said, many popular entry-level SLA machines have strong community support and thorough documentation. Either can work for a beginner who's committed to learning safe resin handling from the start.
Can I use the same resin in both SLA and DLP printers?
Many third-party resins are formulated to work across both technologies, but always verify the wavelength compatibility before purchasing. Most consumer SLA and DLP machines use 405nm UV light, so overlap is common. Specialty or engineering resins may be machine-specific — check the product data sheet for confirmed compatible wavelengths before you order.
Which technology produces better quality prints?
Both can produce exceptional prints — just in different scenarios. SLA maintains consistent resolution edge-to-edge and is better for large parts. DLP matches or exceeds SLA quality on small, intricate prints where pixel size is a non-issue. At small scales, many experienced users find the finished surface quality genuinely indistinguishable between the two technologies.
How dangerous is resin printing?
Liquid photopolymer resin is a skin irritant and potential sensitizer — repeated exposure without protection can cause allergic reactions that worsen over time. Always wear nitrile gloves and work in a well-ventilated space or with an activated carbon filter running. Cured resin is generally safe to handle, but uncured resin must be treated as a hazardous material and disposed of properly — never pour it down a drain or into household trash.
Next Steps
- List the types of objects you plan to print most often — large flat parts, small intricate models, or a mix — then use that list as your primary filter when shortlisting SLA vs DLP machines.
- Build a realistic total budget that includes resin, FEP film, IPA or wash solution, a UV curing station, and gloves before you compare machine prices — the machine is rarely the biggest ongoing expense.
- Download a standard calibration test file (such as the Ameralabs Town or an RERF exposure pattern) and order a small amount of resin so you can validate settings before your first real project.
- Join an active resin printing community online and ask owners of specific machines about their real-world experiences — hands-on feedback surfaces problems that spec sheets never mention.
- If you're also considering a filament printer as a complement to your resin setup, read our PLA vs. PETG guide — understanding how FDM material trade-offs work sharpens your intuition for evaluating resin properties by comparison.
 |  |  |  |

About Karen Jones
Karen Jones spent seven years as an office manager at a mid-sized financial services firm in Atlanta, where she was responsible for a fleet of more than forty inkjet and laser printers spread across three floors, managed ink and toner procurement contracts, and handled first-line troubleshooting for connectivity failures, paper jams, and driver conflicts before escalating to IT. That daily exposure to printers from Canon, Epson, HP, and Brother under real office conditions gave her a practical command of setup, maintenance, and common failure modes that spec sheets never capture. At PrintablePress, she covers printer how-to guides, setup and troubleshooting tips, and practical advice for home and office printer users.


Get some FREE Gifts. Or latest free printing books here.
Disable Ad block to reveal all the secret. Once done, hit a button below
| | | |