How Does Sublimation Printing Work?
by Anthony Clark · March 29, 2022
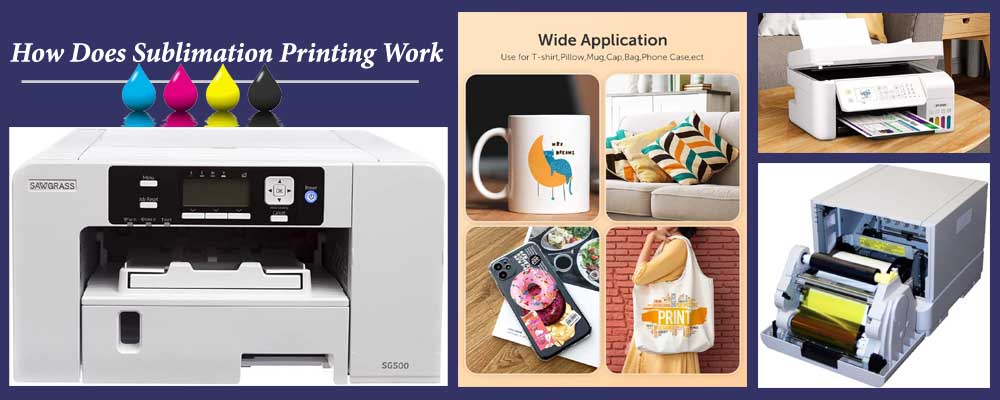
The global sublimation printing market surpassed $7.2 billion in annual revenue, and that figure keeps climbing as more small businesses and crafters discover just how permanent and vibrant the results are. If you've been asking yourself how does sublimation printing work, the answer starts with a phase change: specially formulated dye ink skips the liquid stage entirely and converts directly from solid to gas under heat, then permanently bonds inside the polymer structure of your substrate. There's no surface coating, no film, and nothing to peel off after washing. If you're exploring sublimation printing for the first time or want to sharpen a process you've been running for a while, this guide breaks down the entire workflow — from the chemistry behind it to the gear, the costs, and the fixes for the most common problems beginners run into.
At its core, sublimation is a chemistry-driven process. The dye inks are printed onto special transfer paper using a sublimation-compatible printer. When you place that paper face-down on a polyester or polymer-coated substrate and apply heat — typically between 380°F and 400°F — the solid dye vaporizes and drives itself into the open pores of the polymer. When the temperature drops, those pores close and lock the dye in permanently. You're not printing on the material. You're printing into it. That distinction is what makes sublimation prints feel like part of the fabric rather than a layer on top of it.
Sublimation isn't the only heat-based decorating method worth knowing. You may have already compared it against options like heat transfer paper and vinyl, both of which sit on the substrate surface rather than bonding into it. That fundamental difference — dye inside versus coating outside — is what gives sublimation its durability advantage. It also creates the primary limitation: you need a polymer-rich surface to make it work, which rules out cotton and most dark-colored garments entirely.
Contents
How Does Sublimation Printing Work? The Science and the Workflow
The Chemistry Behind the Process
The term sublimation refers to the phase transition in which a substance moves directly from solid to gas without passing through a liquid state — the same phenomenon you see when dry ice turns into vapor without melting first. In printing, sublimation dyes are suspended in a liquid carrier for printing purposes, but it's the solid dye particles that actually transfer. When heat is applied, those particles vaporize and the resulting gas molecules penetrate the polymer chains of your substrate. As the press cools, the polymer structure contracts and traps the dye permanently inside.
This is fundamentally different from screen printing, vinyl application, or standard inkjet printing, where color sits on top of the material. Because the dye is inside the polymer, it cannot crack, chip, or peel under normal use. Color vibrancy is also superior for photography and gradient-heavy designs because you're looking at dye embedded in the material's structure, not an opaque ink film covering it. This is also why sublimation colors look muted and dull on the transfer paper before pressing — on paper, the dye is still in its unactivated state. The full color only reveals itself when it bonds with the substrate.
The Equipment You Need
You don't need a warehouse full of hardware to get started. A functional sublimation setup has five core components, and you can assemble an entry-level version of each without breaking the bank:
- Sublimation printer — The most popular DIY option is an Epson EcoTank or Expression series printer converted to sublimation inks. Purpose-built sublimation printers from Sawgrass (SG500, SG1000) cost more but come preconfigured and supported specifically for this workflow.
- Sublimation inks — These are not interchangeable with standard inkjet inks. Sublimation inks are formulated to vaporize at press temperatures. Common brands include Cosmos Ink, Hiipoo, and Sawgrass ChromaBlast.
- Sublimation transfer paper — Coated paper that holds the printed dye until heat is applied. A-Sub and Printers Jack are popular entry-level options. Use paper rated for your printer's ink load.
- Heat press — A flat platen press handles apparel and flat hard goods. Cylindrical objects like mugs require a dedicated mug press. Consistent temperature and pressure across the entire platen surface is critical — cheap presses often have hot spots.
- Polyester or polymer-coated substrates — The target surface must contain polymer chains for the dye to bond with. White or light-colored 100% polyester fabric is ideal for apparel. Hard goods must have a factory-applied polymer coating.
- Heat-resistant tape, parchment paper, and an infrared thermometer — Tape holds the transfer in place, parchment protects your platen from ink bleed, and the thermometer tells you whether your press is actually hitting the temperature it claims.
Getting your press temperature and time dialed in correctly is probably the single biggest factor in print quality. If you're new to this, the Beginner's Guide to Heat Press Temperature and Time Settings is worth reading in full before your first press session.

Step-by-Step: From Design to Finished Product
Once your equipment is set up, the actual workflow is six steps. None of them are complicated — the difficulty is in the details of each one.
- Create and prepare your design. Use any design software: Adobe Illustrator, Photoshop, CorelDRAW, or Canva all work. Before you print, mirror your image horizontally. If you forget this step, text and asymmetrical artwork will be reversed on the final product.
- Print onto transfer paper. Set your printer to the highest quality setting. The print will look dull and undersaturated on paper. That's completely normal — do not adjust your color profile based on how the paper print looks.
- Pre-press your substrate. Run your heat press over the blank for 5–10 seconds at press temperature. This removes moisture and wrinkles. Skipping this step causes ghosting from steam movement during the transfer.
- Position the transfer and tape it down. Place the printed side face-down on the substrate. Tape all four corners with heat-resistant tape. Any movement during pressing creates ghosting — a faint duplicate shadow of your design.
- Apply heat and pressure. Close the press at your substrate's required temperature and time (typically 385°F for 55–65 seconds on polyester apparel). Do not open the press early.
- Peel and reveal. Remove the paper according to your paper type's instructions — some papers peel hot, some peel cold. The image is now permanent. Allow the item to cool before handling the printed area.
Pro tip: Always mirror your design before printing — forget this once and you'll remember it forever. Asymmetrical designs and any text will be completely reversed on the finished product.
What You Can Make with Sublimation Printing
Apparel and Soft Goods
Apparel is where most people start with sublimation, and for good reason. Edge-to-edge, all-over printing on polyester produces results that no other decoration method can match at the same price point. The dye bonds with every fiber in the print area, so you get seamless full-bleed designs with photographic color depth and a hand feel that's completely smooth — no raised surface, no texture from ink layers.
Popular soft goods for sublimation include:
- Polyester t-shirts, performance jerseys, and hoodies
- Athletic leggings, yoga pants, and compression wear
- Swimwear and rashguards
- Pillowcases, throw blankets, and tapestries
- Bandanas, neck gaiters, and polyester-panel hats
- Socks, tote bags, and polyester-backed mousepads
One non-negotiable limitation: sublimation requires light-colored substrates. The dye is transparent, so dark fabric backgrounds cancel out the design entirely. If your product line includes dark-colored garments, you'll need a different process. Sublimation also underperforms significantly on blended fabrics — a 50/50 poly-cotton blend produces noticeably washed-out colors compared to 100% polyester.

Hard Goods and Rigid Substrates
Hard goods are where sublimation becomes a serious revenue opportunity for small businesses. Any rigid item with a factory-applied polymer coating accepts sublimation dye the same way polyester fabric does — the coating opens under heat, accepts the dye, and then closes and seals it permanently. The product catalog you can build is wide:
- Mugs and tumblers — Requires a cylindrical mug press. Standard white polymer-coated mugs are the most common sublimation blank and one of the highest-margin products in the category.
- Phone cases — Fast to produce, lightweight to ship, and easy to sell in quantity. Polymer-coated cases are widely available for most major phone models.
- Aluminum photo panels — Polymer-coated aluminum produces gallery-quality prints with exceptional sharpness and color depth. Popular for wall art and photo gifts.
- Ceramic tiles and ornaments — High perceived value for holiday products and personalized gifts. Tiles press flat; ornaments may need a small curved press or a specialized attachment.
- Puzzles and coasters — Polymer-coated puzzle blanks and hardboard coasters are fast to produce and sell well as personalized gift items.
- Keychains and luggage tags — Small format, low ink usage, high margin. Great for add-on sales and event merchandise.
The Real Strengths and Weaknesses of Sublimation
Where Sublimation Wins
Sublimation outperforms competing methods in specific situations, and it does so convincingly. Here's where it genuinely earns its place:
- Unmatched durability on polyester — The dye is inside the substrate, not on top. It doesn't crack, peel, or fade from washing. For polyester apparel, the print typically outlasts the garment itself.
- Full-color photorealistic output at no extra cost — Unlike screen printing, you're not paying per ink color. A 40-color design costs the same to produce as a single-color one.
- Soft hand feel — There is no raised layer. The print surface is identical in texture to unprinted fabric. Athletes and performance wear customers specifically value this.
- No minimum order quantities — Setup cost per job is effectively zero. A single custom mug costs the same per unit to produce as a batch of 100. This makes on-demand and one-off customization genuinely profitable.
- Edge-to-edge, full-bleed printing — All-over designs with no print area boundaries or frame limitations are standard, not premium.
Keep in mind: Sublimation prints always look pale and desaturated on the transfer paper before pressing — this is normal. The full color only develops when the dye bonds with the polymer substrate under heat.
Where It Falls Short
Understanding sublimation's limits saves you from expensive mistakes before you commit to it as a production method. The constraints are real and non-negotiable:
- Light substrates only — Sublimation dye is transparent. White or very light-colored blanks are required. Dark fabrics are completely off the table.
- Polyester or polymer coating required — Cotton, linen, canvas, and other natural fibers don't work. At minimum you need 65% polyester for acceptable results; 100% polyester is the standard for production quality.
- No white ink — White areas in your design are the substrate showing through. You can't print a white element onto a cream-colored blank and have it appear bright.
- Printer requires regular use — Sublimation inks thicken in print heads when the printer sits idle for extended periods. Print at least weekly test sheets to keep the system clear, or face costly head clogs.
- Heat press is non-negotiable — A household iron cannot deliver consistent temperature and pressure across the entire print area. You need a dedicated press.
| Factor | Sublimation | Heat Transfer Vinyl | Screen Printing |
|---|---|---|---|
| Durability | Excellent — dye embedded in substrate | Good — can peel with heavy wear or heat | Very good — depends on ink type and cure |
| Color range | Full CMYK, photorealistic gradients | Limited to available vinyl colors | Spot colors; photorealism requires many screens |
| Substrate requirements | Polyester or polymer-coated only | Most fabrics including cotton | Most fabrics including cotton |
| Dark fabric compatibility | No | Yes | Yes (with underbase layer) |
| Setup cost per job | Low — no screens or film | Low — cut and weed | High — one screen per color |
| Minimum order quantity | None — one-offs are profitable | None | Higher volume needed to offset setup cost |
| Best use case | Full-color, all-over, polyester or hard goods | Names, numbers, simple cut graphics | Bulk runs, dark garments, specialty inks |
What Sublimation Printing Actually Costs
Starter Setup Costs
Getting into sublimation has a lower barrier to entry than screen printing or DTG printing, and the equipment holds its value well if you decide to sell or upgrade. Here's what a realistic starter investment looks like across three budget tiers:
- Entry-level ($400–$700 total) — Converted Epson EcoTank ET-2800 or ET-3850 with third-party sublimation inks ($200–$350 printer + $40–$70 ink set), an 8×10 or 15×15 budget flat platen press ($150–$250), and a 110-sheet pack of transfer paper ($20–$30). This is enough to start producing sellable products from home.
- Mid-range ($800–$1,500 total) — Sawgrass SG500 printer ($499–$549), a reputable 15×15 press from Geo Knight or Stahls ($500–$700), and a starter mug press ($100–$150). This tier gives you professional ink performance and consistent press quality.
- Production ($2,000–$5,000+) — Wide-format sublimation printer (Epson F570 or similar) capable of producing 13-inch-wide transfers or full-width fabric rolls, plus a dual-platen or clamshell press rated for production volume. For serious business use.
Per-Print Running Costs
Your per-unit cost depends on ink coverage, blank cost, and paper usage. For a standard full-color sublimation t-shirt, here's a realistic breakdown:
- Ink per shirt: $0.30–$0.80 depending on coverage area and ink brand
- Transfer paper: $0.20–$0.35 per sheet
- White polyester blank shirt: $4–$8 per unit at wholesale
- Press energy cost: negligible (most platens draw 1,500W for under a minute per press)
Total per-shirt cost lands between $5 and $10, not including labor. At retail pricing of $25–$45 for a custom sublimated polyester tee, the margin is strong — especially for on-demand work where there's no inventory risk and no minimum quantity. Hard goods like polymer-coated mugs at $2–$4 blank cost and $0.50–$1.00 in ink and paper sell comfortably at $15–$25 each. If you're also working with polyester blanks and want to understand the broader heat application process, the guide to how to heat press polyester covers the specifics of working with that material in detail.
Common Sublimation Problems and How to Fix Them
Faded or Washed-Out Colors
Pale, washed-out output is the most frequent complaint from beginners, and it almost always has one of three causes. Diagnose them in this order:
- Temperature too low — Many budget presses run 15–25°F cooler than their display reads. Buy an infrared thermometer ($20–$30) and verify actual platen temperature before blaming anything else. If your press reads 385°F but measures 360°F, you've found your problem.
- Press time too short — More dwell time allows more dye to fully sublimate into the substrate. If colors are consistently light, increase press time by 10-second increments and test again.
- Low polyester content — A 50/50 poly-cotton blend produces significantly lighter, flatter output than 100% polyester. If you're pressing on blended fabric, expect muted results — this is chemistry, not operator error. Switching to a higher polyester count blank is the only fix.
Ghosting and Blurring
Ghosting is a faint duplicate shadow of your design, offset slightly from the main image. It ruins the print entirely. The cause is always movement of the transfer paper during or immediately after pressing. Here's how to prevent it:
- Pre-press the substrate for 5–10 seconds before positioning your transfer. This removes moisture that converts to steam during pressing and pushes the paper out of alignment.
- Tape all four corners — and the center edges on large transfers — with heat-resistant tape.
- When you open the press, peel the transfer paper off in one smooth, decisive motion. Don't let the paper sit and slowly separate as the substrate cools with it still attached — the residual heat and gas movement will ghost.
- If you're using a peel-cold paper, move the substrate immediately to a flat heat-resistant surface and hold it down gently until it cools enough to peel cleanly.
Uneven Transfer and Pressure Issues
Uneven transfer — vivid color in one area of the print, pale or patchy color in another — is a pressure problem. Your heat press platen is not making uniform contact with the substrate across its entire surface. This is extremely common with budget flat platens.
Test your platen by closing it on a sheet of paper and pulling the paper out from different edges. If the resistance varies significantly from corner to corner, your pressure is uneven. Many budget presses have no mechanism to correct this; if you're doing production work, it's a sign you need a better press. On adjustable presses, check the manual for how to calibrate the lower platen. A foam stabilizer pad under the substrate can also help even out pressure on rigid or uneven hard goods. Beyond press quality, always make sure your substrate is centered on the platen rather than hanging over an edge, and that you're using the right platen size for your substrate dimensions.
Frequently Asked Questions
Can you do sublimation printing on cotton fabric?
No. Sublimation dye requires polymer chains to bond with, and cotton fibers don't have them. On 100% cotton, virtually all of the dye washes out after the first launder — the print looks acceptable right off the press but disappears almost completely after washing. You need at least 65% polyester content for usable results, and 100% polyester for production-quality color vibrancy and durability.
Do you need a special printer for sublimation printing?
Yes. You need a printer that's either purpose-built for sublimation (like Sawgrass SG500 or SG1000) or an Epson EcoTank or Expression model that has been converted by filling it with sublimation inks before any other ink is introduced. Standard inkjet printers loaded with sublimation inks will not work correctly — the ink delivery system must be compatible with the specific viscosity and formulation of sublimation dye ink.
Why do sublimation prints look faded on the transfer paper before pressing?
Sublimation dyes appear muted and undersaturated in their unactivated solid state on paper. The full, vivid color only develops when the dye vaporizes under heat and bonds chemically with the polymer substrate. This is normal — do not adjust your colors or ICC profile based on how the paper print looks. Judge final color from pressed samples on the actual substrate you're using, not from the transfer sheet.
Can you sublimate on dark-colored shirts or blanks?
No. Sublimation dyes are transparent — they rely on the white or very light background of the substrate to make colors read correctly. On dark fabric, the colors are invisible or too dim to be usable. If you need to print on dark garments, heat transfer vinyl or screen printing with a white underbase are the right approaches for that application.
What temperature and time settings are correct for sublimation?
Standard settings for polyester apparel are 385°F (196°C) for 55–65 seconds at medium-firm pressure. Polymer-coated hard goods like mugs typically require 400°F for 180–210 seconds in a cylindrical mug press. Always cross-reference these with your specific blank supplier's recommended settings — polymer coating thickness varies between manufacturers, and the wrong temperature can scorch the coating or under-transfer the dye.
Final Thoughts
Sublimation printing is one of the most durable, vibrant, and scalable decoration methods available — and the startup cost is lower than almost any comparable technique. If you're ready to start, pick up a compatible printer, a quality heat press, and a pack of white polyester blanks, run your first transfer, and see exactly why so many crafters and small business owners have made sublimation their primary production method. The learning curve is short, and the results speak for themselves from your very first press.
 |  |  |  |

About Anthony Clark
Anthony Clark spent nine years running a custom printing studio in Phoenix, Arizona, producing sublimation-printed drinkware, heat-pressed apparel, and branded merchandise for sports leagues, small businesses, and online retailers. That hands-on production background means he has calibrated hundreds of heat press cycles, sourced sublimation blanks from over a dozen suppliers, and troubleshot every coating and color-shift problem that shows up when dye meets polyester. He left the shop floor in 2019 to write full-time about the techniques and equipment he used daily. At PrintablePress, he covers sublimation printing and heat press methods.


Get some FREE Gifts. Or latest free printing books here.
Disable Ad block to reveal all the secret. Once done, hit a button below
| | | |