Heat Press Maintenance Tips
by Anthony Clark · March 29, 2022
Good heat press maintenance tips aren't optional — they're the difference between a machine that lasts a decade and one that fails mid-production run. Whether you run a small custom apparel shop or press transfers at home, your heat press works best when it's clean, calibrated, and cared for consistently.

Most heat press problems — scorched garments, uneven adhesion, transfers peeling after one wash — trace back to neglected maintenance. Ink residue builds up on the platen. Teflon sheets wear out unnoticed. Pressure calibration drifts over hundreds of presses. None of these failures announce themselves. They sneak up on you, usually in the middle of a production run.
This guide covers everything: quick daily habits, deep cleaning procedures, a maintenance frequency table, and honest guidance on when a professional technician is the right call. Keep your machine in top shape, and your prints will consistently show it.
Contents
- Essential Heat Press Maintenance Tips You Can Start Today
- Why Your Heat Press Needs Regular Care
- Basic Upkeep vs. Deep Cleaning: Know the Difference
- How to Clean Your Heat Press Platen Step by Step
- Real Scenarios Where Maintenance Makes or Breaks Your Print
- When to Service Your Heat Press — and When to Call a Pro
- Frequently Asked Questions
Essential Heat Press Maintenance Tips You Can Start Today
You don't need a service manual or special tools to start protecting your investment. These three checks take less than ten minutes combined and prevent the most common failures that hobbyists and production shops face alike.
Wipe the Platen After Every Session
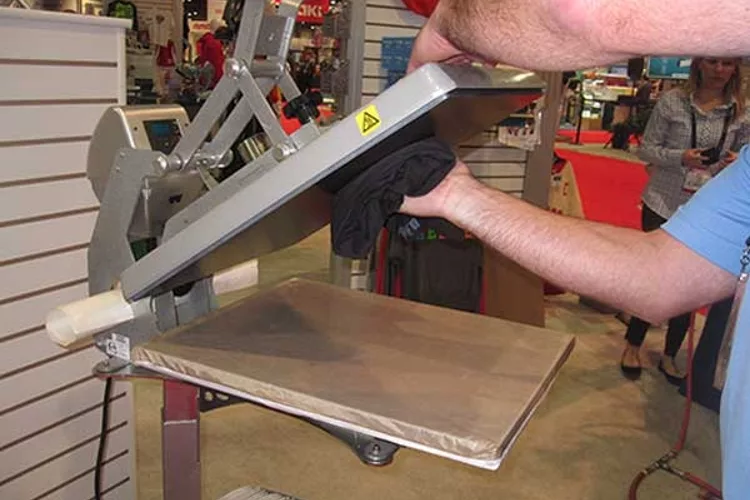
This is the single most impactful heat press maintenance tip in your toolkit. After your machine cools to a safe handling temperature — warm but not dangerously hot — wipe the upper platen with a lint-free cloth. Sublimation ink, HTV adhesive, and transfer paper residue all bond far more stubbornly to a platen that hasn't been cleaned in weeks.
For residue that won't come off with a dry cloth, apply a small amount of dedicated platen cleaner or 70%+ isopropyl alcohol to the cloth first. Never spray any liquid directly onto the platen — moisture near the electrical connections creates real safety risks. One wipe-down per session adds up to a platen that stays clean and consistent for years.
Inspect Your Teflon Sheets
Teflon sheets are consumables, not permanent components. They protect both your transfers and your platen surface, but they degrade — scratches, discoloration, and thin spots are all signs of wear. Hold yours up to a light source and look for areas where the coating has worn through. A compromised Teflon sheet transfers heat unevenly, which means inconsistent results even when your time and temperature settings are perfect.
Replace them at the first sign of significant wear. Teflon sheets cost very little, and the improvement in print consistency is immediate. Keep two or three spares on hand so you're never caught mid-project without a replacement.
Check the Pressure Knob
Pressure affects adhesion as much as time and temperature, yet it's the most overlooked variable. Over hundreds of presses, the pressure knob can loosen or drift from your baseline setting — particularly in clam-shell designs where the mechanism heats up during long runs.
- Set pressure using a paper strip test — firm resistance when pulling it out indicates correct pressure
- Record your ideal pressure setting for each transfer type so you can verify it quickly
- Recalibrate after any machine transport or relocation
- Run a test swatch at the start of each production batch before committing to the full run
Why Your Heat Press Needs Regular Care
Heat presses operate at temperatures between 250°F and 400°F under consistent mechanical pressure. According to Wikipedia's overview of heat transfer printing, the process depends on precise temperature and pressure combinations to activate transfer media. Any deviation from those parameters degrades output quality — and degradation accelerates when maintenance is skipped.
How Heat and Pressure Degrade Components
Every press cycle stresses the heating element, platen surface, pressure mechanism, and wiring harness. Normal wear is designed into the machine — the components are rated for thousands of cycles. What they're not rated for is the accelerated wear that comes from baked-on residue, miscalibrated pressure, or ignored early warning signs.
Watch for these specific degradation patterns:
- Platen warping — sustained overheating or uneven heat distribution creates subtle warps that produce dead zones in your transfers
- Heating element degradation — residue buildup on the element forces it to work harder to reach set temperature, wearing it out faster
- Pressure spring fatigue — springs lose tension over time, especially in clam-shell models under heavy use
- Thermostat drift — electronic controls can read one temperature while operating at another, quietly ruining your calibration
The Real Cost of Skipping Maintenance
A replacement heat press runs anywhere from $200 for a basic entry-level model to well over $2,000 for a professional pneumatic unit. A bottle of platen cleaner and a pack of replacement Teflon sheets costs under $30. The math is straightforward. Every skipped maintenance session is borrowing from your machine's lifespan to save a few minutes today — and the debt compounds.
Don't wait until a transfer scorches to realize your platen needed cleaning — by then you've already wasted a garment, your materials, and your time.
Basic Upkeep vs. Deep Cleaning: Know the Difference
Not every maintenance task belongs on your daily checklist. Some are weekly. Others are monthly or quarterly. Knowing the difference keeps you from over-maintaining (which wastes time) and under-maintaining (which wastes machines).
Beginner-Level Upkeep
If you're new to heat pressing or running fewer than 50 transfers per week, these tasks cover your core responsibilities:
- Wipe the platen surface after each session
- Replace Teflon sheets when visibly worn or scratched
- Store the machine covered when not in use to keep dust out of vents
- Avoid leaving the machine at press temperature during extended idle periods
- Read the manual — the manufacturer's specifications override generic advice every time
Advanced Maintenance Tasks
Higher-volume users pressing t-shirts and custom transfers daily need a more rigorous schedule. Advanced maintenance addresses the components that steady production stress most:
- Monthly pressure spring inspection and lubrication per manufacturer specs
- Quarterly thermostat calibration check using an independent infrared thermometer
- Periodic cleaning of the lower platen pad and silicone base
- Inspection of power cords and strain reliefs for cracking or fraying
- Cleaning vents and air intake channels to prevent thermal buildup
Use this maintenance frequency table as your reference:
| Task | Frequency | Difficulty | Tools Needed |
|---|---|---|---|
| Wipe platen surface | After every session | Easy | Lint-free cloth, platen cleaner |
| Inspect / replace Teflon sheet | Weekly or as needed | Easy | Replacement Teflon sheet |
| Check pressure calibration | Weekly | Easy | Paper strip, test fabric swatch |
| Clean lower platen pad | Monthly | Moderate | Damp cloth, mild detergent |
| Clean vents with compressed air | Monthly | Easy | Can of compressed air |
| Thermostat calibration check | Quarterly | Moderate | Infrared thermometer |
| Lubricate pressure mechanism | Quarterly | Moderate | Machine oil, manufacturer guide |
| Inspect wiring and power cord | Every 6 months | Advanced | Visual inspection only |
How to Clean Your Heat Press Platen Step by Step
Platen cleaning is the most frequently needed maintenance task — and the one most people do wrong. Here's the correct procedure from start to finish, without shortcuts that damage the surface or create safety hazards.
What You'll Need
- Dedicated platen cleaning solution (or isopropyl alcohol 70%+)
- Lint-free cloths or microfiber towels — at least two
- A wooden or silicone scraper (never metal)
- A fresh Teflon sheet for reassembly
- Heat-resistant gloves if you're cleaning while the platen is still warm
The Cleaning Process
Follow these steps in order every time you do a thorough platen clean:
- Preheat to 280°F — warm adhesive releases far more easily than cold, hardened residue
- Power off and unplug — work only with residual warmth, never with the machine actively heating
- Apply cleaner to the cloth, not the platen — spraying directly risks moisture reaching electrical components
- Wipe in one direction — straight strokes move residue off the surface; circular scrubbing just redistributes it
- Use the scraper for stubborn spots — light pressure at a 30-degree angle, working with the grain of the surface
- Follow with a dry cloth pass — remove every trace of cleaner before you apply heat again
- Install a fresh Teflon sheet — run a blank press cycle at normal temperature before your first real transfer
Air circulation matters more than most users realize. The vents on your heat press prevent the control board and heating element from overheating during extended runs. Blocked vents — from lint accumulation, dust, or placement too close to a wall — shorten component life significantly. Clean vents monthly with compressed air, and keep at least 6 inches of clearance on the exhaust side at all times.
If you regularly press materials like flock vinyl, increase your vent cleaning frequency. Flock fibers shed during pressing and accumulate in air pathways faster than almost any other material — it's a detail the manual often doesn't warn you about.
Real Scenarios Where Maintenance Makes or Breaks Your Print
Abstract maintenance advice is easy to set aside. These specific scenarios make the stakes concrete — and each one traces directly back to a maintenance step that was skipped or delayed too long.
The Sticky Platen Problem
You're pressing white HTV on a dark shirt. The transfer adheres — but when you open the press, shirt fibers stick to the upper platen. The surface pulls fabric. Something is tacky where it shouldn't be.
What happened: HTV carrier sheets leave a microscopic adhesive film on the platen with every single press. Over time that film accumulates and becomes thermally reactive — it bonds to fabric under heat. A three-minute wipe-down after your last session would have prevented this entirely. Instead, you're now spending 20 minutes with a scraper and cleaner trying to recover the surface mid-run.
The same scenario plays out with sublimation ink (which ghosts faint impressions onto subsequent transfers if residue isn't cleared), screen printing transfers, and any heat-applied vinyl with an aggressive adhesive. The fix never changes: clean the platen regularly, before there's a visible problem.
Pressure Inconsistency Mid-Run
You're 40 shirts into a batch. The first 30 look perfect. The last 10 have lifting edges and inconsistent bond. Nothing else changed — same temperature, same time setting, same transfer material.
Pressure is the variable. Clam-shell presses are especially prone to pressure drift during long production runs as the spring mechanism heats up and changes its resting tension. If you're using stretch HTV for athletic wear, this problem amplifies — stretch materials require precise, consistent pressure to bond without distortion. A drift of even half a turn on the pressure knob can pull a full run out of spec.
A five-second pressure check at the start of every batch costs you nothing; reprinting an entire run costs you everything.
The solution: define a pressure baseline for each material type, record it, and verify it at the start of every session. For deeper insight into how material properties interact with your press settings, comparing Siser EasyWeed vs. Siser EasyWeed Extra shows exactly how two products with different adhesive profiles require different pressure approaches — maintenance and material knowledge go hand in hand.
When to Service Your Heat Press — and When to Call a Pro
There's a clear boundary between owner maintenance and technician work. Crossing it in the wrong direction — attempting electrical repairs without proper training — turns a fixable problem into a safety hazard. Know which side of the line each issue falls on.
Signs It's Time for a Deep Clean
Schedule a full deep clean immediately when you notice any of these:
- Visible residue or discoloration on the platen that routine wipe-downs don't remove
- Transfer ghosting — faint impressions of previous designs appearing on new work
- Unusual odors during pressing, particularly burnt plastic or chemical smells
- Uneven heat distribution across the platen surface, confirmed with an infrared thermometer
- The machine takes noticeably longer to reach your set temperature than it used to
That last indicator deserves attention. If your machine once reached 350°F in three minutes and now takes six, something is working harder than it should — usually a partially degraded heating element or a thermostat reading inaccurately. Catching it early means a cleaning or recalibration. Ignoring it means a component replacement.
When to Call a Professional
Contact your manufacturer's support line or a qualified repair technician for any of these issues:
- Electrical symptoms: sparking, tripped circuit breakers, burning smell from the cord or housing
- Temperature that won't stabilize or consistently overshoots your set point by more than 10°F
- Physical damage to the heating element or thermocouple wires
- Pressure mechanism that won't hold calibration after multiple adjustments
- Any internal component issue that requires opening the machine housing
If you're weighing whether a repair is worth the cost against replacement, reviewing what well-maintained professional machines deliver — detailed in this roundup of the best t-shirt printing machines — gives you a useful benchmark for setting expectations on either path.
Frequently Asked Questions
How often should you clean a heat press platen?
Wipe the platen after every session as your baseline routine. Perform a thorough clean with platen solution whenever you notice visible residue, experience transfer ghosting, or find the surface becoming tacky. High-volume users pressing more than 100 items per day should plan for a deep clean at least once a week.
What is the best product to use for cleaning a heat press platen?
A dedicated platen cleaning solution delivers the best results without risking damage to the surface coating. Isopropyl alcohol at 70% or higher is a reliable substitute. Always apply the cleaner to a lint-free cloth first — never spray directly onto the platen. Avoid abrasive pads or metal scrapers, which scratch the surface and create uneven heat transfer.
How do you know if your heat press temperature is accurate?
Test it with an independent infrared thermometer. Hold the thermometer 1 to 2 inches from the platen surface and compare the reading to your machine's display. A discrepancy of more than 10 to 15 degrees means your thermostat needs recalibration. Run this check quarterly, or any time your transfer quality drops without an obvious cause.
A clean, calibrated heat press isn't a luxury — it's the foundation that every great print is built on.
 |  |  |  |

About Anthony Clark
Anthony Clark spent nine years running a custom printing studio in Phoenix, Arizona, producing sublimation-printed drinkware, heat-pressed apparel, and branded merchandise for sports leagues, small businesses, and online retailers. That hands-on production background means he has calibrated hundreds of heat press cycles, sourced sublimation blanks from over a dozen suppliers, and troubleshot every coating and color-shift problem that shows up when dye meets polyester. He left the shop floor in 2019 to write full-time about the techniques and equipment he used daily. At PrintablePress, he covers sublimation printing and heat press methods.


Get some FREE Gifts. Or latest free printing books here.
Disable Ad block to reveal all the secret. Once done, hit a button below
| | | |